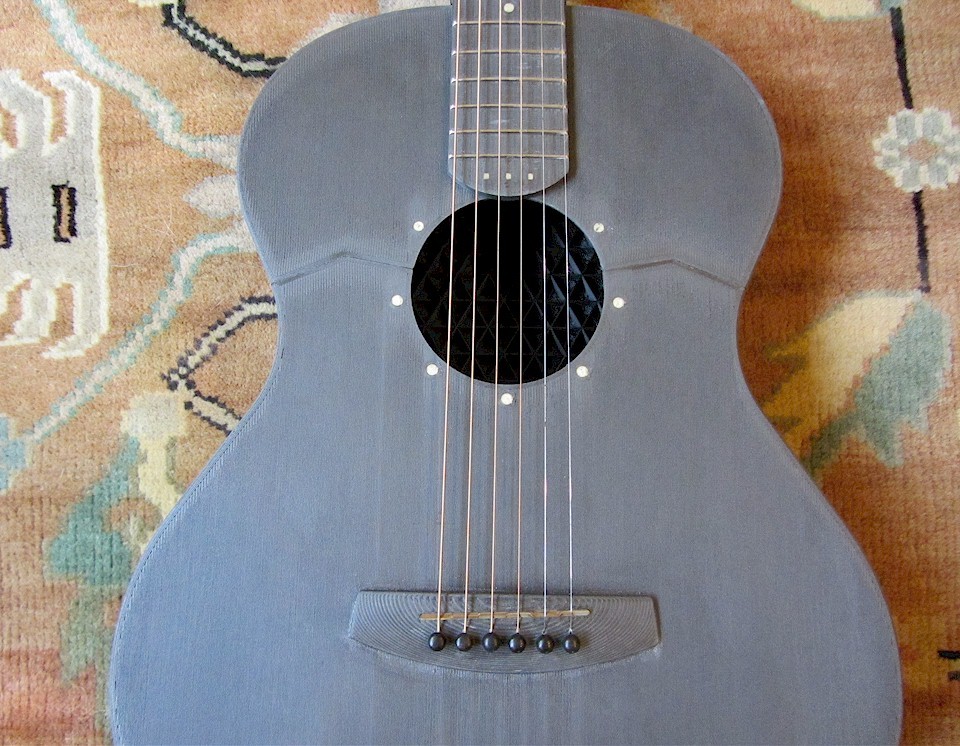
Steel String Guitar, Take 2
prusaprinters
<p>See it in action: </p><figure class="media"><oembed url="https://youtu.be/v3aeKj2nCo4"></oembed></figure><p>This is an improved of my original printed guitar (<a href="https://www.thingiverse.com/thing:710561">http://www.thingiverse.com/thing:710561</a>). It is printed with 15% carbon fiber filled PLA, which is about 50% stiffer than regular PLA. I've also added slots for aluminum ribs in the X-bracing to keep the top from warping over time, and a head-to-heel aluminum truss rod to prevent neck warp.</p><p>This guitar requires a big printer - at least 14"x14".</p><h3>Print Settings</h3><p><strong>Printer:</strong></p><p>UDIO</p><p><strong>Rafts: </strong></p><p>No</p><p><strong>Supports:</strong></p><p>No</p><p><strong>Resolution: </strong></p><p>0.2mm</p><p><strong>Infill:</strong></p><p>35%</p><p><br> </p><p><strong>Notes:</strong></p><p> </p><p>The body prints as 4 separate pieces, and the neck prints as 2 pieces. The upper top and the lower top both consist of two separate parts: a shell and an infill. The shell prints normally with 3 perimeter lines a 0.3mm first layer followed by 0.2mm layers. The infill is a grid pattern that prints as part of the shell, but it prints with no solid top layers, no solid bottom layers, and no perimeter lines - just a 6% triangular infill pattern. The shell and infill parts should be loaded into your slicer with out any additional offsets so that the stay lined up relative to one another.</p><p>The back pieces prints with no bottom layers and a 12% triangular infill pattern.</p><p>For those interested, here's a video of the custom built printer I used to print this guitar:<br> </p><figure class="media"><oembed url="https://youtu.be/hdju_6XEHZ4"></oembed></figure><p> </p><h3>Post-Printing</h3><p><strong>Assembly</strong></p><p>You pretty much need some lutherie skills to build this guitar, but here are a few brief notes for the ambitious:</p><ul><li>All the mating pieces glue together with gel-type cyanoacrylate glue.</li><li>The X-braces have slots for 1/16" thick aluminum braces. I shaped these freehand as shown in the photos, but they are about 0.6" tall.</li><li>There is a 5mm thick hardwood bridge plate that goes into the triangular pocket below the X.</li><li>The bridge is both glued and screwed in place with two 4-40 screws.</li><li>There is a heel plate that goes between the body and the heel of the neck. I designed it with a 1/2 degree angle, but you can shim it with tape to slightly adjust the angle of the neck.</li><li>The aluminum truss rod is formed with a 1/4" thick plate that fits into a slotted 1/2"x1/2" square rod. The two are pinned together with steel dowels. (See Solidworks part.)</li><li>I've used extra-light strings because the fixed aluminum truss rod gives a little too much flex with regular light gauge strings.</li></ul><p>I'm happy to answer any questions about construction details as they come up.</p><p> </p><p> </p><p>Category: Music</p>
With this file you will be able to print Steel String Guitar, Take 2 with your 3D printer. Click on the button and save the file on your computer to work, edit or customize your design. You can also find more 3D designs for printers on Steel String Guitar, Take 2.
