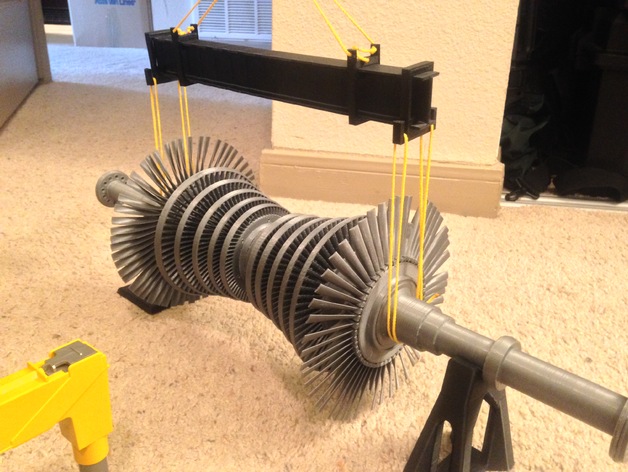
Steam Turbine Model - Low Pressure Rotor V1
thingiverse
Version 2 is now available at http://www.thingiverse.com/thing:1698321, making it easier and faster to print. This beautifully detailed Low Pressure Steam Turbine Rotor model comes in 1:18 scale and includes as much detail found on a real machine as possible. Certain parts have been modified for easier 3D printing, but this has been minimized as much as possible even if it made the model more complicated to print or assemble. This model is designed to be assembled with glue, with all parts except LP_bore_plug, 20T_blade, and 20G_blade needing to be glued together. Superglue plus clamping for 10 minutes worked well for me. LP_bore_plug is designed to be removable with a slight friction fit. The assembly was designed to fit 58 blades but I was only able to insert 55. Don't glue these in place because you may need to replace broken blades at some point in the future. In the assembly drawing, parts which are used in more than one location are labeled only once. See http://www.thingiverse.com/thing:1676760 for the rotor stand and http://www.thingiverse.com/thing:1666208 for the lifting beam. Edit 7/31/2016: Added 20T_blade_r4 and 20G_blade_r4, which are the same as the r3 blades but have support materials built-in. Print in the upright position with 10-15 lines of brim or use the tree. Printer Settings: * Brand: SeeMeCNC * Printer: Rostock MAX * Resolution: 0.2mm * Infill: 20% in general Notes: At 1:18 scale, total filament used was about 730g and took roughly 52 hours of print time on my machine. All parts are at 1:18 scale with mm units. 1:18 scale is printable on a Rostock Max V2 with the stock 0.5mm nozzle with 0.2mm layers. Smaller scales probably will require a smaller nozzle size and/or layer height. Most parts should be printed with automatic supports. The only part which required manual support tweaking for me was Generator_end_shaft. Support material is basically required in the groove for 20T_and_20G_wheel. If you can remove support material using pliers from the 5mm x 5mm bridge test on the 5mm calibration steps http://www.thingiverse.com/thing:24238, you should have no problem removing the supports from the groove with needlenose pliers. Remaining material in the groove can be removed by running 20T_blade_r3 or 20G_blade_r3 around the groove forcefully using needlenose pliers.
With this file you will be able to print Steam Turbine Model - Low Pressure Rotor V1 with your 3D printer. Click on the button and save the file on your computer to work, edit or customize your design. You can also find more 3D designs for printers on Steam Turbine Model - Low Pressure Rotor V1.
