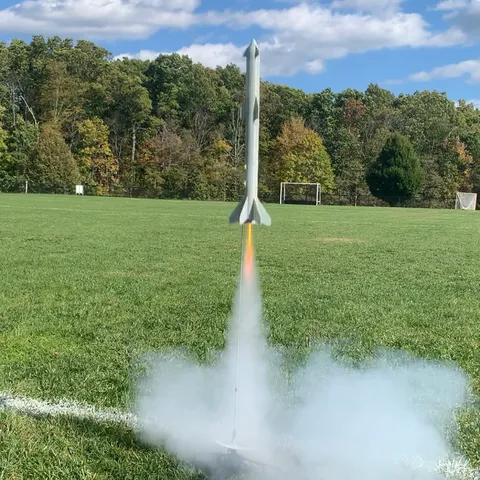
Starship Style Model Rocket v2
prusaprinters
Hi There, if you plan on downloading this model please consider leaving a like, posting a make, leaving a review, or even a donation. Thank You!This is version 2 of my Starship style model rocket. As I'm learning how to design rockets I decided to overhaul the original design. I was working on the two stage version of this rocket but decided to take a step back and rework the design of the single stage version. Since this is a single stage version, the motor is loaded into the booster and starship acts as the nose cone. I designed this rocket for use with Estes 1/8" rod launch pads, and Estes C6-3, and C5-3 motors. The rocket is 42mm in diameter and has a total length of 22". I have prototyped and launched this rocket in PLA and ABS. ABS results in a lighter rocket with better heat resistance. The walls of the rocket are kept thin to reduce weight. I used a combination of .8mm, 1.2mm and 1.6mm wall thicknesses. For reference I included an image of the Open Rocket design file with a breakdown of the target weights for each part. The nose cone of this rocket is printed with rectilinear infill, and the target weight is 11g-16g.Print Settings: Print in ABS or ASA plastic.Nose Cone: 0.3mm layer height, 3 perimeter walls, seam position rear, 5% infill.Starship Body: 0.3mm layer height, 2 perimeter walls, seam position rear, brim, 0% infill.Booster Tubes: 0.3mm layer height, 2 perimeter walls, seam position rear, brim, 0% infill.Booster Base: 0.3mm layer height, 2 perimeter walls, seam position rear, brim, 0% infill.Motor Cap: 0.2mm layer height, 3 perimeter walls, seam position rear, 0% infill.Assembly: Test the fitment before gluing any parts. The parts of this rocket include alignment notches so they all fit in one orientation. Line up seams when assembling. Start with the booster base and booster base ring. Glue the booster base ring to the booster base. Next attach a 24" shock cord to the lower booster tube mount. I like to use a slip knot. Use glue to attach the upper booster tube to the lower booster tube, and then glue the completed booster tube section to the booster base. Next glue the nose cone to the starship body. Next you can attach the parachute to the bottom of the starship body and then add the shock cord with a double knot. When you are ready to launch; place recovery wadding in the rocket first, next pack the shock cord, and then fold and pack the parachute and install starship to the booster. For extra protection I like to wrap the folded parachute with a piece of recovery wadding. Add the motor at the launch site, the motor cap is a simple twist and lock engagement. Share a picture if you print one!Support Me: The assembled version is available for sale on Etsy: Model Rocket on EtsyLaunch Videos: TikTok Launch VideosDIY Parachute Guide: DIY Model Rocket ParachuteLink to Version 1 for Reference: Starship Style Model Rocket v1
With this file you will be able to print Starship Style Model Rocket v2 with your 3D printer. Click on the button and save the file on your computer to work, edit or customize your design. You can also find more 3D designs for printers on Starship Style Model Rocket v2.
