Star Wars Signs and Door Hanger
prusaprinters
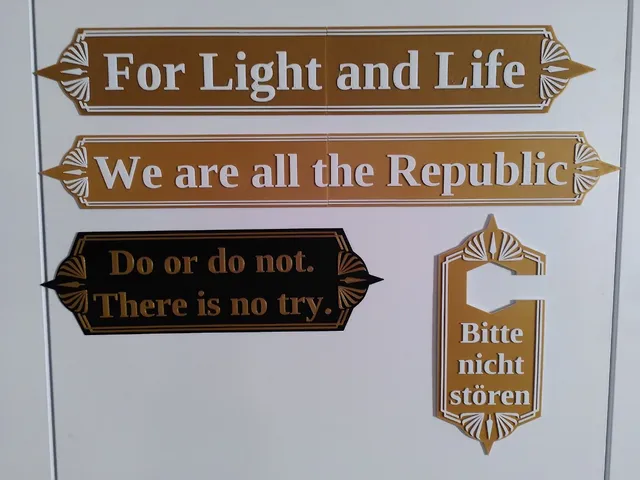
Simple signs and a doorhanger inspired by the design of the logo for Star Wars: The High Republic.The Signs feature different phrases:May the Force be with youDo or do not. There is no try.The greatest teacher, failure is.For Light and LifeWe are all the RepublicEach phrase comes in two versions - Long is the entire phrase on a single line, Short is split into two lines.The doorhanger says “Do not disturb”. There is also a german version which says “Bitte nicht stören”.If you have any phrases that might fit as well, I am open to suggestions.The font used is Liberation Serif Bold.Print InstructionsI've used gold and white or black and gold filament at 0.15mm layer height.How to rescale, cut and slice the signs in PrusaSlicerThe signs are meant to be rescaled to whichever size you want. All of the short signs (at 100% scale) fit on a Prusa MK3S if you print them diagonally. The long signs will probably have to be cut to fit on your printer. All of this can be done within PrusaSlicer.First, load the sign you want to print. For this example, I am choosing republic_long.Then we can rescale it. We don't want to change the thickness of the sign, so click on the lock symbol left of the scale factors. This allows us to enter a new scale for each axis seperatly.Now we enter the new scale. I want a sign that's 500mm long, so I put 500 into size-x.Then copy x-scale over to y-scale.The sign does not fit on my printer, so I will have to cut it. PrusaSlicer can cut objects along the z-axis, so start by rotating the sign 90° along the y-axis.Now use the cut-tool on the left of the screen to cut the sign. Move the position of the cut by dragging the orange cube or entering the z-coordinate directly. Try to move the cut to a place where it does not intersect with one of the letters.When you are happy with the position of the cut, press “perform cut”.We have started by rotating the sign +90° along the y-axis, so now we have to rotate both parts back, -90° along the y-axis. Then hit “A” on your keyboard to arrange everything. If it still doesn't fit, try roating the pieces along the z-axis. Here I have rotated them 20°.There is no space left for a skirt, so deactivate the skirt by going to “Print Settings”→"Skirt and Brim" and setting "Loops (minimum)" to 0.Once everything fits, press “Slice now”.To get a different color for the lettering, we will do a filament change halfway through the print. Move the slider on the right of the viewport down until you meet the first layer of the lettering.Then click the “+” next to the slider to add a filament change. (The “+” has turned into a “x”. You can remove the filament change by clicking the “x”.)All thats left to do now is to slice everything with the filament changes and the gcode is finished.This last step isn't strictly necessary, but after your print is finished and everything came out the way you wanted, I'd appreciate it if you could share your gcode under “User Print Files” for others to use. For Light and Life. If you want to support me, you can do so via this link: https://ko-fi.com/printingdaniel#
With this file you will be able to print Star Wars Signs and Door Hanger with your 3D printer. Click on the button and save the file on your computer to work, edit or customize your design. You can also find more 3D designs for printers on Star Wars Signs and Door Hanger.