Star Wars Inspired WLED Lamp
prusaprinters
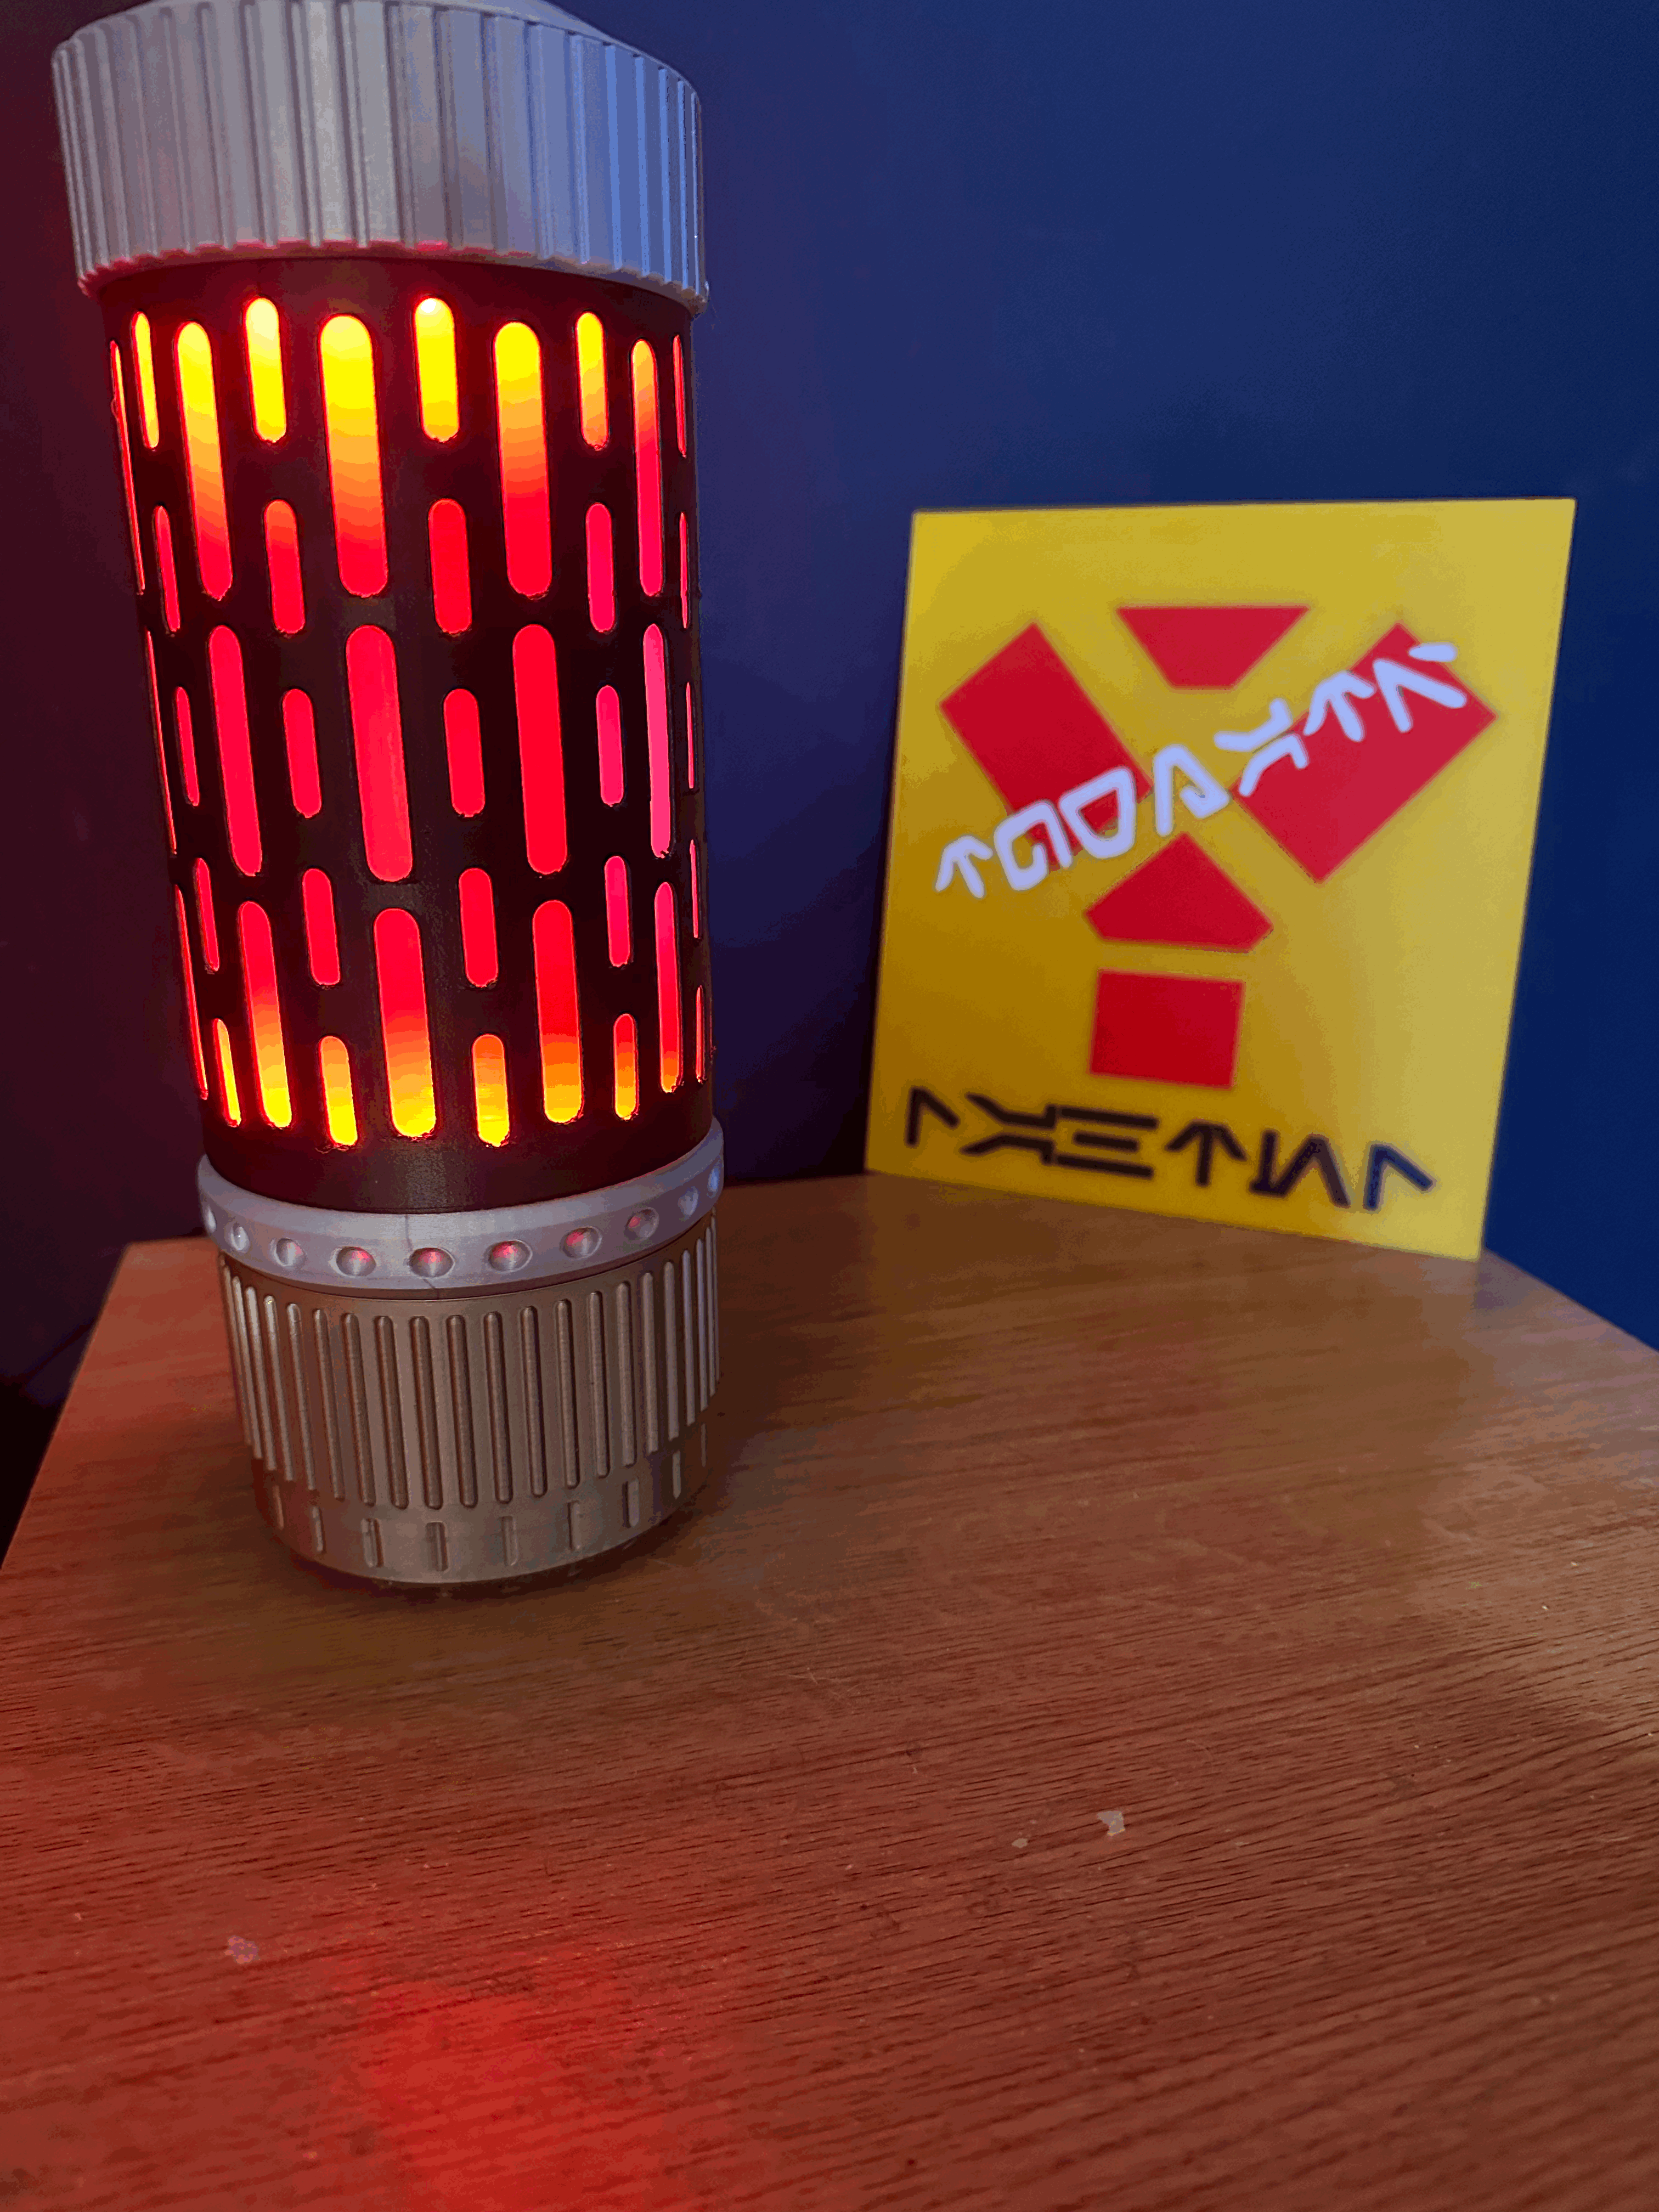
This simple wifi enabled WLED lamp is perfect for adding a bit of fun StarWars galactic aesthetic to your space. This lamp is a simple project using 2 24 LED WS2812b rings and an ESP32 microcontroller and is powered via usb.The case is fully 3D printed, the only part that needs support is the cap, but there is a less detailed version of this top section that makes the whole thing support free. The tolerances are tight on the parts and it pretty much friction fits together, but some hot glue was used to fix the lower led ring support in place. You will probably get the best fit if you print all the parts on the same machine. If parts are loose you may need a little glue. I admit it would probably benefit from a better built in assembly mechanism but I have neither the time, the patience nor the inclination haha.You will need:2x Addressable 24 LED Rings https://www.amazon.co.uk/dp/B07DKJ6SFR?psc=1&ref=ppx_yo2ov_dt_b_product_detailsESP WROOM 32 Dev Board https://www.amazon.co.uk/dp/B0BP1QWVMB?psc=1&ref=ppx_yo2ov_dt_b_product_detailsUSB Cable (whichever suits the board you use)WireBasic Soldering SkillsWhite PETG (for the diffuser)Black PLA/PETG (for the outer shell)Metallic coloured PLA (I used Overture Silver Metal and Bambu Iridium Gold)White PLA (for the inner core, I used Overture Matte White as this blocked light bleed between the sections the best)Accent Colour for the lid insert (translucent will give a nice effect from the light bleed in the centre, I used Overture Blue Glow)WLED software - Available free online, google WLED Project, their site will guide you on how to flash the ESP32 board and configure your LEDsHot glue (or any glue really) to secure the rings in place to the core.Notes:You can use whatever ESP32 board (or Arduino etc.) but the base is designed for the 38 pin WROOM controller listed above, so some modding maybe required.Print the diffuser in Vase mode using PETG as you will need to flex it to push it in place, PLA may be too brittle.The insert in the top is designed to be two colour using a simple M600 filament change if you don't have a multi material system available.The outer shell will print better at a lower layer height as there are lots of little over hangs in the tops of the windows, I used .12 with good results.If the parts are a loose fit then a little CA glue may be required (or experiment scaling the parts in X and Y by a small amount if you don't mind reprinting)Assembly is a simple stack formation, Take care to align the rings when installing them so that they are in sync. You can either wire them together on one GPIO Pin (data out from the bottom goes to Data in on the top) or use two individual Pins. The data pin on the board I used was GPIO 16, then you will want to take the 5v rail and Ground up to both rings. In WLED set them up as individual segments LED 0-24 and 24-48 and reverse the direction on one of them. The rest is up to you, get creative!
With this file you will be able to print Star Wars Inspired WLED Lamp with your 3D printer. Click on the button and save the file on your computer to work, edit or customize your design. You can also find more 3D designs for printers on Star Wars Inspired WLED Lamp.