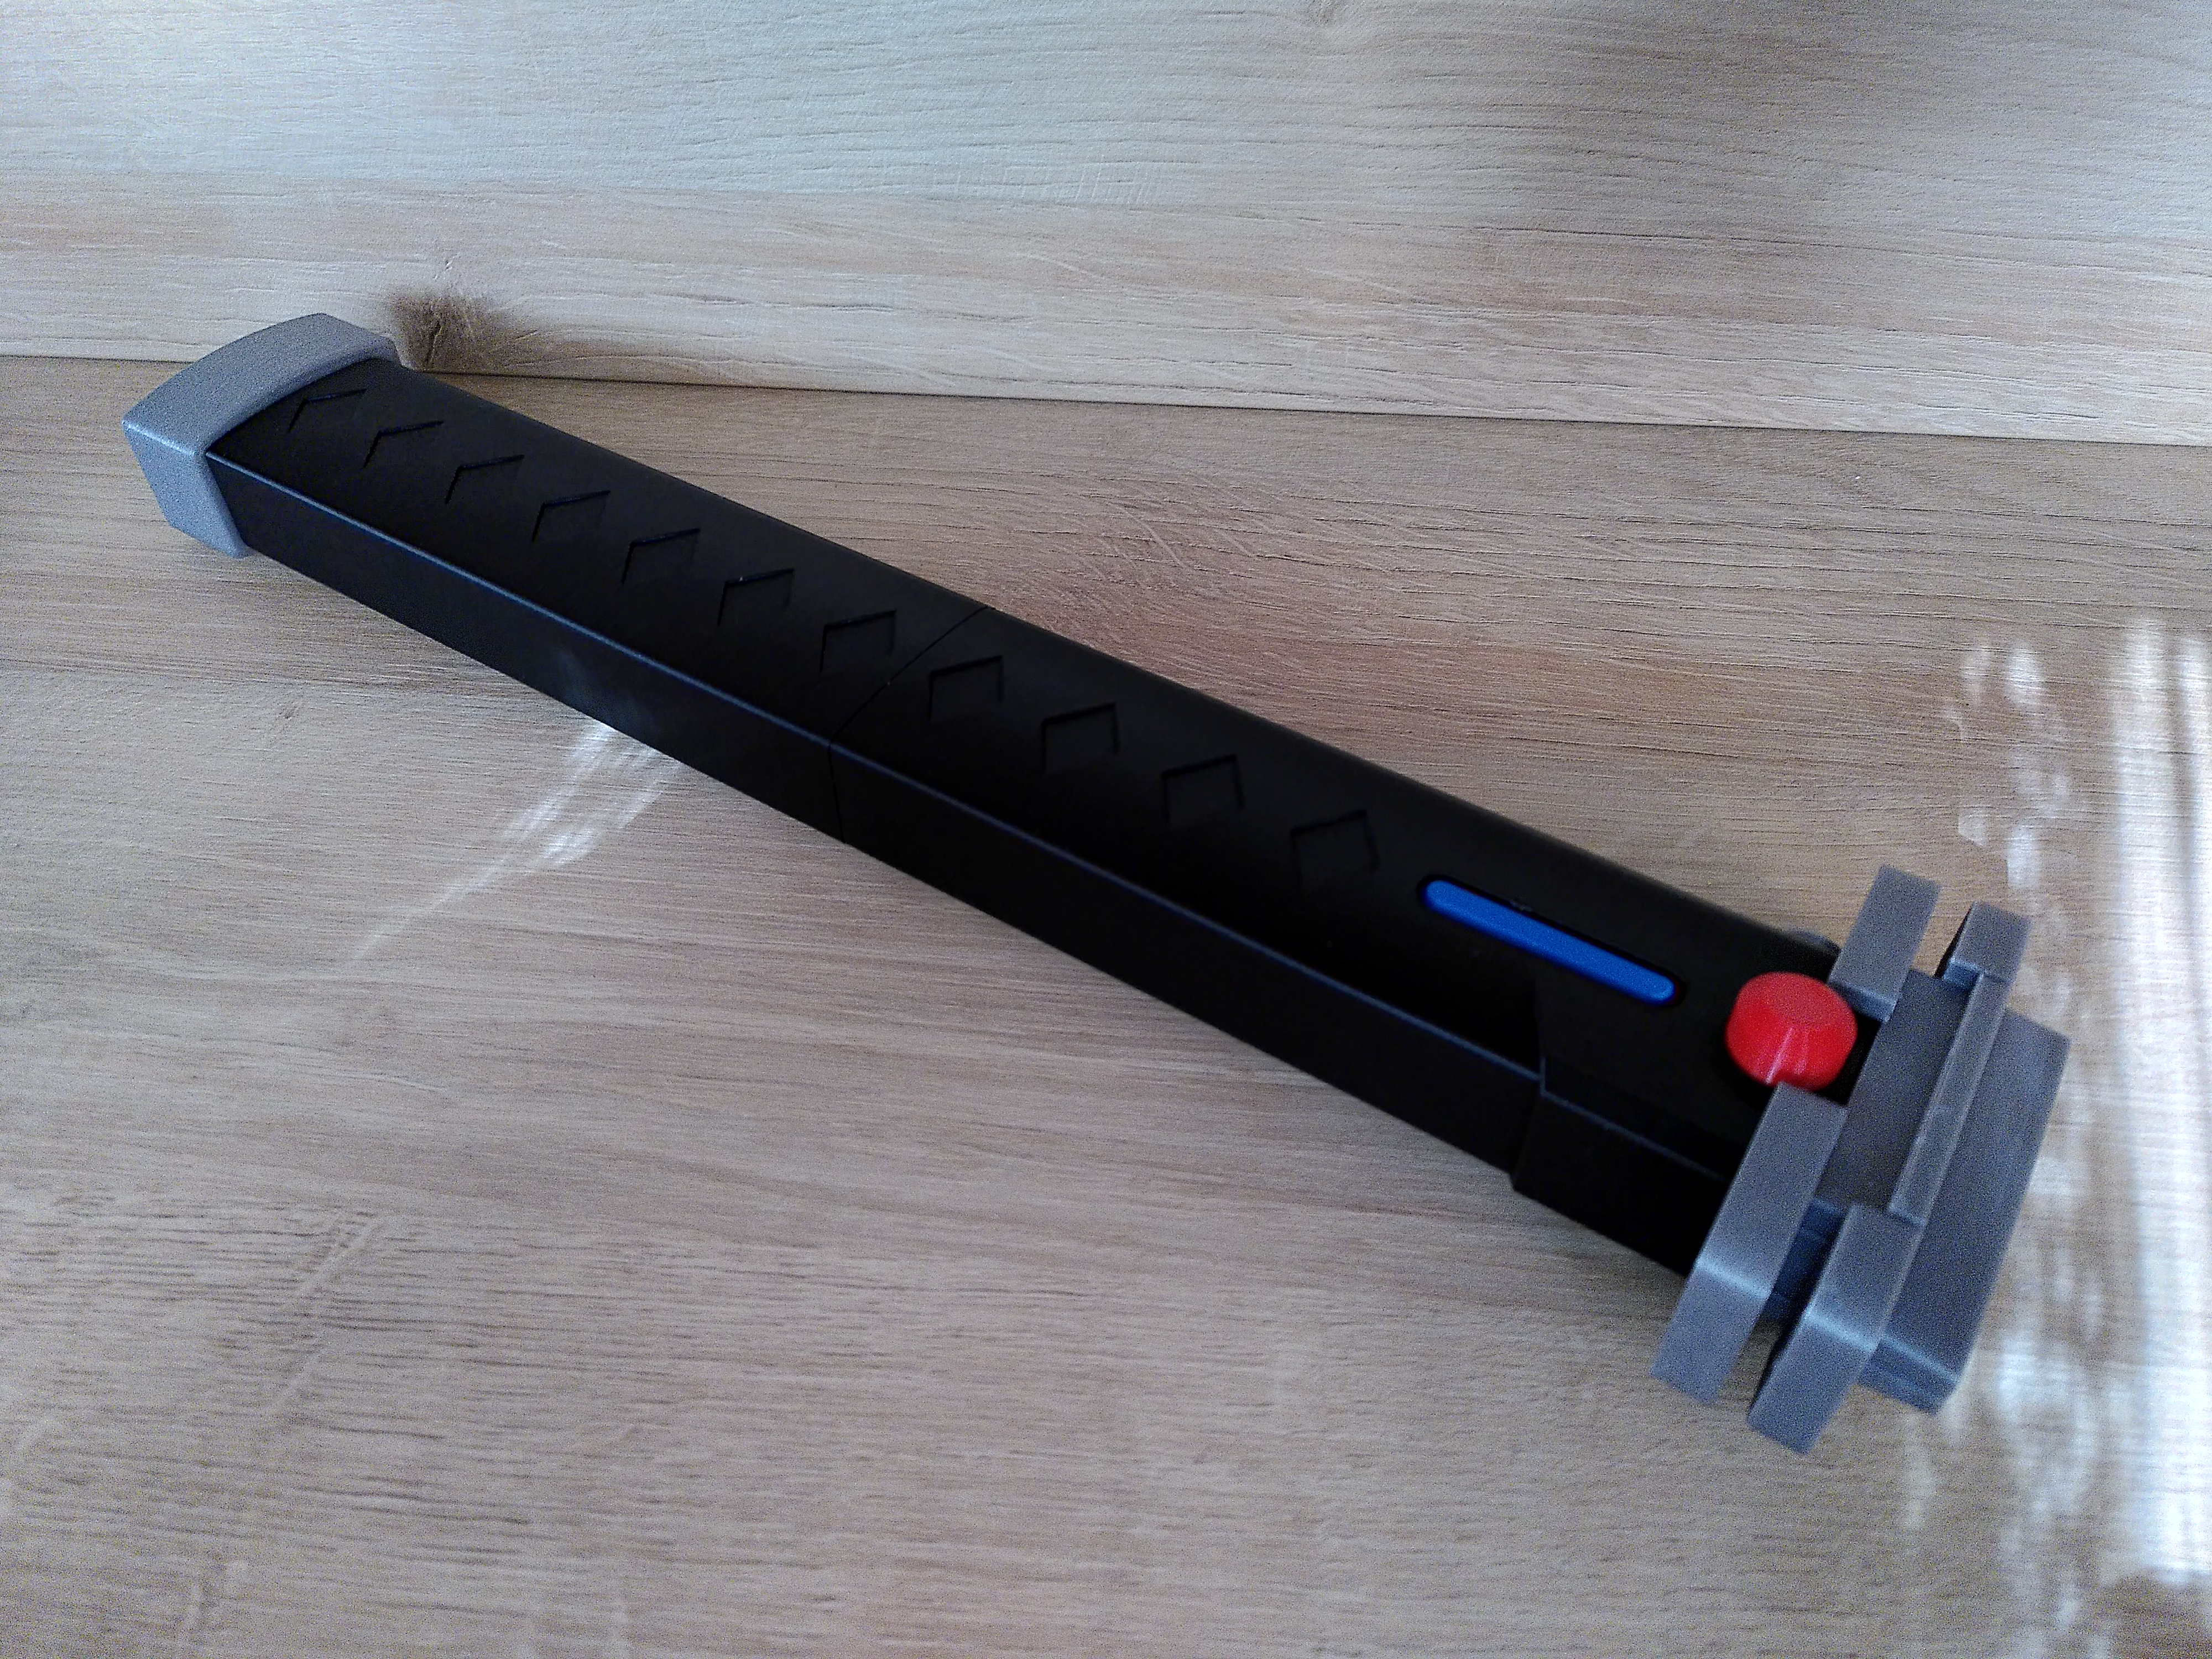
Star Wars F's Lightsaber
prusaprinters
<p><a href="https://www.prusaprinters.org/prints/119978-star-wars-fs-lightsaber">Link to improved Version</a></p><p>This is my attempt to recreate the lightsaber seen in Star Wars Visions - The Village Bride. The Jedi who wields it is called “F” in the credits.</p><p>I had to use some guesswork designing this lightsaber. There were some great shots of the top from multiple directions, but almost none of the rest. The shape of the handle was especially tricky. I tried to infer as much as possible from every line, shadow and color gradient there was.</p><p>There is some inconsistency in the color of the pommel. In one shot it is silver, in another it is the same color as the handle (i.e. black). I have used silver, but you can use black as well.</p><h3>Switch</h3><p>The emitter opens up like it does in the short when F ignites the lightsaber by using the switch (blue). There are two versions for how the switch works.</p><h4>Slide</h4><p>The switch slides down to open and up to close the emitter. Make sure there is enough friction for the emitter to stay in place. If it is to loose, you can add some tape to the sides to make it thicker.</p><p>This version is simpler and more reliable, but also less accurate.</p><h4>Push</h4><p>Push the switch from one side to open the emitter and from the other to close it. The mechanism is very primitive, involves a lot of friction and jams easily.</p><p>This version is consistent with what we see on screen. You can even see in one shot that the switch on one side is pushed in while the other side sticks out.</p><h3>Print instructions</h3><p>I have printed everything in PLA at 0.15mm layer height. You will need black, silver, blue and red filament.</p><p>There are Slide and Push versions of the Upper Handle, Lower Emitter and Switch. Internal is only used for Push. (With Push it is printed at a different orientation to reduce friction. With Slide, this part is integrated into the Lower Emitter.)</p><figure class="table"><table><tbody><tr><td style="background-color:#E0E0E0;">Part</td><td style="background-color:#E0E0E0;">Copies</td><td style="background-color:#E0E0E0;">Color</td><td style="background-color:#E0E0E0;">Supports</td><td style="background-color:#E0E0E0;">Ironing</td></tr><tr><td>Pommel</td><td>1</td><td>silver or black</td><td>no</td><td>no</td></tr><tr><td>Lower Handle</td><td>1</td><td>black</td><td>no</td><td>no</td></tr><tr><td>Upper Handle (Slide/Push)</td><td>1</td><td>black</td><td>no</td><td>no</td></tr><tr><td>Knob</td><td>1</td><td>silver</td><td>no</td><td>no</td></tr><tr><td>Button</td><td>2</td><td>red</td><td>no</td><td>no</td></tr><tr><td>Switch (Slide/Push)</td><td>2</td><td>blue</td><td>no</td><td>yes</td></tr><tr><td>Internal (Push only)</td><td>1</td><td>any</td><td>no</td><td>yes</td></tr><tr><td>Lower Emitter (Slide/Push)</td><td>1</td><td>silver</td><td>yes</td><td>yes</td></tr><tr><td>Upper Emitter</td><td>1</td><td>silver</td><td>yes</td><td>yes</td></tr></tbody></table></figure><h3>Assembly</h3><p>The following pictures show how all parts fit together and the order in which they should be assembled.</p><figure class="image image-style-align-left image_resized" style="width:50%;"><img src="https://media.prusaprinters.org/media/prints/78084/rich_content/371bb685-e8f3-48c6-9a9d-a31afe0fc534/assembly-push.png#%7B%22uuid%22%3A%225a305c62-5a3c-4638-823c-ee898594094b%22%2C%22w%22%3A1080%2C%22h%22%3A1920%7D"></figure><h4>Push</h4><ol><li>Glue the Lower Handle to the Pommel.</li><li>Glue the Lower Handle to the Upper Handle.</li><li>Glue the Knob to the Upper Handle.</li><li>Glue both Buttons to the Upper Handle.</li><li>Glue the Lower Emitter to the Internal.</li><li>Insert the Internal into the Upper Handle. Do not use glue.</li><li>Insert both Switches through the gaps in the Upper Handle and Internal and glue them to each other. Do not glue them to the Internal or the Upper Handle.</li><li>Glue the Upper Emitter to the Upper Handle. Do not glue it to the Lower Emitter.</li></ol><figure class="image image-style-align-left image_resized" style="width:50%;"><img src="https://media.prusaprinters.org/media/prints/78084/rich_content/f24a615f-071c-47c5-a784-a0af2e459b15/assembly-slide.png#%7B%22uuid%22%3A%22afc6110c-7166-4cd9-9064-d5955d817950%22%2C%22w%22%3A1080%2C%22h%22%3A1920%7D"></figure><h4>Slide</h4><ol><li>Glue the Lower Handle to the Pommel.</li><li>Glue the Lower Handle to the Upper Handle.</li><li>Glue the Knob to the Upper Handle.</li><li>Glue both Buttons to the Upper Handle.</li><li>Skipped</li><li>Insert the Lower Emitter into the Upper Handle. Do not use glue.</li><li>Insert both Switches through the gaps in the Upper Handle and glue them to the Lower Emitter. Do not glue them to the Internal or the Upper Handle.</li><li>Glue the Upper Emitter to the Upper Handle. Do not glue it to the Lower Emitter.</li></ol>
With this file you will be able to print Star Wars F's Lightsaber with your 3D printer. Click on the button and save the file on your computer to work, edit or customize your design. You can also find more 3D designs for printers on Star Wars F's Lightsaber.
