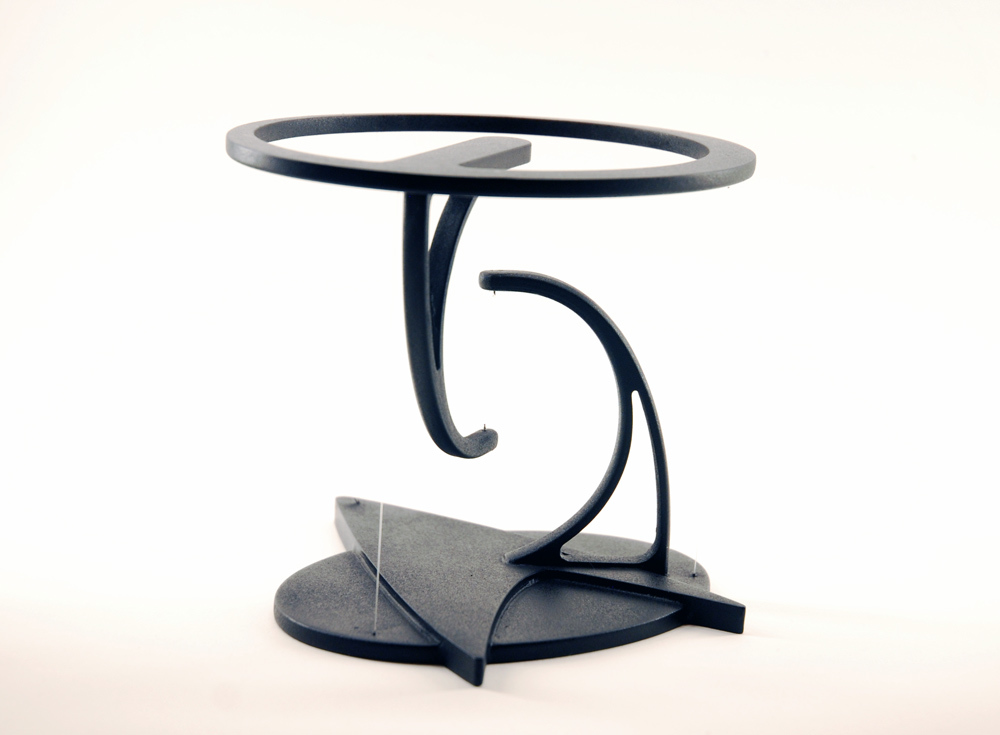
Star Trek: TNG - Tensegrity Table
prusaprinters
<p>I was creating a Geordi La Forge visor for a friend and thought it would be awesome if it "floated" for display. Looking around the "verse" I found this table and really liked how the arm options looked.</p> <p>I decided to remix it and add a Star Trek themed spin on it for the visor to sit on.</p> <p>To create this, I printed it out, sanded it and prepared it for filler primer using Spot Putty. I then glued the pieces together and did some final prep.</p> <p>I then took fishing line and started to join it all up. This was the most difficult because I was having issues keeping the tension on the strings while I got it all hooked up. To solve this, I drilled holes in some small plastic tubing. I then fed the fishing line up through the hole, through the plastic tube, then back down into the hole where I tied a knot.</p> <p>This allowed me to pull on the knot end to add tension on the strings (as the plastic would bind on the string). Once I had it all measured and tensioned, I could drop some superglue in the holes and add a little "kicker" to cure it instantly.</p> <p>I then did a final round of spot putty on the holes and sanded them as flush as I could. After a final primer, paint, and sealer, it was done.</p> <p>...</p> <p>If I were to do this again I would change a few things.</p> <ol> <li>I would probably try to make a tension system on the bottom to help aid in putting it together.</li> <li>I originally modelled caps to place over the strings in the top, but they didn't work. I would probably find a way to explore this again as the sanding result wasn't as perfect as I would like.</li> <li>I had no idea how much weight it could take when I created it. The visor (because my local hobby store only had rods and not tubes) was heavier than intended after paint, resin, etc. and so the strings buckle slightly. Had I used tubes it wouldn't have been an issue.</li> </ol> <p>...</p> <p>I've only started to dabble in 3D modelling, so hopefully it works well for everyone. Let me know if you have any issues and I'll try and fix it.</p> <h3>Print Settings</h3> <p><strong>Printer Brand:</strong></p> <p>Creality</p> <p class="detail-setting printer"><strong>Printer: </strong> <div><p>CR-10</p></div> <p><strong>Rafts:</strong></p> <p>No</p> <p class="detail-setting supports"><strong>Supports: </strong> <div><p>No</p></div> <p><strong>Resolution:</strong></p> <p>0.16</p> <p class="detail-setting infill"><strong>Infill: </strong> <div><p>25%</p></div> <p><strong>Filament:</strong> Hatchbox PLA White</p> <p><br/> <p class="detail-setting notes"><strong>Notes: </strong></p> </p><div><p>I printed all of these flat on the bed. Everything printed well except the arms that had a slight print error with the bevel. I'm not sure if this was my printer or what, but something to be aware of. </p></div> </p></p></p> Category: Decor
With this file you will be able to print Star Trek: TNG - Tensegrity Table with your 3D printer. Click on the button and save the file on your computer to work, edit or customize your design. You can also find more 3D designs for printers on Star Trek: TNG - Tensegrity Table.
