Star Rear bike lights
myminifactory
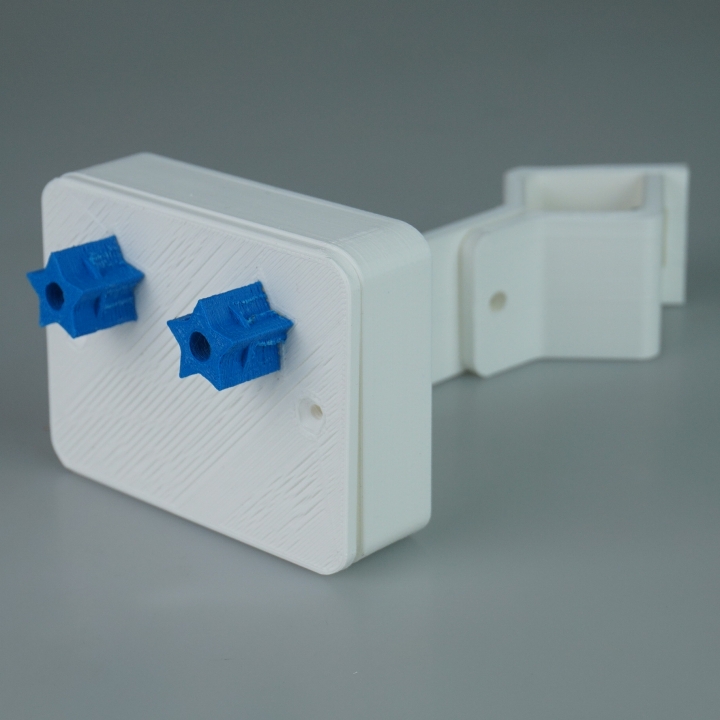
This is a compact housing for the rear bike light kit, as the light streams through two stars. Cut out the pieces and assemble by following these steps: 1) Connect the two battery holder cables to the PCB with solder. 2) Place the PCB on top of the box and secure it with four M3x15mm screws and their corresponding nuts. 3) Glue the two star-shaped inserts onto the lid. 4) Position the lid over the box, seal it with silicone, and fasten the assembly with two self-threading countersunk screws that are 2.9mm in diameter and 20mm long. 5) Grab the short bracket, attach it to the box bracket, and secure it to the seatpost using an M5x40mm screw and its nut. Note: To conserve battery life, use a slide switch connected to the positive battery cable.
With this file you will be able to print Star Rear bike lights with your 3D printer. Click on the button and save the file on your computer to work, edit or customize your design. You can also find more 3D designs for printers on Star Rear bike lights.