"Stained glass" tiles Lampshade
prusaprinters
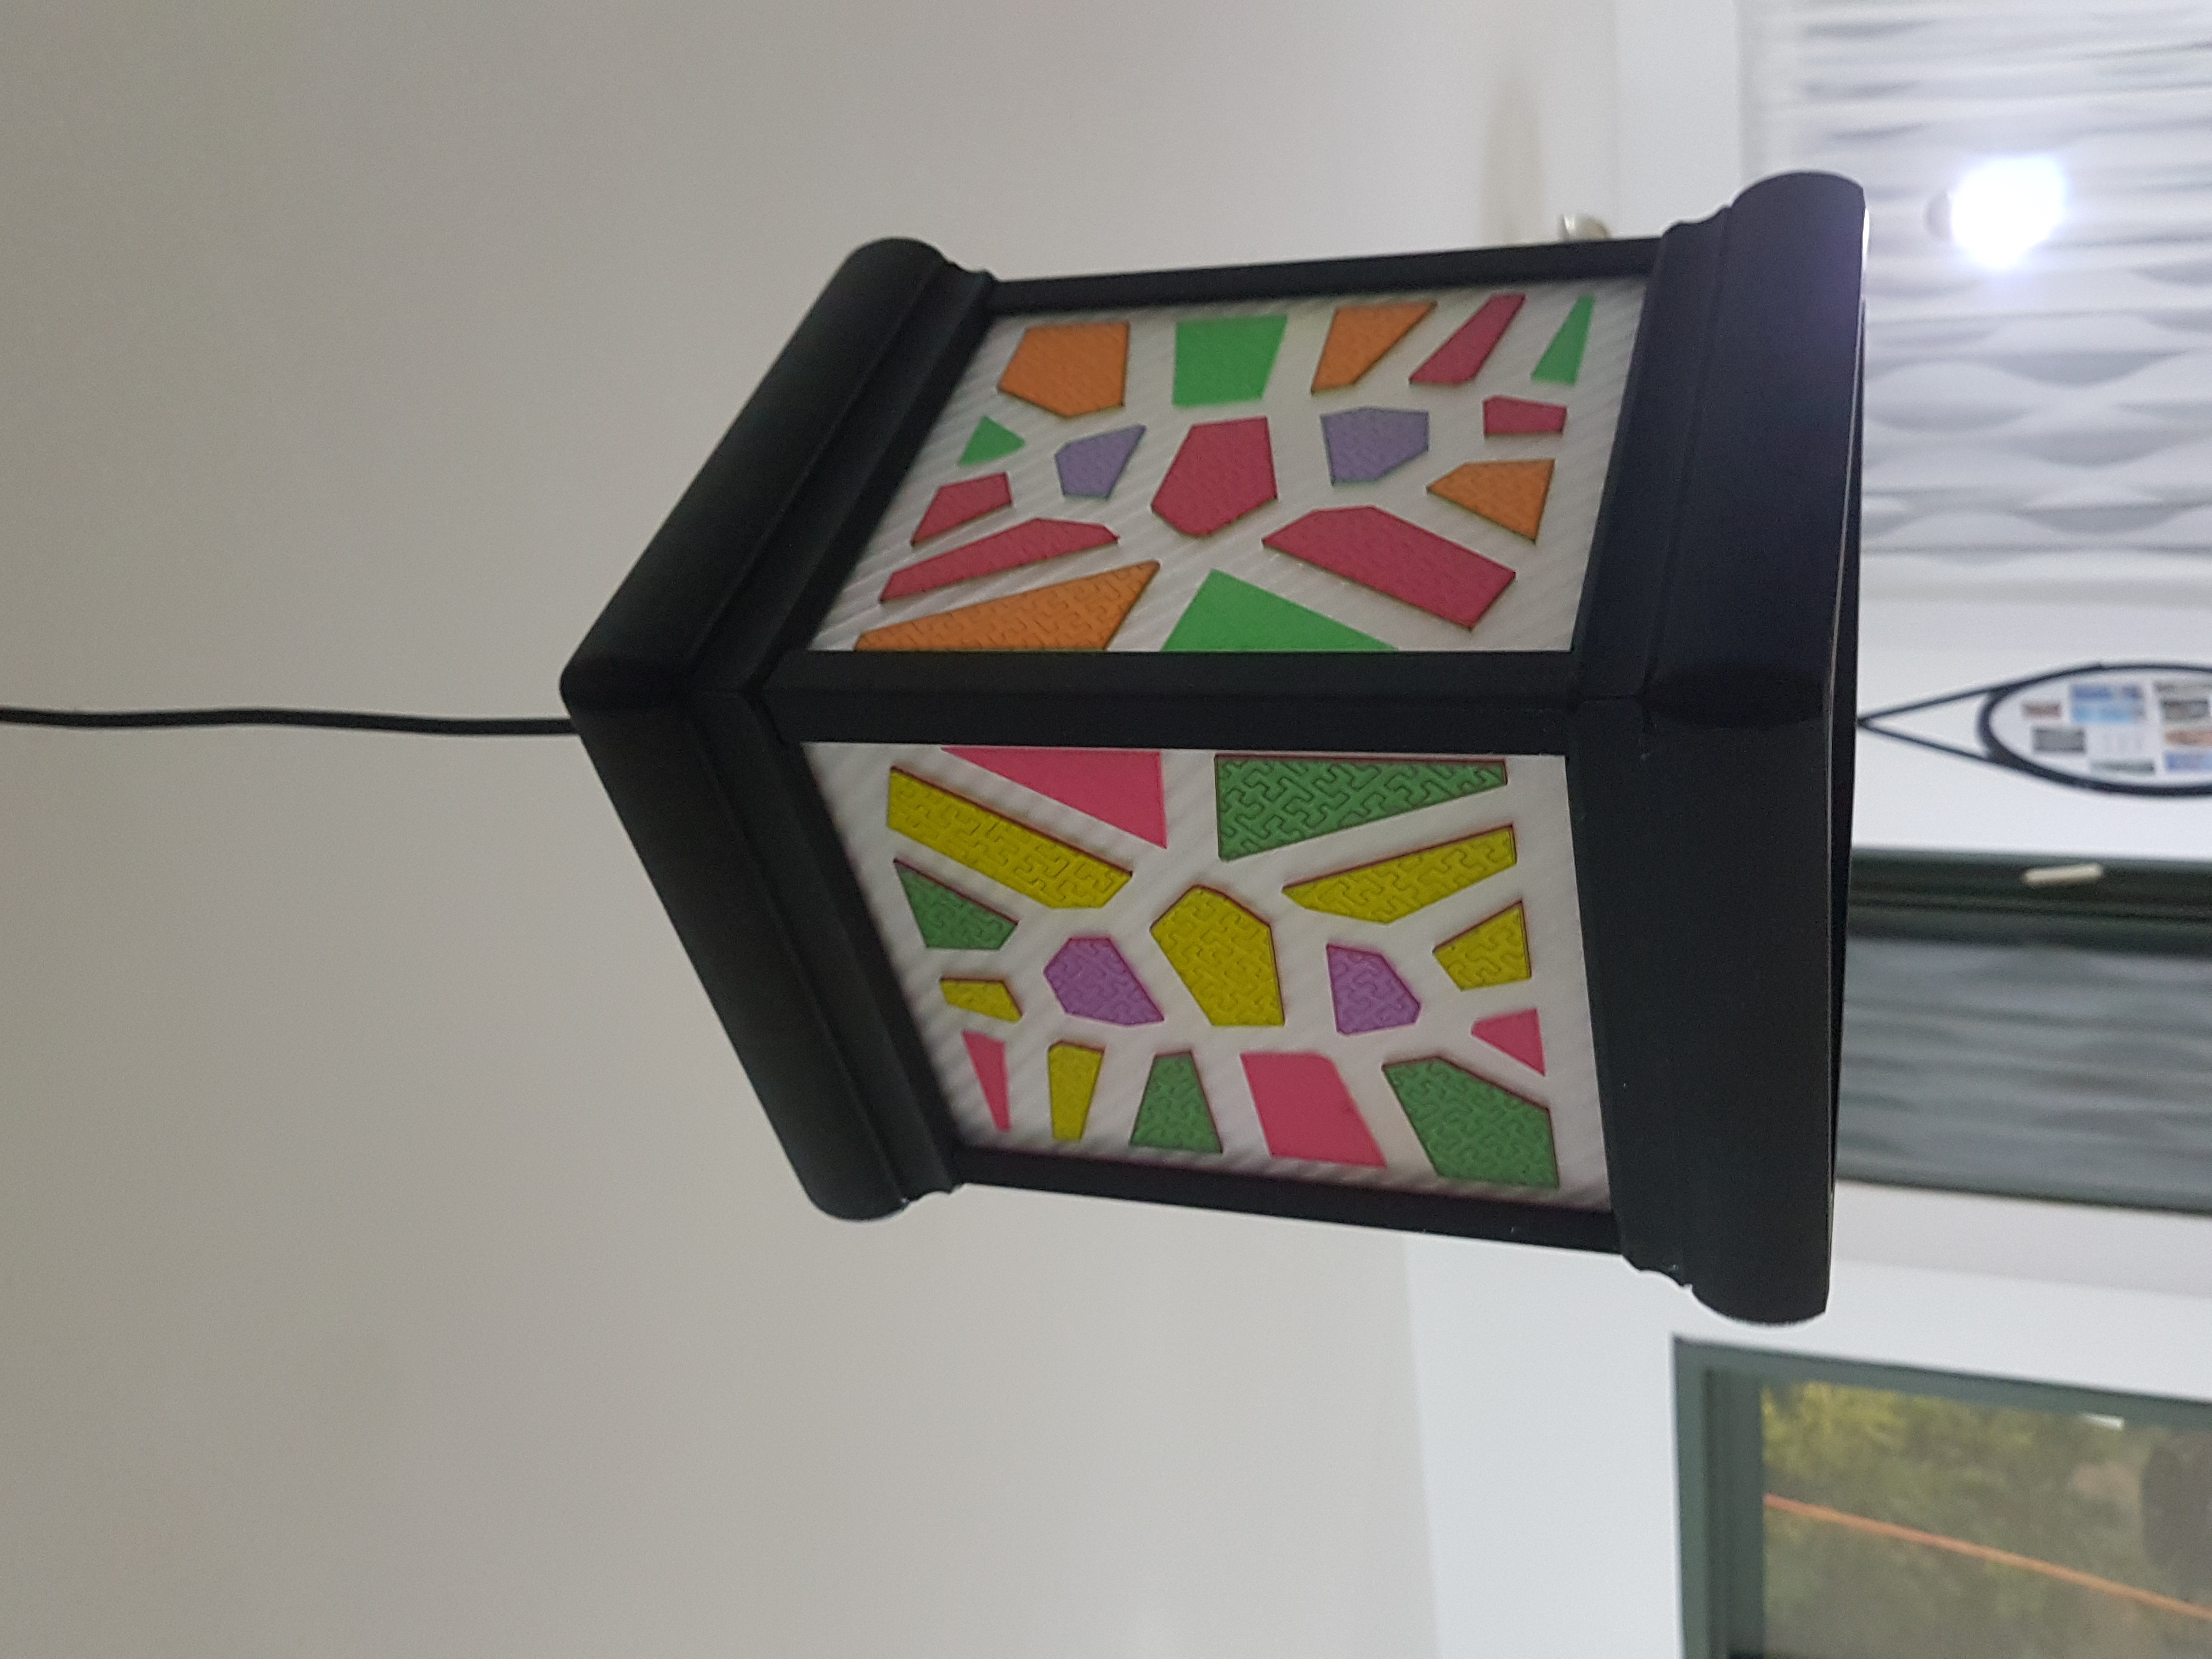
<p>lampeshade designed to be one model with various tiles so anyone can costume it freely. suit for IKEA "SEKOND"</p> <h3>Print instructions</h3><p>PRINTED PART:<br/> 1 pcs Base<br/> 1 pcs Top part 1<br/> 1 pcs top part 2<br/> 4 pcs Column<br/> 4 pcs Tiles (as your choice)</p> <p>HARDWARE:<br/> 8 pcs M3X40mm<br/> 8 pcs M3nS</p> <p>Filament -PETG</p> <h3>All of the frame part printed the same layers and perimetrs:</h3> <p>Layer height- 0.2mm ,5 up, 4 down<br/> perimeter - 2<br/> Infill - 15% Grid</p> <p>TILES</p> <p>VORONI TILES - Layer height- 0.2mm ,2 up, 2down (make sure to set min to 0.4 for both)<br/> perimeter - 2<br/> Infill - 15% Hilbert Curve</p> <p>FLAT TILES<br/> filament color and print setting will call the style of a tile!<br/> Layer height- 0.2mm ,0 up, 0 down<br/> perimeter -8 (min)<br/> Infill - your call!</p> <p>ASSEMBLY INSTTRUCTION:</p> <p>Step 1:<br/> Insert the M3ns into the slot at the end of the column do it in both sides.<br/> Step 2:<br/> Take the base, the side with the triangles slots is up. Insert the columns to the slots<br/> Step 3:<br/> Insert the tiles between the columns.<br/> Step 4:<br/> Take the TOP PART 2 (triangles slot face down) and place it at the top. Before you go to the next stage make sure the nuts are aligned to the hole.<br/> Step 5:<br/> Take the TOP PART 1 (wide part face up) put at the top and insert 4 M3X40 and tight them all.<br/> Step 6:<br/> Flip over the whole structure while you holding the bottom (it isn’t attached yet). Insert 4 M3X40 and tight them<br/> Step 7:<br/> Connect the lampshade to "SEKOND" light holder. (I don’t think it will fit "HEMMA" due its weight).<br/> ENJOY!!!!!<br/> HAPPY PRINTING</p> <p>Step 1:<br/> Insert the M3ns into the slot at the end of the column do it in both sides.<br/> Step 2:<br/> Take the base, the side with the triangles slots is up. Insert the columns to the slots<br/> Step 3:<br/> Insert the tiles between the columns.<br/> Step 4:<br/> Take the TOP PART 2 (triangles slot face down) and place it at the top. Before you go to the next stage make sure the nuts are aligned to the hole.<br/> Step 5:<br/> Take the TOP PART 1 (wide part face up) put at the top and insert 4 M3X40 and tight them all.<br/> Step 6:<br/> Flip over the whole structure while you holding the bottom (it isn’t attached yet). Insert 4 M3X40 and tight them<br/> Step 7:<br/> Connect the lampshade to "SEKOND" light holder. (I don’t think it will fit "HEMMA" due its weight).<br/> ENJOY!!!!!<br/> HAPPY PRINTING</p>
With this file you will be able to print "Stained glass" tiles Lampshade with your 3D printer. Click on the button and save the file on your computer to work, edit or customize your design. You can also find more 3D designs for printers on "Stained glass" tiles Lampshade.