Stacking Block Toy Train MK3
prusaprinters
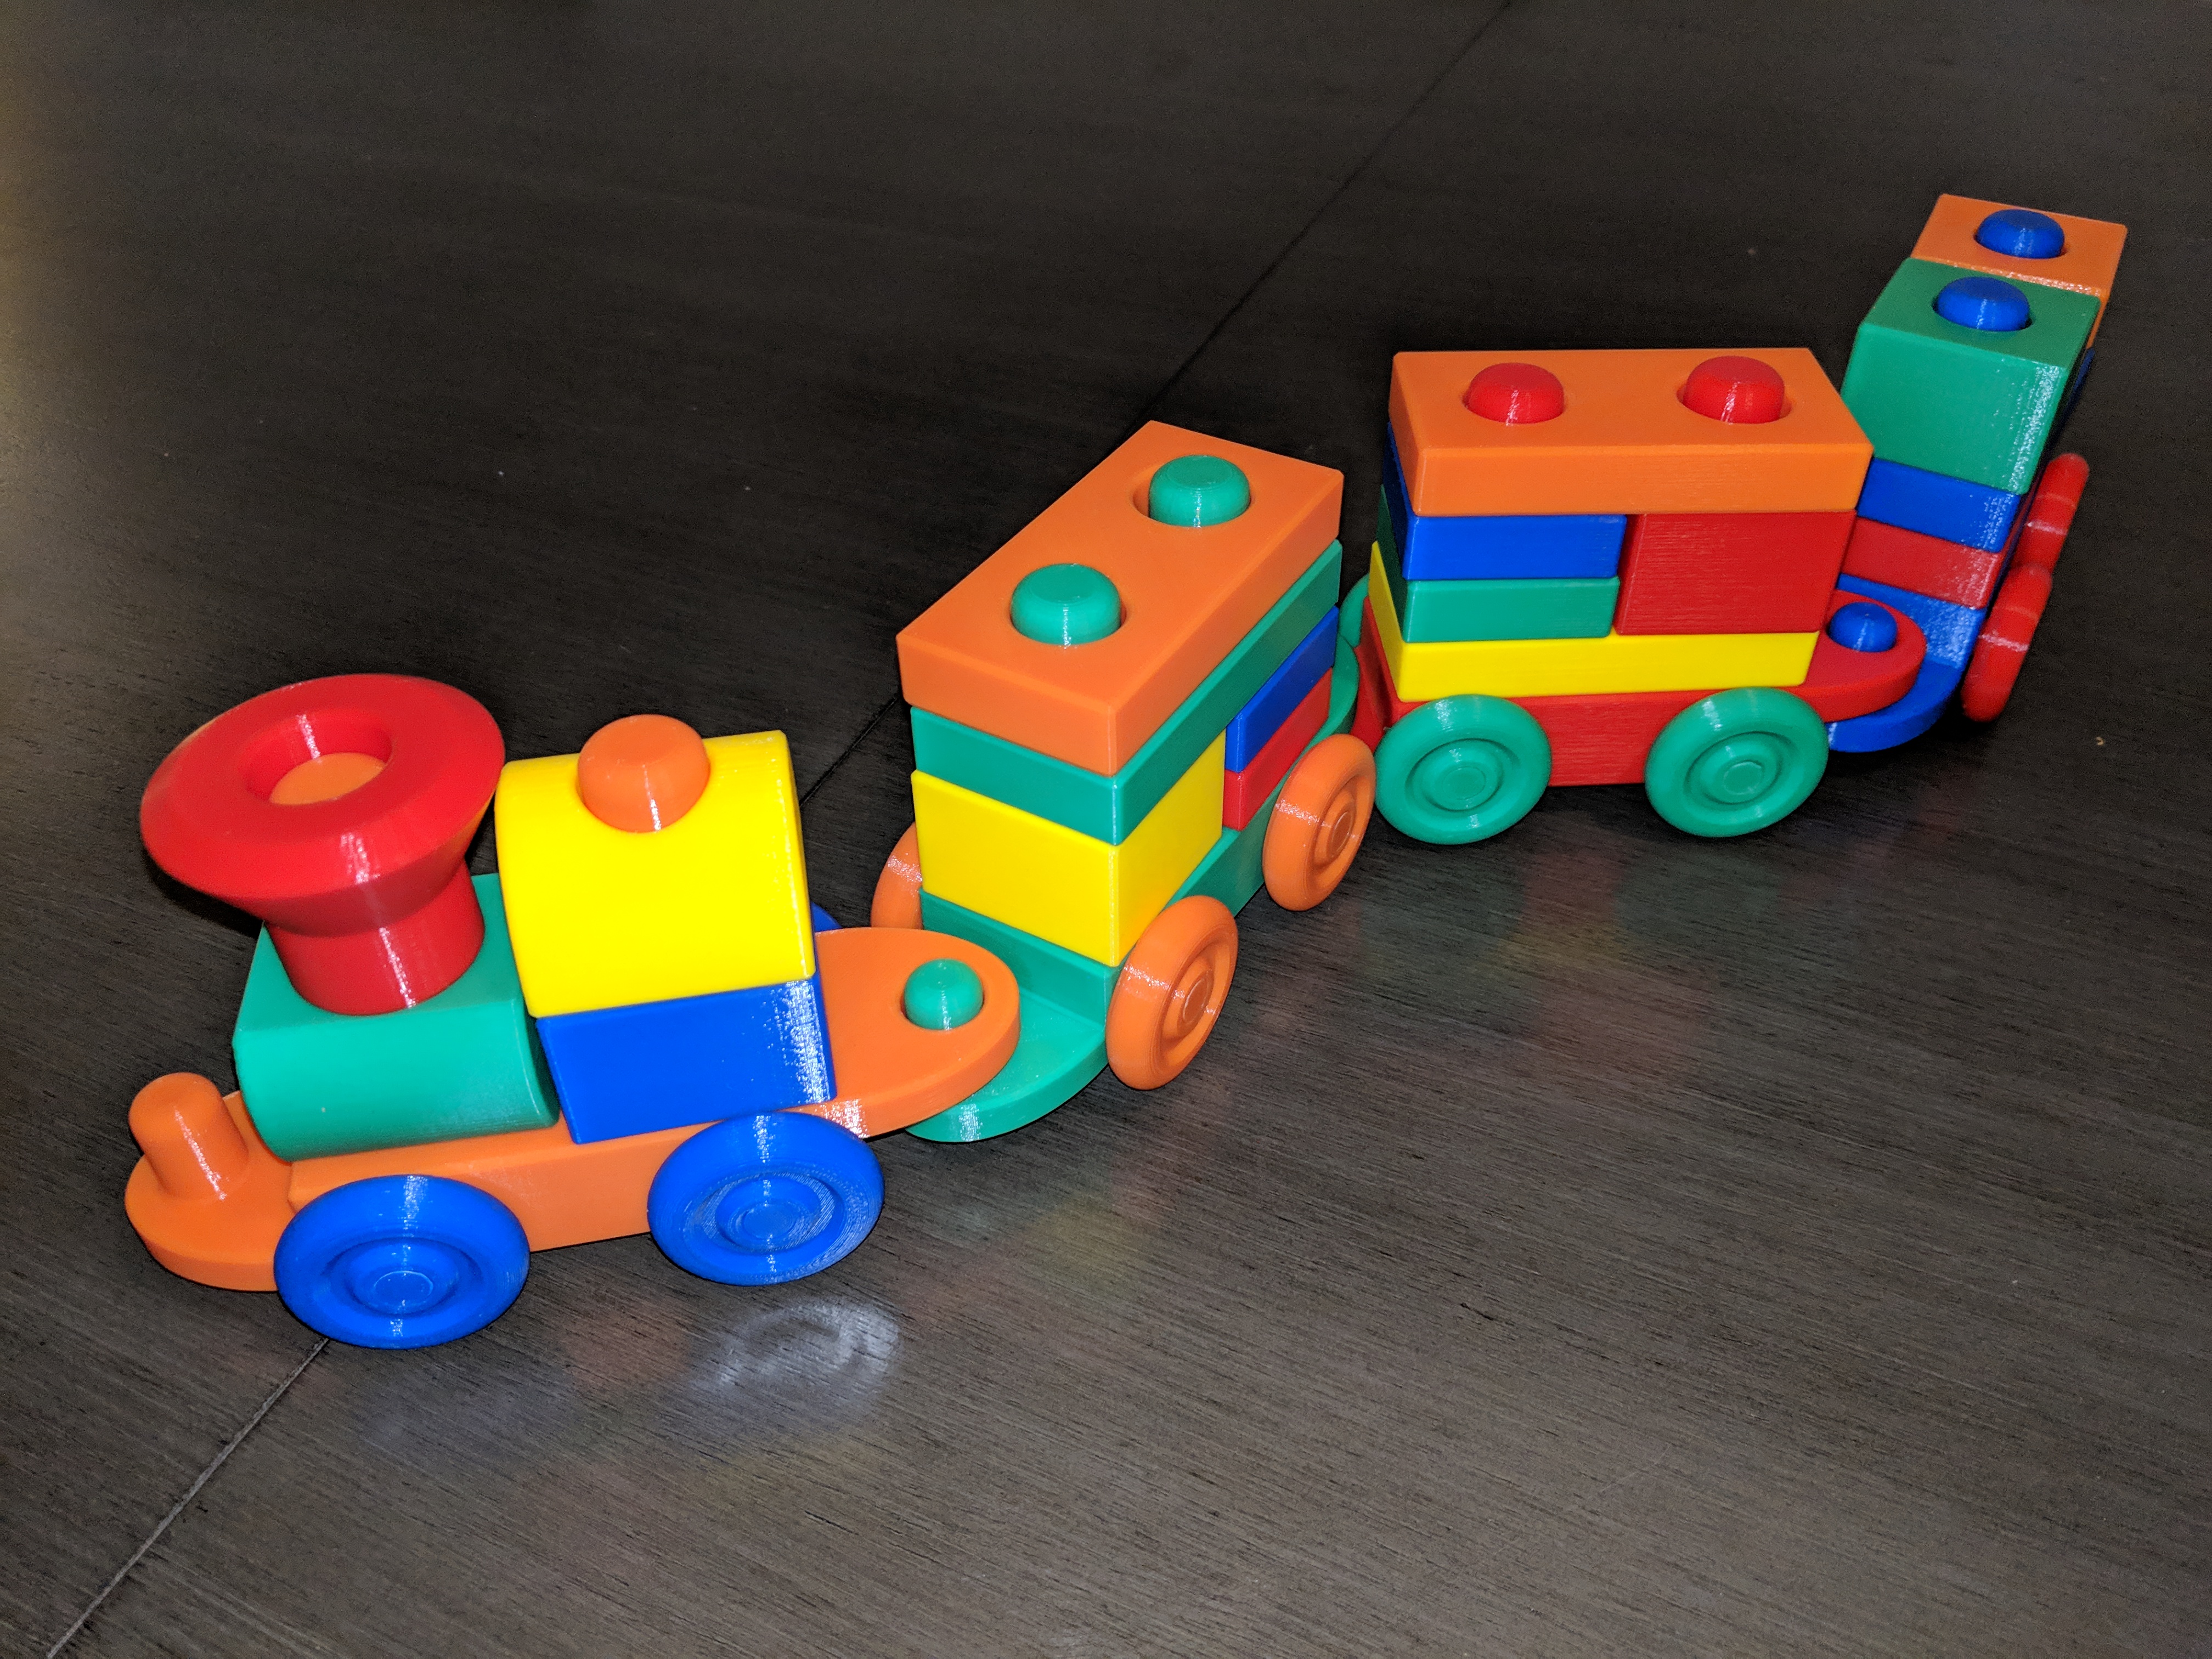
<p>This is more a "homage" than a direct remix of Caj's inspirational <a href="https://www.thingiverse.com/thing:2133225">Pull Toy Train</a>.</p><p>My niece has Down Syndrome and is currently working hard on fine motor control. Her doctors have suggested that stacking toys, such as this, will help in her development. So I've been looking for the right gift for her upcoming birthday.</p><p>Once I got my printer dialed in, I began entertaining the thought of printing a gift, but I couldn't really think of any good ideas. A few weeks ago, I stumbled on a Reddit post of a customized version of Caj's train, and I thought it would be perfect.</p><p>I immediately printed a set of parts for the "car", but was disappointed in the loose fits and sharp corners. I was hoping to keep this as child-safe as possible by avoiding glue altogether.</p><p><strong>Update</strong>: After extensive field testing (thank you Harper, Cora, and Brenna) I discovered that when a child puts their weight on the car this puts stress perfectly in line with both the printed layers and the weakest area of the axle and causes it to break. This appears to be the primary failure mechanism and results in either threaded stubs stuck in the wheels--or worse--a small chunk of free plastic just small enough to be a choking hazard.</p><p><i><strong>I STRONGLY ENCOURAGE EVERYONE TO REPLACE THEIR AXLES IMMEDIATELY</strong></i></p><p>The new AxleV2 includes a hollow for a 5x60mm dowel pin. This insert makes the axle all but indestructible. Specifically, I used <a href="https://smile.amazon.com/gp/product/B07MB8QV7J/">these</a> from Amazon.</p><p>I suggest you split the part and print it in two long halves and superglue them around the pin. However, you can also insert a pause at the end of the pocket and insert the pin during the print.</p><p>I am leaving the original axle up in case someone is using a stronger print method or wants to make a remix, but please do not use it.</p><p>Thus was born my "Mark-3" Block Stacking Train. I took inspiration from Caj, improvements from Anon, and then designed my own system from the ground up.</p><ul><li>All parts are universal and can be connected in any way.</li><li>All parts are printed as single pieces, no glue necessary.</li><li>All parts have a minimum 1 mm chamfer on all edges to avoid sharp corners.</li><li>All thin posts are generously radiused.</li><li>All parts meet the 1.25″ minimum dimension as to not be considered a choking hazard as long as the wheels stay attached to the axles.</li><li>Fits and dimensions are standardized so producing custom blocks is easy.</li></ul><p>Parts are broken down into two major categories:</p><p>Two "Axles", four "Wheels", and one "Car" are assembled into a single train car. The train car forms the base for all stacking.</p><p>All other parts are "Blocks" and can be printed in whatever quantity you desire. Three of the included blocks are special as they form the distinctive locomotive shape, but they are also optional.</p><p>A train car can carry 8 "units" of blocks. The "Block-Short" counts as 1 unit, the "Block-Long" and "Block-Square" both count as 2 units--as do all the special blocks: "Block-Cabin", "Block-Boiler", and "Block-Smokestack".</p><p>I encourage you to design your own blocks for this train--I have plans to do so as well. Remixers and block designers should add the tag "StackBlockTrain" to all compatible projects so we can keep them related. The dimensions for blocks are as follows:</p><ul><li>Blocks are multiples of 15 mm high (square blocks are 30 mm high)</li><li>Blocks are 44 mm wide</li><li>Short blocks are 44 mm long, Long blocks are 90 mm long (1 mm of stacking clearance)</li><li>Post holes are 20.5 mm in diameter. A single post hole should be placed in the center of short blocks</li><li>Two post holes should be centered on long blocks, separated by 45 mm (each hole offset from the center by 22.5 mm)</li><li>All edges should be kept to 45° or less using at least 1mm chamfers when necessary.</li></ul><h3>Print instructions</h3><p>Unless suggested otherwise below:</p><ul><li>0.2mm layer height</li><li>20% Infill</li><li>No rafts or supports</li></ul><p>Almost all parts can be printed with no supports, brims, or rafts. I chose 20% infill to increase durability.</p><p>The axles should be printed vertically to keep the threads clean and so probably require 10-15 perimeters of brim. I also increased the fill to 100% as, when printed this way, the layer weakness is aligned with the axle stress. Pause the print or split in half in order to insert the dowel pins.</p><p>Wheels have a flat side that should be oriented down. These sides should be assembled facing "in" towards the car body.</p><p>The Car needs support on the build plate only for the tongue.</p><p>Resist the urge to flip the smokestack. While the contact area is larger on top, the draft angle is smaller when printed upright.</p>
With this file you will be able to print Stacking Block Toy Train MK3 with your 3D printer. Click on the button and save the file on your computer to work, edit or customize your design. You can also find more 3D designs for printers on Stacking Block Toy Train MK3.