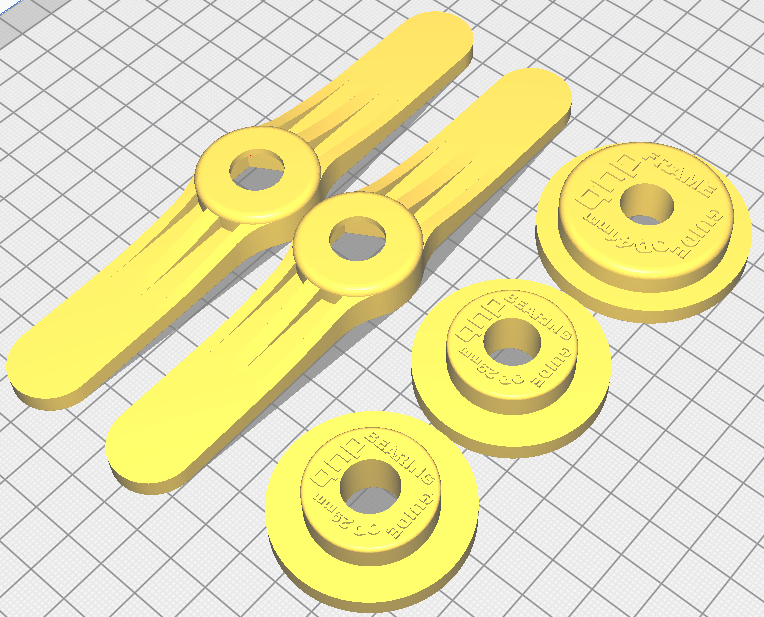
SRAM DUB BB PF (bottom bracket pressfit) installation kit (NEW V2 handle!!)
thingiverse
This is an SRAM DUB bottom bracket installation kit. You don't have to break the bank on a fancy bearing installation tool to install your bike's bottom bracket, I know it looks sleek with that blue anodizing and brand sticker, but your wallet will thank you for using this kit. MORE INFO THAN YOU MIGHT NOT NEED TO READ: The one I printed has slightly looser tolerances than the one I uploaded, but it's straight and alignment shouldn't be a problem as long as the handles are parallel to each other and perpendicular to the rod. I'm pretty particular about my bikes and tools, but I just didn't want to pay 200€ for a kit that I can design myself and print for less than 10€. IMPORTANT: This kit has three parts, two of which need to be printed twice. - The bearing guide needs to be printed twice. - The frame guide needs to be printed once. - The handle needs to be printed twice. YOU WILL NEED TO BUY: - A 12mm rod that's at least 200mm long - even 150mm might be enough. The ID of the guides I designed is exactly 12.5mm. - Two 12mm nuts, with an official width of 19mm between the faces of the hexagon, but in reality, it's about 18.8mm. This should be a pretty tight fit, so the handle has an exact 19mm hexagon, but you can also use glue if your nuts are too loose like mine. NOTE: I recommend using PETG, but PLA works just fine without any issues. I'm just more comfortable with the results I get from PETG. SRAM DUB data for those who are interested: - Axle: exactly 28.99mm - my bearing guide has an exact 28.5mm OD diameter. - Frame: exactly 41mm - my frame guide has an exact 40.5mm OD diameter. PRINT INFORMATION: Everything can be printed at once, with a layer height of 0.24mm, and supports are necessary for the handle's hexagonal hole. Just place everything as shown below and print it - it'll take some time. CURA PREPARE view:  CURA PREVIEW view:  INSTRUCTIONS 1. Insert the nuts into the handles, use some glue if you want to be sure they're secure. Make sure the nuts are flat and perpendicular to the rod. Mine weren't perfect, so check them carefully. 2. Insert a handle into the rod, just a few turns - the nut should be on the outside. 3. Insert the frame guide into one side of the frame, then insert the rod into the frame guide. The handle should be contacting with the guide, not the nut with the guide. 4. On the other side of the frame insert one of the DUB cups, place it in the frame. Then insert the bearing guide into the DUB cup. 5. Insert the other handle now - the nut must be on the outside. 6. Now start turning the handles carefully and the DUB cup will be inserted into the frame. Stop when it's in the frame and you feel like you need to apply more force. It's pretty obvious, just don't use brute force or you might break the frame. 7. Now remove the frame guide, install the other cup with the other bearing guide, and the plastic piece that goes between the cups. Then insert the handle. 8. Now start turning the handles again as in point 6, but also make sure that the plastic piece between the cups slides correctly into the other cup (my last bike came from the factory with this piece bent because of this). 9. FINISHED! You can also follow the official tutorial (starting at 1:32): <a href="https://youtu.be/E0CDaxwbd5c?t=92" target="_blank"></a>
With this file you will be able to print SRAM DUB BB PF (bottom bracket pressfit) installation kit (NEW V2 handle!!) with your 3D printer. Click on the button and save the file on your computer to work, edit or customize your design. You can also find more 3D designs for printers on SRAM DUB BB PF (bottom bracket pressfit) installation kit (NEW V2 handle!!).
