Squeezebox Keyboard v2209
prusaprinters
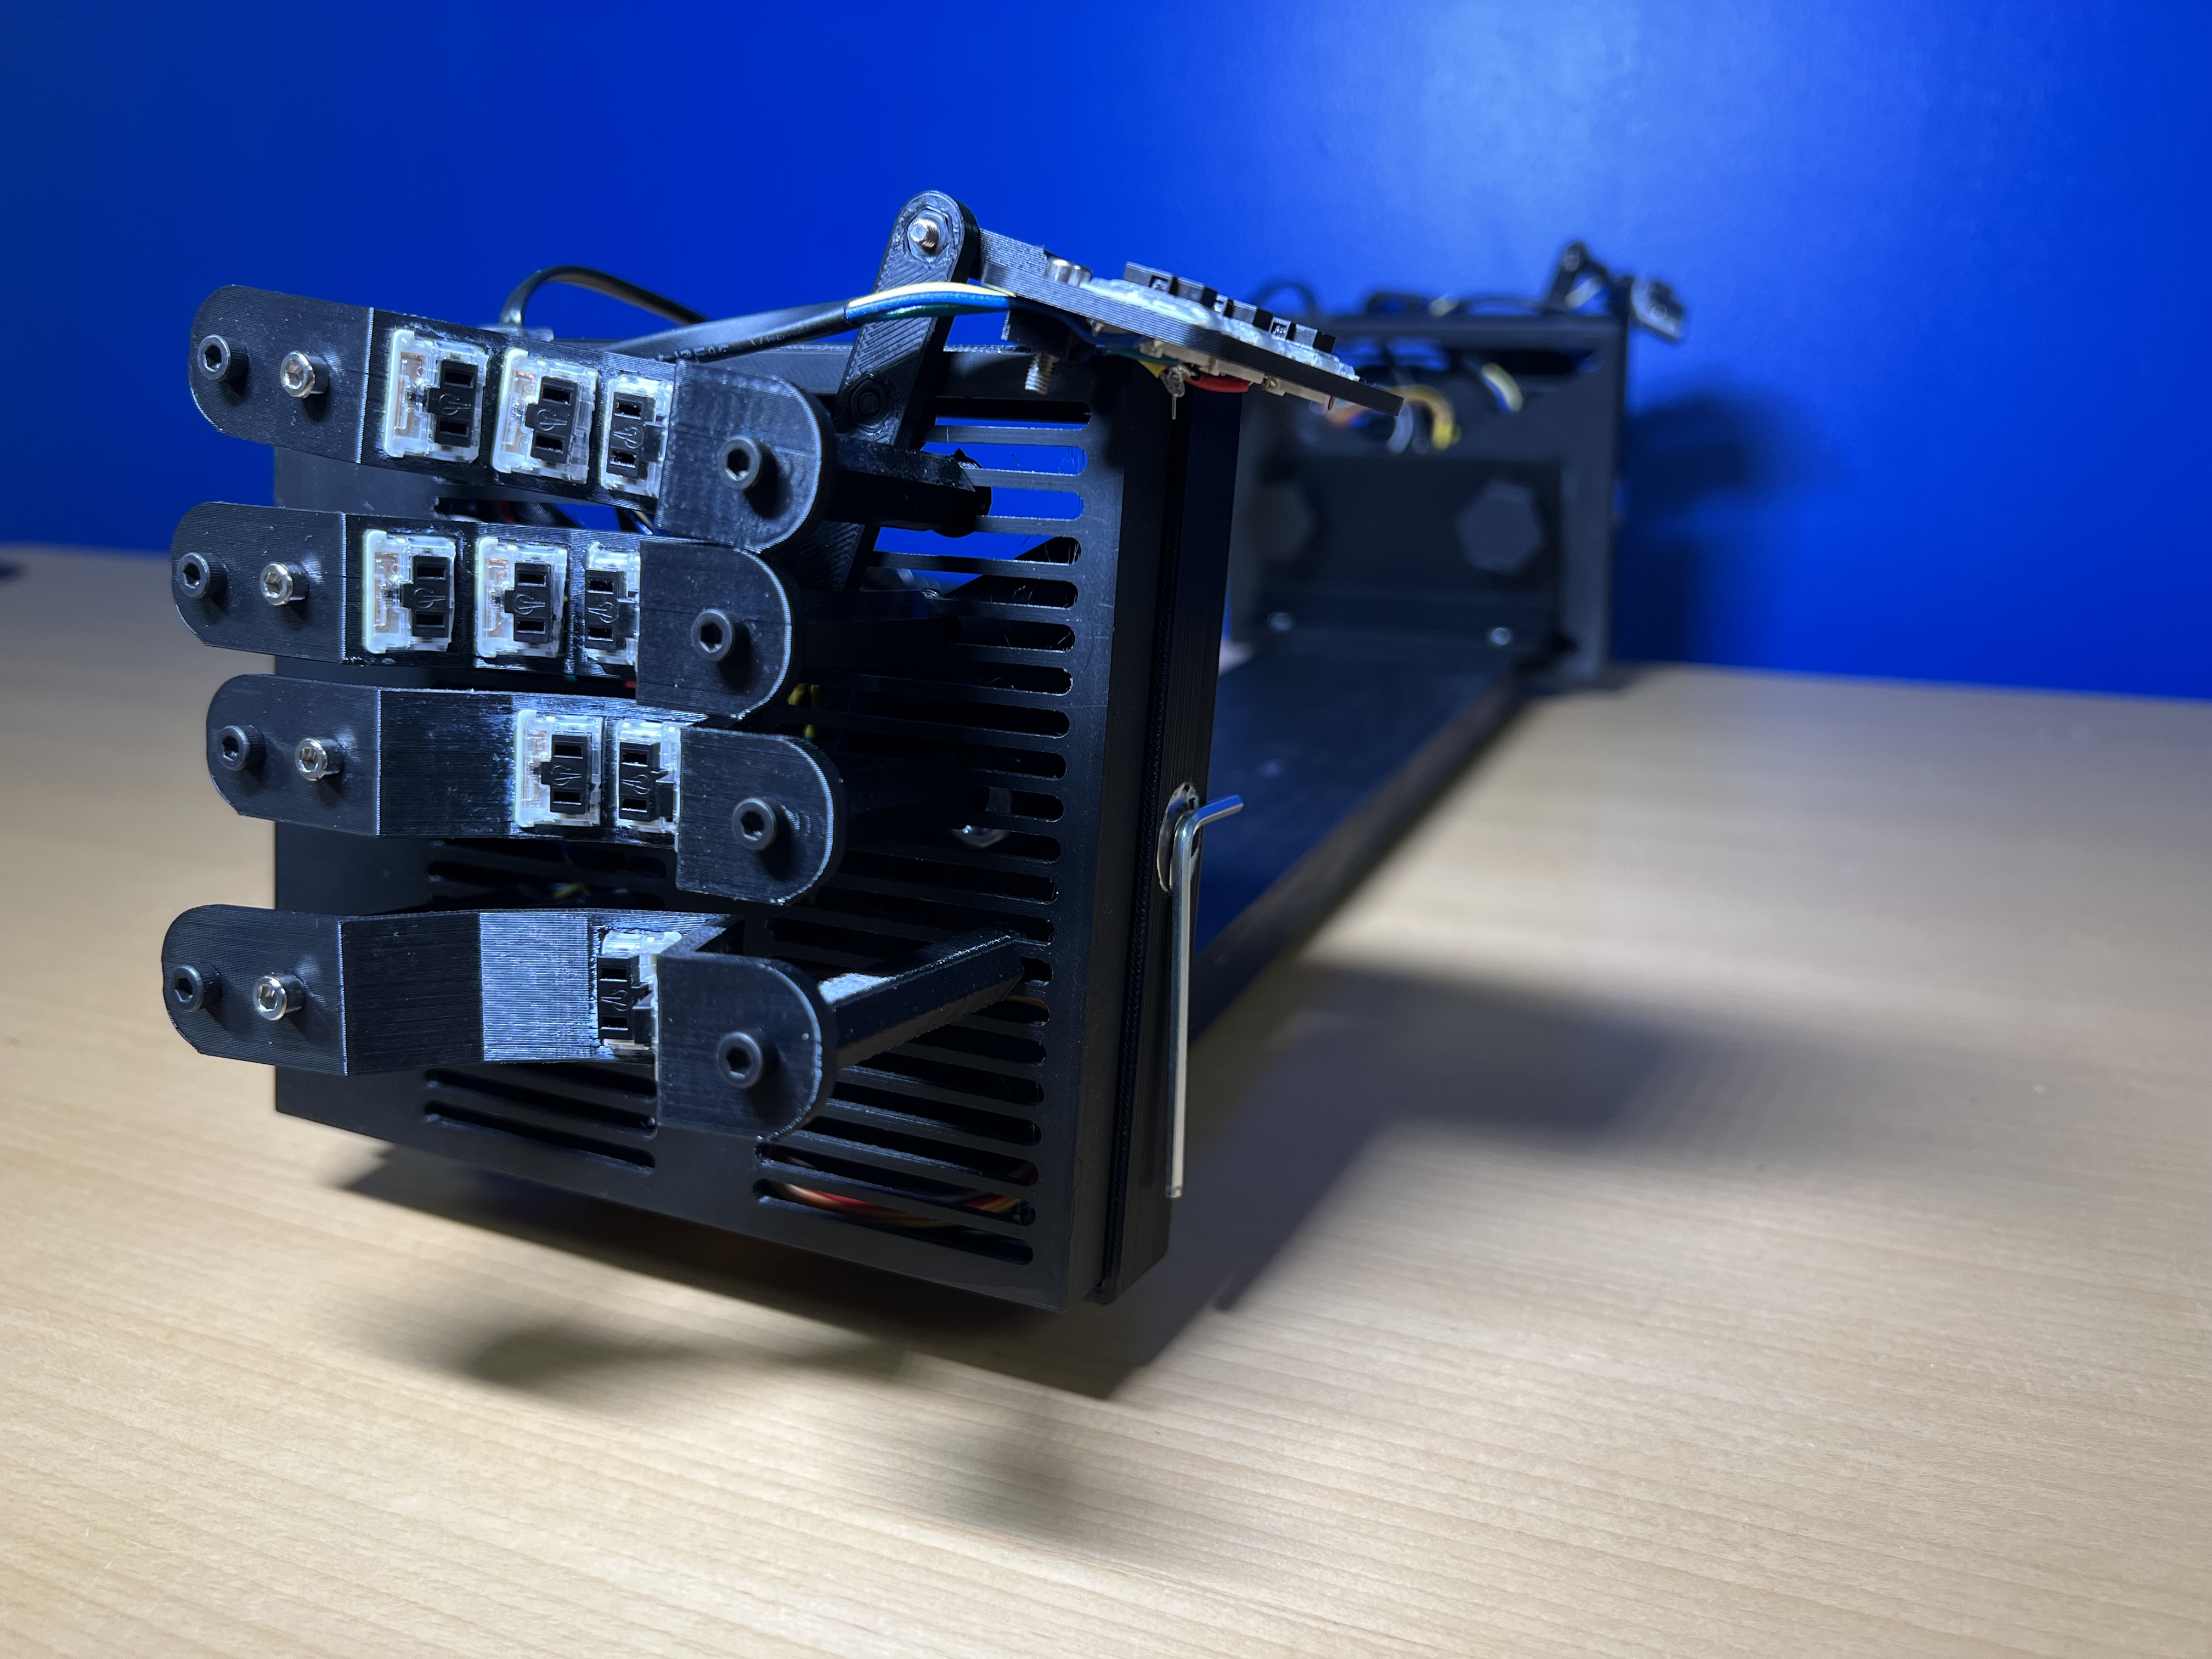
<h3>Slicer Orientation and Printing</h3><p> </p><p>I'll do this in the order the final structure ends up to keep it somewhat logical.</p><p> </p><ul><li>Tents should be printed on their thin edge side</li><li>Bottom Plate should be printed with the open side facing up</li><li>Hex bolt handles should have the bolt recess facing up</li><li>Slot box should have the slot face on the build plate</li><li>hex column keywell offset posts work either on their ends or on their sides.<ul><li>You can print many at once if you print them with the long sides down</li></ul></li><li>Keywells should be printed with their thin wall edge down<ul><li>This requires bridging for the top of the switch housing rectangles but my printer handles it OK. Any little gloops just need to be filed off.</li></ul></li><li>Strain reliefs should have the hex recess up and can be printed in a big batch</li><li>Washers go flat and can be printed in big batches of like 16 at once</li><li>Thumb clusters print flat in the obvious orientation</li><li>Thumb cluster posts print flat with the hex housings facing up</li><li>PCB mount prints flat on the big flat surface</li></ul><h3>Store Bought Parts You Will Need</h3><ul><li>m3 bolts of 8mm and 12mm length, matching hex wrench</li><li>m3 heat-set threaded inserts</li><li>kailh choc mini switches</li><li>Elite-C microcontrollers (2)</li><li>Jumper wire</li><li>DuPont connector kit and crimper</li><li>15mm diameter disc magnets</li><li>¼-20 nuts and bolts (4 pairs) for mounting the base to the tent</li><li>Short wood screws (4) for mounting the tents to a spacer board</li><li>Some kind of wooden spacer board. Roughly 16-18" depending on your shoulder width. ¾" thickness should be fine and about 4" width</li><li>RJ9 connectors (2)</li><li>Reset buttons (2)</li></ul><h3>A Very Sketchy and Incomplete Build Guide</h3><ul><li>Each hexagonal post gets a heat-set threaded insert installed into each end.<ul><li>Place the insert into the hole</li><li>Heat soldering iron to 250F and use press the tip into the threaded insert while keeping the soldering iron perfectly upright and plumb/true</li><li>The insert should slowly lower into place as the PLA starts to melt</li><li>Stop when the insert is flush with the top of the post</li></ul></li><li>Prepare some chopped choc mini keyboard switches<ul><li>I prefer doing this with a rotary tool cutting wheel, but it can also be done with a pair of flush cutters.</li><li>Be sure to wear safety goggles</li><li>Place the switch securely in a clip or clamp of some kind to hold it steady</li></ul></li><li>Add wire “flagpoles” to the switch pins<ul><li>This will make hand wiring the switches together much easier once glued into the keywell. There is almost no clearance for the soldering iron once the switches are glued in so you will melt the PLA.</li><li>To ease this, prepare a short section of wire with a shepherd's hook or loop at the end. Solder it onto the switch pin so the end extends up about 10mm.</li></ul></li><li>Building each keywell follows a similar procedure and is the trickiest part of the build<ul><li>I use DAP RapidFuse to glue the switches in place. Get the gel with the brush applicator. This is definitely better than regular CA glue, but there's probably something else even better.</li><li>Glue one unmodified choc mini switch in the first row. I brush a very light amount of glue on the keywell housing then place the switch in.</li><li>For row 2, glue in a chopped choc being sure to have the switch further away from the corner. The chopped edge should be further away from you than the factory edge. If you have it oriented with the switch closer too the corner, it's too close and will not line up directly below the point of your finger.</li><li>For row 3 and 4, the chopped edge should be oriented toward you.</li><li>Hand wire one pin of each switch together. This will be the column circuit conductor.<ul><li>I usually connect each pair with a section of wire. This makes stripping the insulation and measuring easier.</li></ul></li><li>For the other switch pins, measure a section of wire long enough to reach all the way to the PCB, plus some routing slack. Solder that wire to the other flagpole on the switch pin</li><li>Run the loose ends of the wire through 1 or 2 sections of heat shrink tubing to keep them tidy like a cable. Use a heat gun to shrink the tubing.</li><li>Crimp DuPont connectors to the ends of the wire</li><li>Install the connectors into a plastic housing plug of the appropriate size<ul><li>3 wires for pinky</li><li>4 wires for ring and thumb</li><li>5 wires for index and middle</li></ul></li><li>Glue an m3 nut into the strain relief</li><li>Route the wires under the strain relief and tighten down with an m3 bolt to secure </li></ul></li><li>PCB assembly<ul><li>Solder through hole diodes in the center of the board. Be sure each diode is oriented correctly and they all match</li><li>Install and solder pin headers for each keywell wire, the reset button, and the RJ9 wires. Plastic goes on the top side of the PCB, solder goes on the bottom</li><li>Install your MCU either directly onto pin headers (not recommended) or <a href="https://docs.splitkb.com/hc/en-us/articles/360011263059-How-do-I-socket-a-microcontroller-">socket your MCU as per these instructions</a></li></ul></li><li>Flash a test firmware onto your MCU</li><li>Once you have the PCB prepped and a single keywell built, you should be able to connect them and confirm that each switch types the expected letter</li></ul>
With this file you will be able to print Squeezebox Keyboard v2209 with your 3D printer. Click on the button and save the file on your computer to work, edit or customize your design. You can also find more 3D designs for printers on Squeezebox Keyboard v2209.