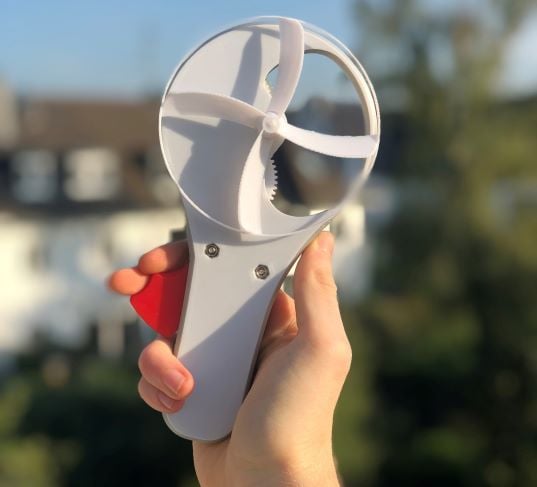
Squeeze Fan
thingiverse
For more info watch: https://youtu.be/PjOyAcW-Fic This is an open source project. All the step files are provided for you to download for the purpose of making the assembly easier and so you can easily modify the design. The only things you are going to need for the assembly are: -3 2mm pins, you can just take anything with a 2mm diameter and cut it to the right lenght -some M3 screws and two M3 nuts -some threaded insterts [I used these ones](https://www.amazon.de/gp/product/B08BCRZZS3/ref=ppx_yo_dt_b_asin_title_o00_s00?ie=UTF8&psc=1) -a pull spring or if you can't find one, a rubber band will do fine too Printing recommendations: You should print the Lever with at least 6 walls and 50-80% Infill. Use your stiffest filament possible. If your printer is underextruding sometimes, then bump the flowrate up a bit. It is also the only part that needs support so make sure to enable supports in your slicer. If you're having trouble with the gears not meshing smoothly, try printing them on rafts. This worked great for me because it gets rid of the elephants foot. The rest can be printed with your normal settings but be aware that your printer needs to be at least functioning properly before you print this. Making this has showed me that any parts below average printing quality were no good to use and often broke during use. Especially underestruded parts. Also I bumped the temperature up by 10C to 220-225 depending on the filament (PLA). I have found that greasing the gearbox can make a significant impact on the performance later on. Takes a while until the grease is distributed evenly but the gears will run more smoothly. Dont use too much though because then it will fill out the gaps in the gears and they won't mesh properly anymore.
With this file you will be able to print Squeeze Fan with your 3D printer. Click on the button and save the file on your computer to work, edit or customize your design. You can also find more 3D designs for printers on Squeeze Fan.
