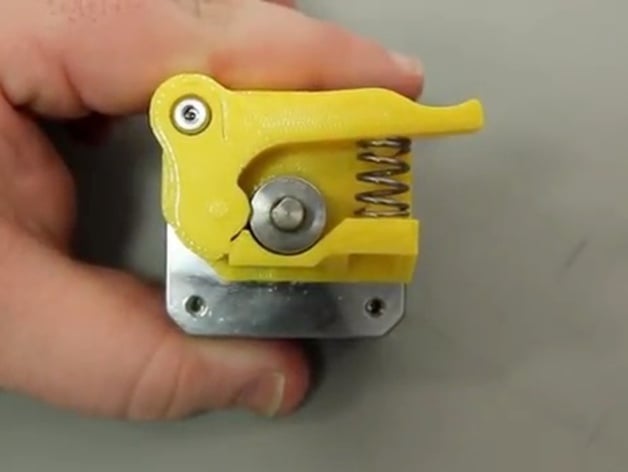
Spring-loaded Replicator 2 Drive Block
thingiverse
Based on designs by Thingiverse users whpthomas, emmett, and whosawhatsis, this redesigned extruder utilizes a spring-loaded arm to maintain consistent pressure between the drive gear and a bearing. Improvements include a filament guide hole beneath the drive gear for seamless hot end insertion. MakerBot Replicator 2 owners will appreciate the smooth filament operation provided by this system. The hardware kit for this replacement part is available at http://store.makerbot.com/drive-block-hardware-kit.html. Revised files and a print-without-support version of the base are also accessible, along with video instructions (http://youtu.be/ZdOS5NP5eaE). Follow these steps to install: 1. Gather required components: 2mm and 2.5mm hex wrenches from your MakerBot Replicator 2, an M3 Hex Socket Shoulder Screw (4mm x 10mm), a 0.360"OD/0.276"ID compression spring (0.630" free length, 32lbs/in spring rate), an M3 x 6mm Flat Head Cap Screw, and a 4mm ID x 10mm OD x 4mm width ball bearing. 2. Print SCHDrive.thing with the following settings: Layer height - 0.20 mm; Infill - 10%; Shells - 3. 3. Remove support structures from the drive block base and bearing arm, switch off your MakerBot Replicator 2, disconnect motor wire harness connector, and remove front extruder fan components. 4. Remove the motor assembly, then add the new drive block base to the motor with the flat side facing the top of the motor, centering it over the drive gear, and aligning bolt holes. Secure with a 2mm hex wrench. 5. Add the bearing arm, radial bearing, and bearing cover as described in the instructions, then fit one end of the spring to the bump on the drive block base and the other to the bump on the bearing arm. Align the corresponding bolt holes, and push the shoulder bolt through the arm and motor, tightening with a 2mm hex wrench. 6. Reassemble the motor assembly in the extruder, ensuring the fan bolts are loosened if necessary for smooth operation. Connect the motor wire harness and start printing!
With this file you will be able to print Spring-loaded Replicator 2 Drive Block with your 3D printer. Click on the button and save the file on your computer to work, edit or customize your design. You can also find more 3D designs for printers on Spring-loaded Replicator 2 Drive Block.
