Spooky Office Ghost Clip
prusaprinters
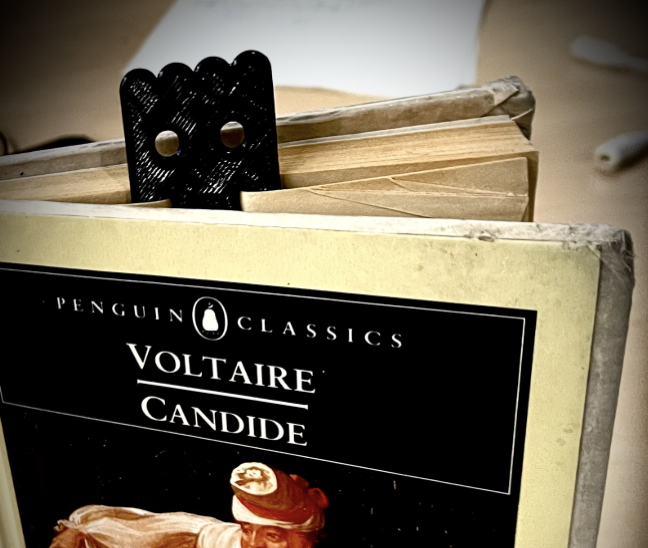
<p>Summary (Cont.): This one-of-a-kind design allows you to have a stylish Halloween-themed, paper clip for your house or office. For almost no cost at all, you can get this lightweight Ghost Clip that will not only impress, but give your co-workers a slight scare! Best of all, there is no assembly in order for the Ghost Clip to function properly. All you need is a 3D printer and the STL File shown above! The dimensions of the Ghost Clip are 6.55cm x 3.00cm x 0.200cm. This innovative, revolutionary design was engineered by myself and Brendon Wen. His page is linked here: <a href="https://www.printables.com/social/395989-brendon-wen/about">https://www.printables.com/social/395989-brendon-wen/about</a></p><p> </p><p>Lesson Plan and Activity: </p><p>With a partner, you will recreate your ghost clip using Solidworks. You and your partner must have identical files that you create by collaborating on each step, one at a time. This ensures that your projects will be made accurately and efficiently.</p><p> </p><p>Assembly/Construction Instructions Section:</p><ol><li>Create a center construction rectangle on the origin with dimensions similar to the ones shown on the paper.</li><li>Make sure the construction lines appear from midpoints instead of from corners.</li><li>Make two horizontal construction lines similar to the ones shown on the paper distanced from the top and bottom of the construction box <ol><li>Split the upper construction line into 4 equal sections. </li><li>Split the bottom construction line into 3 equal sections.</li></ol></li><li>Use the three-point arc tool to form four congruent semicircles with points positioned on the upper construction line and box as shown in the diagram.</li><li>Create three congruent isosceles triangles with points positioned on the lower construction line and box as shown in the diagram. The bottom tips should be along the midpoints of each of the 3 sections.</li><li>To create the ghost’s eyes: <ol><li>Form a horizontal construction line on which the eyes’ center points rest on. It should be distanced from the top of the constraint box as shown in the diagram.</li><li>Create a circle on the portion of the construction line that is to the left of the box’s vertical axis of symmetry. Then, position it a certain length away from the vertical axis of symmetry as shown in the diagram.</li><li>Use the mirror entities function: select the circle as the entity to mirror and the vertical axis of symmetry as the line to reflect across.</li></ol></li><li>To create the smile of the ghost:<ol><li>Construct a vertical line within the constraint box’s left half. Position its upper endpoint from the top of the constraint box and axis of symmetry and set its length as shown in the diagram.</li><li>Connect the bottom endpoint of the vertical line to a diagonal line that ends on the vertical axis of symmetry. Adjust the vertical and horizontal components of the diagonal line to match those of the diagram.</li><li>Select these two lines and use offset entities with a width as shown in the diagram. Make sure that the function has cap ends checked off and will offset the lines leftward only.</li><li>Delete the bottom cap end, and extend the offset diagonal line until it snaps onto the vertical axis of symmetry.</li><li>Use mirror entities to mirror this hockey stick-looking figure across the vertical axis of symmetry</li></ol></li></ol><p> </p><p>Design Choices:</p><p><img class="image_resized" style="width:49.76%;" src="https://lh6.googleusercontent.com/6EZq2mVfx47RG4wT7weqguHk1saGt41ZAPTYXMEGxQG--a0Bdu26Q_M_uu9l97zu1xrqE_hqwBsGFMYfnhiM4jX7cH8cPkDVQY89ZbeHi8jxtolT0Nq8am__c8tajihjhxL6OLAN4FizATPbFLomEC51BmhFK48OZCtaaECXpNv-cbRyRO3TppFPSA"><img class="image_resized" style="width:48.24%;" src="https://lh6.googleusercontent.com/rSQLgqhWIUzk9UFZoh9jVk5400ZYR_PSpGERZSpG6twuvA8k_2WG8YZPo8uvaPS2tRDOoAMZTrUvDXfAbbWnNTtt6EMp0rMBT-JXgiLNKZ-XCk1P_hztlbgSNJzPq9W3gk-CFZWxH48uLD891iw7zqxCeFYX5CK-0DKP6yDjaG9myl2mbL-POA8PSQ">As shown above, we adjusted the height of the Ghost Clip from 7 cm to 6.55 cm in order to decrease the surface area and make the ghost smaller overall. This improved how functional the ghost was by taking up less space while still maintaining the ability to function as a clip.</p><p> </p><p><img class="image_resized" style="width:49.93%;" src="https://lh3.googleusercontent.com/vPwLYRd6_KciR561-WB-dyESgWkIbHNDa5xugpx0eGZnniJIMaSvIvht310dReveZ20yzdQbtLVpDBGS6mZH3ybroJfUP2GiBT99JuqEE5T5mnGbQcZ_SWIUD2T_k1Ynj9vCQZszp1J_pWenAWf8wQS-APvdyojJ9skt8u4Soo37INv_jqRuhtNmQA"><img class="image_resized" style="width:47.59%;" src="https://lh4.googleusercontent.com/owhYLWJDQkp4uZ59m4u92ftMpeejQr-qUmzXOkOr_4PJjWX7eJltcJnvwILqBrVP3YZPUjoC7xcmDKFIpboZm6GKHNC58E2LF_0JTxpCozH5YfCgi_TQGFieK3_AJSuK5bn7ZArhdy0Xn2xnQCtUpH8mPW7XXBA7WWfjhMH_7oeHhsNn_Izi-xupLg">As seen above, we adjusted the width from 0.20 cm to 0.27 cm for functional use and also some aesthetics. Having too small of a “mouth” would make it harder to clip and hold material together. Additionally, this improved the range of the Ghost Clip, since it would be able to clip more.</p><p> </p><p><img class="image_resized" style="width:50.94%;" src="https://lh4.googleusercontent.com/Qdb7rv_xlLolpdsh4bL1AjYNexZNCQ7kH3V36g9GIijg0lNSa3vhtKJ9YpCO6VT1VOQTH1_0Z_xLEWJ6J0oHwFhgzuPIEynHUMh_7QFGF4LOVfQY8kcSlD8hAOwLKzAOLOna6Jfm23C998iM_au36YLx2dqy5q5DaOroflL_5uTXpCw9MCxCWb9xEA"><img class="image_resized" style="width:46.87%;" src="https://lh6.googleusercontent.com/DA-aTmOm71IKB_LHtSS_q0o_QOf485Rtx1OLnA6gPBZuhrODY7gIe4rTurGaaM9LbkqUKt8u54QCNIvAVqHLE6hT9byBSZZkD-Qb0EW9iahxNbRfEiyhp2lX3zJYatP0mEKKfk-HsETaJl-oo-QDRDqa-UDYOBUTsHEc7GctPEPbm34jSpOV-N1nrQ">Finally, we changed the height from the mouth to the bottom of the Ghost from 2.4 cm to 1.9 cm. This improved the aesthetics of the Ghost Clip to make it look more pleasing to the eye. Additionally, this slightly improved the functionality of the Ghost Clip, since the bottom was more sturdy and less likely to break.</p>
With this file you will be able to print Spooky Office Ghost Clip with your 3D printer. Click on the button and save the file on your computer to work, edit or customize your design. You can also find more 3D designs for printers on Spooky Office Ghost Clip.