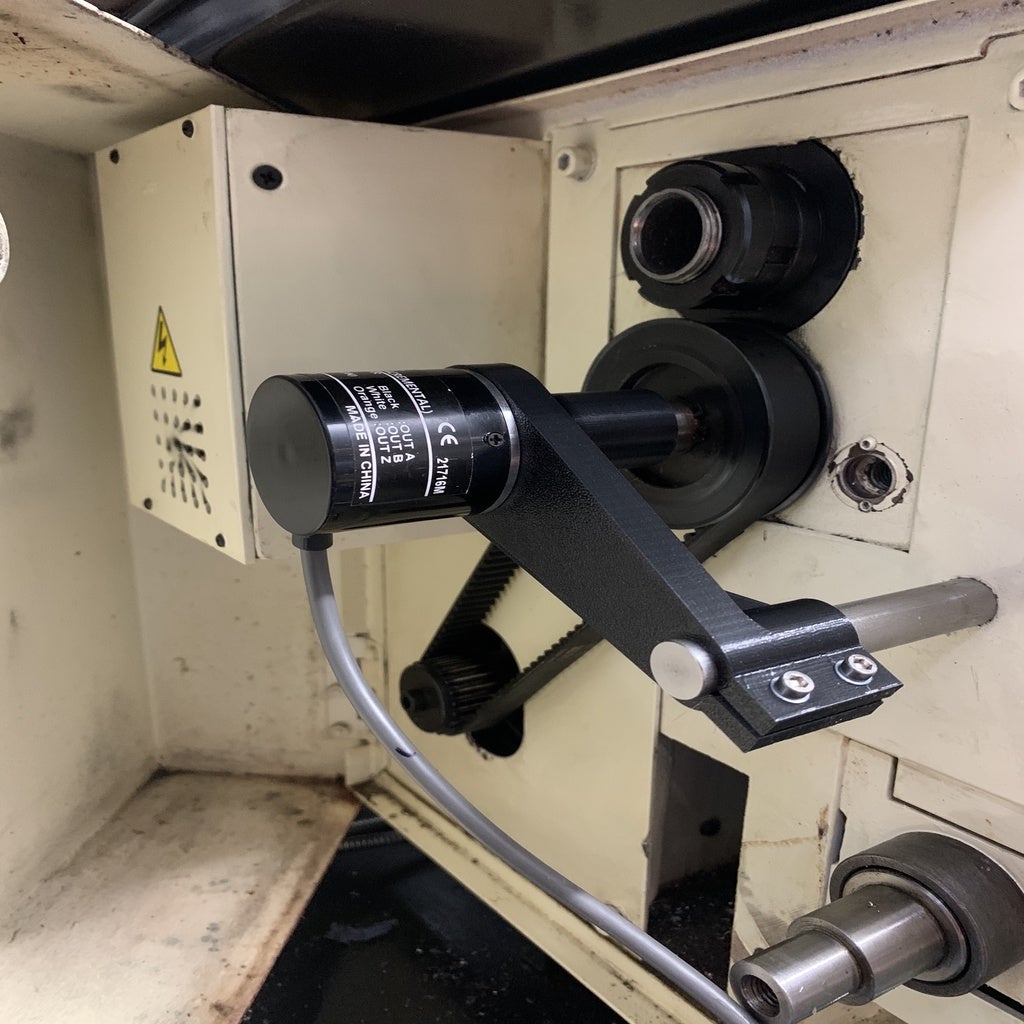
Spindle Encoder Mount and Coupling
prusaprinters
<p>A bracket and coupling to mount an Omron rotary encoder on the spindle of my SIEG SC4 lathe, for use with the Clough42 ELS system.</p> <p>The coupler is 16mm to 6mm, with a 4mm keyway for the larger shaft, and a hole for a 3mm set screw to secure the smaller shaft.</p> <p>Bracket uses a 1/2" stud that replaces the lower right cap head screw (see pics). This is a fabricated part and you'll need to make one. Length is to suit.</p> <p>I'm putting these on thingiverse in the hope it may help other SC4 owners, but usual caveats apply - these fit my lathe, with the dimensions of my spindle shaft and the distance of the spindle & stud location centres. It's also specific to the Omron encoder that I'm using (E6B2-CWZ6C 1024P/R)</p> <p>I've uploaded the STEP files, in case anyone wants to tinker</p> <h3>Print instructions</h3><h3>Category: Machine Tools Summary</h3> <p>A bracket and coupling to mount an Omron rotary encoder on the spindle of my SIEG SC4 lathe, for use with the Clough42 ELS system.</p> <p>The coupler is 16mm to 6mm, with a 4mm keyway for the larger shaft, and a hole for a 3mm set screw to secure the smaller shaft.</p> <p>Bracket uses a 1/2" stud that replaces the lower right cap head screw (see pics). This is a fabricated part and you'll need to make one. Length is to suit.</p> <p>I'm putting these on thingiverse in the hope it may help other SC4 owners, but usual caveats apply - these fit my lathe, with the dimensions of my spindle shaft and the distance of the spindle & stud location centres. It's also specific to the Omron encoder that I'm using (E6B2-CWZ6C 1024P/R)</p> <p>I've uploaded the STEP files, in case anyone wants to tinker</p> <h3> Print Settings</h3> <p><strong>Printer Brand:</strong></p> <p>Prusa</p> <p><p class="detail-setting printer"><strong>Printer: </strong> <div><p>I3 MK3S</p></div><strong>Rafts:</strong></div></p> <p>No</p> <p><p class="detail-setting supports"><strong>Supports: </strong> <div><p>Yes</p></div><strong>Resolution:</strong></div></p> <p>0.2</p> <p><p class="detail-setting infill"><strong>Infill: </strong> <div><p>25%</p></div><br/> <strong>Filament:</strong><br/> [</div></p> <h3> Real Filament PETG ](http://www.amazon.com/s?url=search-alias&field-keywords=Real+Filament+PETG&tag=tvad0304-20) Black <br/> <p class="detail-setting notes"><strong>Notes: </strong> </p><div><p>Supports required for the coupler - print large diameter down, and turn on / put support in the 16mm bore and keyway.</p></div> Post-Printing</h3> <p>Run appropriately sized drill bits down the various holes to ensure they are on size.</p> <p>Tap the hole in the side of the smaller end of the coupler to M3, and use an M3 set screw to lock the shaft in place</p> <p>Mounting hardware for the encoder is 3x M3 x 10 cap heads. Pinch bolts on the bracket are M3 x 16, with washers and nylock nuts to match.</p></p></p></p>
With this file you will be able to print Spindle Encoder Mount and Coupling with your 3D printer. Click on the button and save the file on your computer to work, edit or customize your design. You can also find more 3D designs for printers on Spindle Encoder Mount and Coupling.
