Spice Drawer
prusaprinters
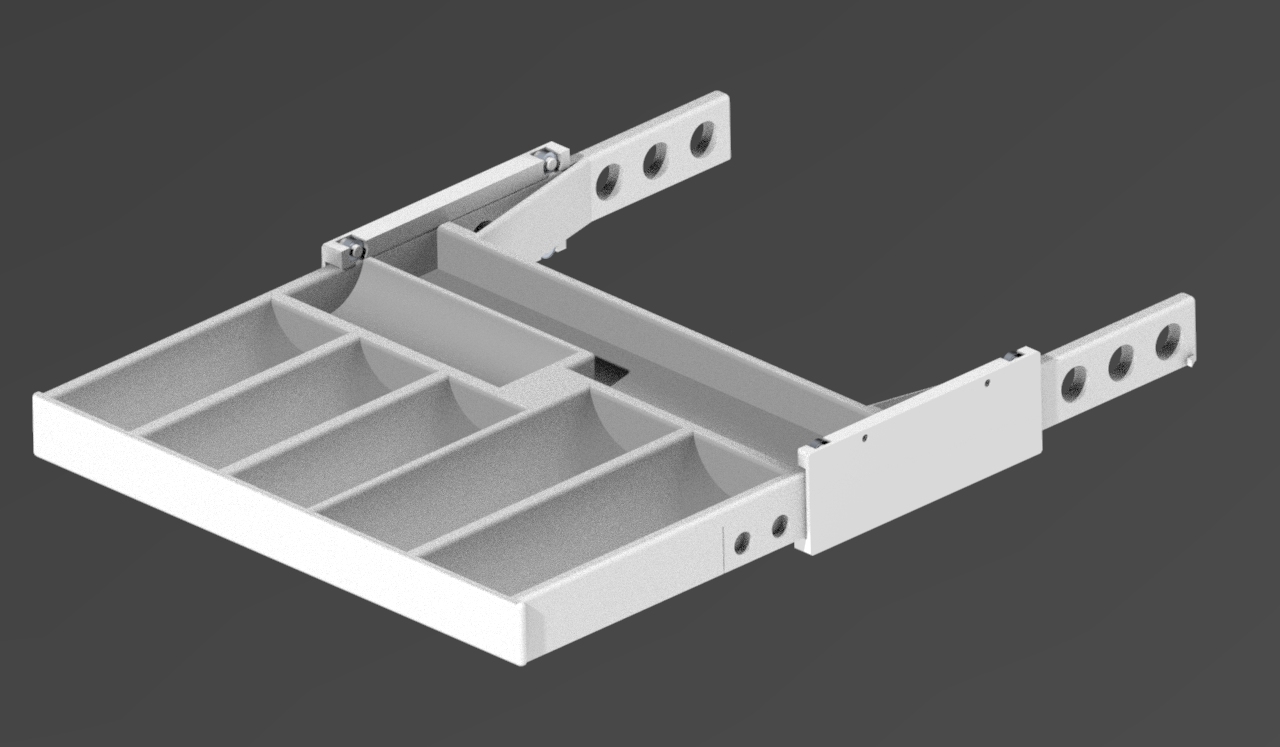
<p>Spice rack for 4 smaller + 2 larger spice jars, plus additional storage for misc. items. The additional storage is designed for chopsticks, but can be used for other purposes, too.</p> <p>Small spice jars approx. D42xL114 (mm)<br/> Large spice jars approx. D51xL144 (mm)<br/> Lengths are the maximum lenghts, while diameter is the optimal diameter. Smaller or slightly larger jars in diameter will fit, but not longer.</p> <p>Width of the whole assembly: 265mm<br/> Lenght of the whole assemly: ~361mm</p> <h3>Print instructions</h3><p>To print the complete assembly, you will need to print the following:</p> <p><strong>Option 1 (print bed larger than 210x270mm)</strong><br/> 1 x rail<br/> 1 x rail (note: mirror in slicer to fit the other side)<br/> 2 x sliding rail<br/> 1 x spice rack<br/> 4 x bearing (or use 5x9x3 (dxDxW) bearings)</p> <p><strong>Option 2 (print bed less than 210x270mm)</strong><br/> 1 x rail<br/> 1 x rail (note: mirror in slicer to fit the other side)<br/> 2 x sliding rail<br/> 1 x rack part 1<br/> 1 x rack part 2<br/> 3 x connecting rod (these are used to join the rack parts together)<br/> 4 x bearing (or use 5x9x3 (dxDxW) bearings)</p> <p><strong>Assembly instructions</strong><br/> The rack requires assembly with e.g. superglue. Start by connecting the rack part 1 and rack part 2 with the three connecting rods (skip step if option 1 was used). Use glue to permanently connect the parts together. Continue by gluing the sliding rails to the rack.</p> <p>The bearings are simply pressed onto the rails, but a small drop of superglue can be used to ensure that they stay in place.</p>
With this file you will be able to print Spice Drawer with your 3D printer. Click on the button and save the file on your computer to work, edit or customize your design. You can also find more 3D designs for printers on Spice Drawer.