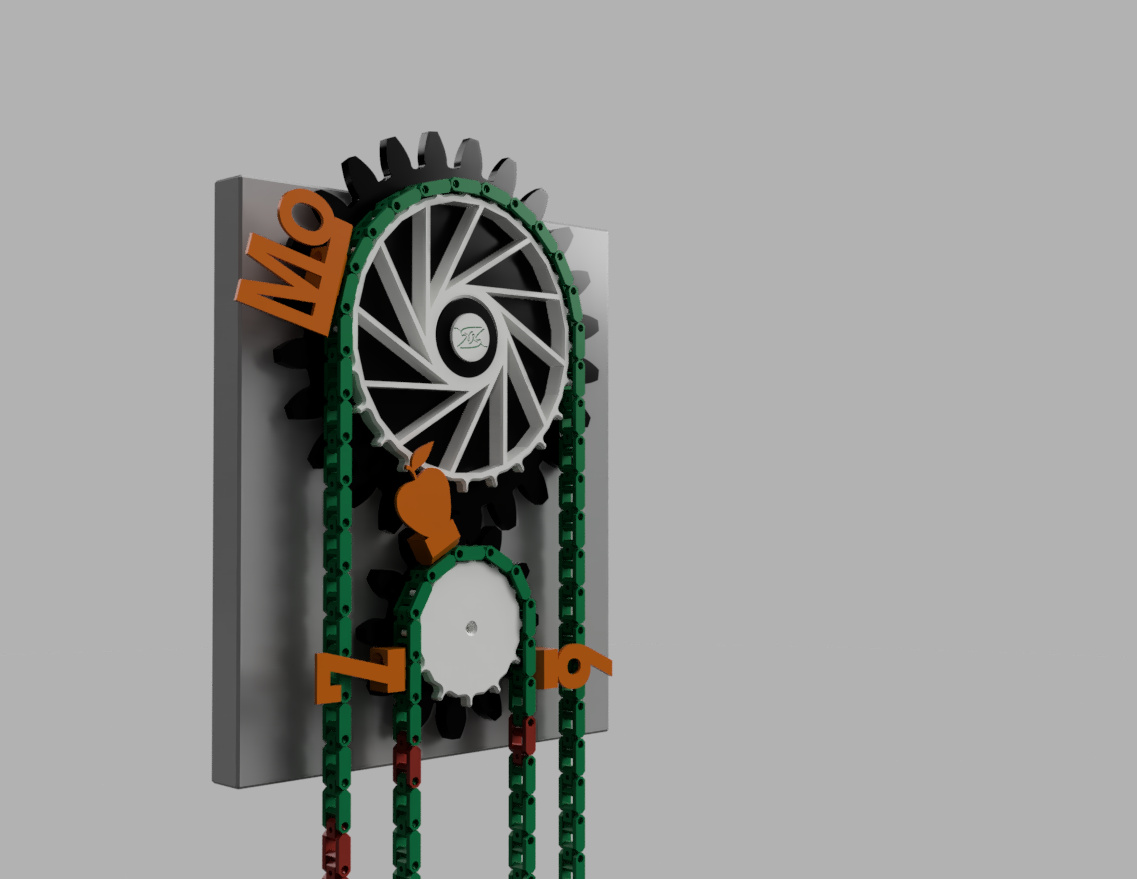
Special Chain Clock
prusaprinters
<p>This version of a chain clock can be customized to show any daily repeating events.</p><p>I printed mine for the school I work in. It shows the school-periods (First period, Second period, break, …). Every period is 50 minutes and there are two small breaks and a lunch-break. After 8 periods, students can go home …</p><p>I also show the real time by changing the colour of the chain (eleven of the twelve chainlinks are green, the last one is red so the actual hours can also be “read”).</p><p>I also added a day-calendar (this can also be changed if needed).</p><p>For people with autism (or just really organised people) you can add personal labels either by printing the plate and putting on a sticker of by creating custom labels. Every chain represents a 5 minute period so it is fairly accurate.</p><p>The day-chain is printed green for week days and red for week-end days and wednesday afternoon (students don't have school on wednesday afternoon).</p><p>A day has 24 chain links (so one per actual hour … this too can be used) and the hour chain has 12 links per hour. Mine has a 12 hour chain, but you could also print a 24 hour chain. You need to watch out for the length of the chain and make shure it does not tangle with the day-chain … if space is not an issue, you could add another week to accomodate for the longer hour-chain in a 24h version.</p><p>Labels are attached to the chain using M3-16 screws (not bolts) (M3 thread and 16 mm long including the head).</p><p> </p><p><strong>Printing instructions:</strong></p><p>Chains are best printed at 0.15mm layer height or less (they are rather small and larger layer heights tend to bend less easilly).</p><p>The backplate is the only part that needs any support and it is allready included as sacrificial support (a sacrificial layer in the hole and some support for the overhang where the clock-mechanism goes).</p><p><strong>Tips and tricks:</strong></p><p>I made my first one with a regular quartz clock mechanism and it had some trouble going round. I ordered a mechanism with extra torque and that seems to work. a stepper motor would also work I guess but you would have to accommodate for the double function (minute hand and hour hand).</p><p>Make sure the clock (backplate) is flush with the wall (or as straight as possible). If the backplate (and therefore the clock) are not straight the chain might come off. Attaching it with a screw on the back should work best (that's what it's designed for).</p><p>If the clock mechanism itself turns around instead of the clock parts (the space for the mechanism is plenty) you can use the removed supports to block the mechanism by putting them all to one side (and maybe holding them in place with some glue). Fully turning should be impossible after that.</p><p>I did not get the second-hand to print in a way it could be used (0.4mm nozzle does not seem to leave a hole that small) … maybe someone else can get it to print right.</p><p>The logo-plate has a <strong>left turning thread</strong> (so it will not turn loose on regular use).</p><p>Remember to put the day-labels on in reverse order (the day-cog spins <strong>counter-clockwise</strong>)</p><p>Especially for the Dutch speaking people: You will not have a dotted “i” in “Di” … sorry, a small oversight.</p>
With this file you will be able to print Special Chain Clock with your 3D printer. Click on the button and save the file on your computer to work, edit or customize your design. You can also find more 3D designs for printers on Special Chain Clock.
