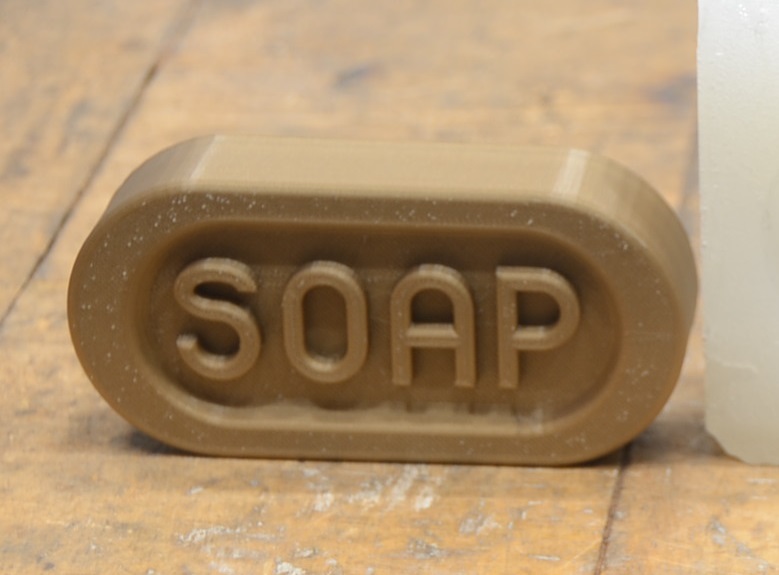
Space Station 13 Soap Bar
prusaprinters
<p>This is a clown-approved interpretation of soap from <a href="https://spacestation13.com/">Space Station 13</a> (SS13). Everything you need to make your very own SS13 soap bar is included here. Follow the instructions at your own risk. HONK!</p><h3>Materials</h3><h4>For the mold</h4><ul><li>A 3D printer to print out the soap model</li><li>A laser cutter to cut an acrylic frame.<ul><li>Provided .svg is designed for a 300 mm x 200 mm laser cutter, but you can rearrange it in Inkscape if needed.</li></ul></li><li>A sheet of 3 mm acrylic.</li><li>A hot glue gun with a few sticks of glue.</li><li>A few disposable cups and some water.</li><li>A small box-cutter or paring knife.</li><li>A couple of popsicle sticks (or snap the remaining acrylic scraps in strategic locations)</li><li>Silicone kit (roughly 500 g).</li></ul><h4>For the soap</h4><ul><li>Melt & pour soap base (roughly 150-200 g per bar).<ul><li>The soap model has a volume of ~150 cm^3</li></ul></li><li>Additives such as essential oils and pigment<ul><li>I added 10 ml of <a href="https://en.wikipedia.org/wiki/Pine_oil">pine oil</a> to 500 g melt & pour soap for a subtle pine scent. For a stronger scent, add 15 ml.</li><li>I also added powdered dandelion leaves for the color.</li></ul></li><li>A larger pot of water (for melting the soap indirectly)</li><li>A smaller pot for melting the soap</li><li>A spoon for mixing everything together</li><li>Another disposable cup.</li></ul><h3>Instructions</h3><h3>Making the mold</h3><ol><li>Print out the soap model on your 3D printer (no supports needed!).</li><li>Laser cut the frame out of 3 mm (or 1/8") acrylic using the supplied .svg.</li><li>Glue the acrylic frame together using the hot glue gun.<ul><li>The long sides were purposefully made slightly too long to account for different thicknesses of acrylic.</li></ul></li><li>Test the water tightness of the frame using the water. Dry and apply more glue if necessary.</li><li>Glue the soap model into the frame.<ul><li>After gluing in the soap model, you can use the water to estimate the volume of silicone you will need.</li></ul></li><li>Thoroughly mix the silicone with its catalyst in one of the disposable cups.</li><li>Pour the silicone into the frame <i>slowly</i> to avoid larger air bubbles. Pour until the model is covered by at least 5 mm (roughly). Allow it to cure overnight.</li><li>Break apart the mold, extract the model, and cut off any loose silicone (flash).</li></ol><h4>Making the soap</h4><ol><li>Cut up the soap base into bits and place 150-200 g in the smaller pot.</li><li>Bring the larger pot of water to a boil, then lower the heat to a simmer.</li><li>Place the smaller pot with the soap in the boiling water and allow the soap to melt.</li><li>Once melted, you will likely find that a skin has formed. Remove this with a spoon, and mix in the additives.</li><li>Pour the soap into the mold and allow it to cool for a few hours at room temperature.</li><li>Carefully pop out the soap from the mold.</li><li>Using a knife, chamfer the bottom edges to make them less sharp.</li></ol><p>Congrats, you now have ss13 soap!</p><h3>HONK!</h3><ol><li>Annoy Security personnel with your bike horn.</li><li>After initiating a high speed chase, drop your newly-crafted soap into the path of the guard.<ul><li>An alternative method involves dropping the soap next to a guard and pulling them onto it.</li></ul></li><li>Laugh as the guard flops to the floor like a fish.</li><li>Honk your bike horn a few times for comedic effect.</li><li>Make a clean getaway.</li></ol>
With this file you will be able to print Space Station 13 Soap Bar with your 3D printer. Click on the button and save the file on your computer to work, edit or customize your design. You can also find more 3D designs for printers on Space Station 13 Soap Bar.
