Solidoodle M5 Threaded Rod Kit
thingiverse
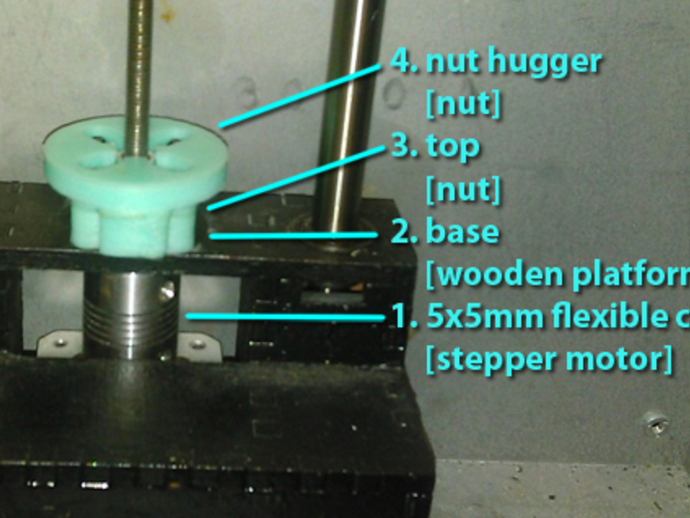
To address banding issues, replace the Solidoodle's standard threaded rod with a more precise M5 threaded rod (200mm long and paired with two nuts). Use a 5mm to 5mm flexible coupling for attachment. The entire project costs under $10. Print three parts with high infill, following the dimensions in millimeters. Assemble from bottom to top, according to the provided picture. First, attach the flexible coupling to the stepper motor, followed by the 5mm threaded rod. Slide the platform over the rod and place it on the base. Secure the nut beneath the base, then cover it with the top piece and fasten with original M3 nuts and bolts. Lastly, add the second nut and secure it with a nut hugger. Don't forget to adjust the steps per mm for the Z stepper in EEPROM settings or firmware! The official guide can be found here: http://vimeo.com/61632393. Unscrewing the stepper motor is optional.
With this file you will be able to print Solidoodle M5 Threaded Rod Kit with your 3D printer. Click on the button and save the file on your computer to work, edit or customize your design. You can also find more 3D designs for printers on Solidoodle M5 Threaded Rod Kit.
