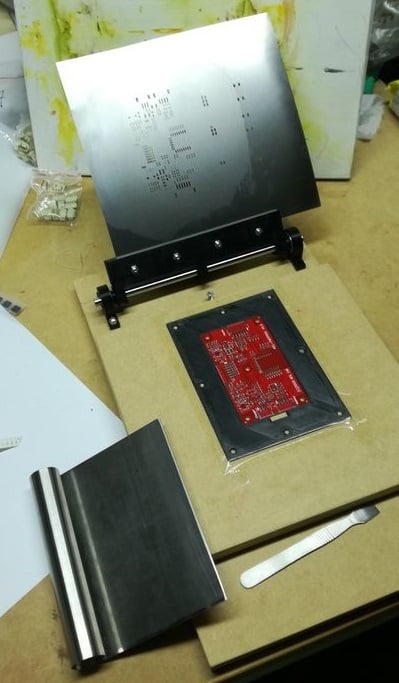
Solder paste stencil holder + PCB holder
thingiverse
This is an exceptional and flawless PCB stencil holder design. I grew tired of dealing with tape and shifting masks, so I created this PCB solder paste stencil holder. It perfectly secures the mask in place for precise solder paste printing. Following the print, the mask lifts up without shifting to vertical, allowing for easy removal of the PCB. I've only used the holder with frameless PCB stencils, but it should also work with framed stencils by using longer M4 screws. It's essential that the stencil is at the same height as the PCB top. The rod holders determine this height, which is 16.2+1.6 mm in my design. The 16.2mm represents the height of the MDF support, and 1.6mm is the thickness of the PCB. Other heights can be achieved by placing thin shims under the rod holders. On the back, I added a small piece of wood to hold the stencil upright, but this is optional. Without it, the holder still functions properly. In the front, there's a single screw that keeps the holder horizontal when no stencil is present – also an optional feature. In one photo, you'll see the tool I use for applying solder paste: a stainless dough cutter (available on Aliexpress). It's wide and stiff, ensuring perfect prints. Another useful item in the photo is the metal spoon (also on Aliexpress), which is handy for stirring and scooping solder paste. The stencil can be easily adjusted for precise hole and pad alignment by loosening the screws slightly, moving the stencil to the correct position over the PCB holes, and then tightening the 4 screws. To make a print: 1. Ensure the solder paste is at room temperature and stir it before use. 2. Place the PCB in the holder. 3. Clean and degrease the PCB with alcohol. 4. Position the stencil over the PCB. 5. Apply plenty of solder paste, wider than the stencil holder, and secure it back in place. 6. Place your paste applicator at a 45 to 60 degree angle behind the paste. 7. Press the applicator down and move it towards you in one smooth motion until you've covered the entire PCB. 8. To remove excess paste from the stencil, rotate the applicator to 135 degrees and scoop up the paste. 9. Park the applicator safely. 10. Gently lift the stencil up, then remove the PCB with the perfect print. I've included examples of PCB holders for 1.6mm PCBs: 10x10cm, 5x10cm, 5x5cm, and 6x10cm. The picture shows the 6x10cm version. For other PCB sizes, you can scale down the 10x10cm holder to fit your needs. I originally intended to screw the PCB holders down, but holding them in place with tape proved easier and works just as well. The PCB can be removed from the holder using a thin screwdriver. Parts needed: 1. 8mm rod (22 cm long) 2. 8x M4 nuts 3. 4x M4 x 25mm screws 4. 2x M3 nuts 5. 2x M3 x 10mm screws 6. 2x bearing 608ZZ 8x22x7 (standard spinner bearings) 7. 1x MDF 24x24cm, 16mm thick 8. 1x MDF 24x38cm (or whatever size you prefer) Print the following parts: - 2x rod holders - 2x spacers - 1x bottom - 1x top Use 90 to 100% fill, 0.3mm layers, and no support material. I used ABS but feel free to use whatever material you have available. Remove any supports from the various holes. The M4 nuts are pressed into the bottom of the stencil holder and the knops. The M4 screws go into the top of the knop and should be screwed in all the way. The 2x M3 nuts are pressed into the side of the vertical parts of the holder, with no screw or nut needed in the center one. The bearings are pressed into the rod holders; some sanding may be required depending on your printer's specifications. Between the bearing and the stencil holder, spacer rings are placed. The bearing holders must be mounted tightly against the spacer and stencil holder to prevent shifting sideways. If this design works for you, please let me know! Your feedback and tips are a great incentive for me to create more designs that you'll enjoy.
With this file you will be able to print Solder paste stencil holder + PCB holder with your 3D printer. Click on the button and save the file on your computer to work, edit or customize your design. You can also find more 3D designs for printers on Solder paste stencil holder + PCB holder.
