Solar-powered Candle
prusaprinters
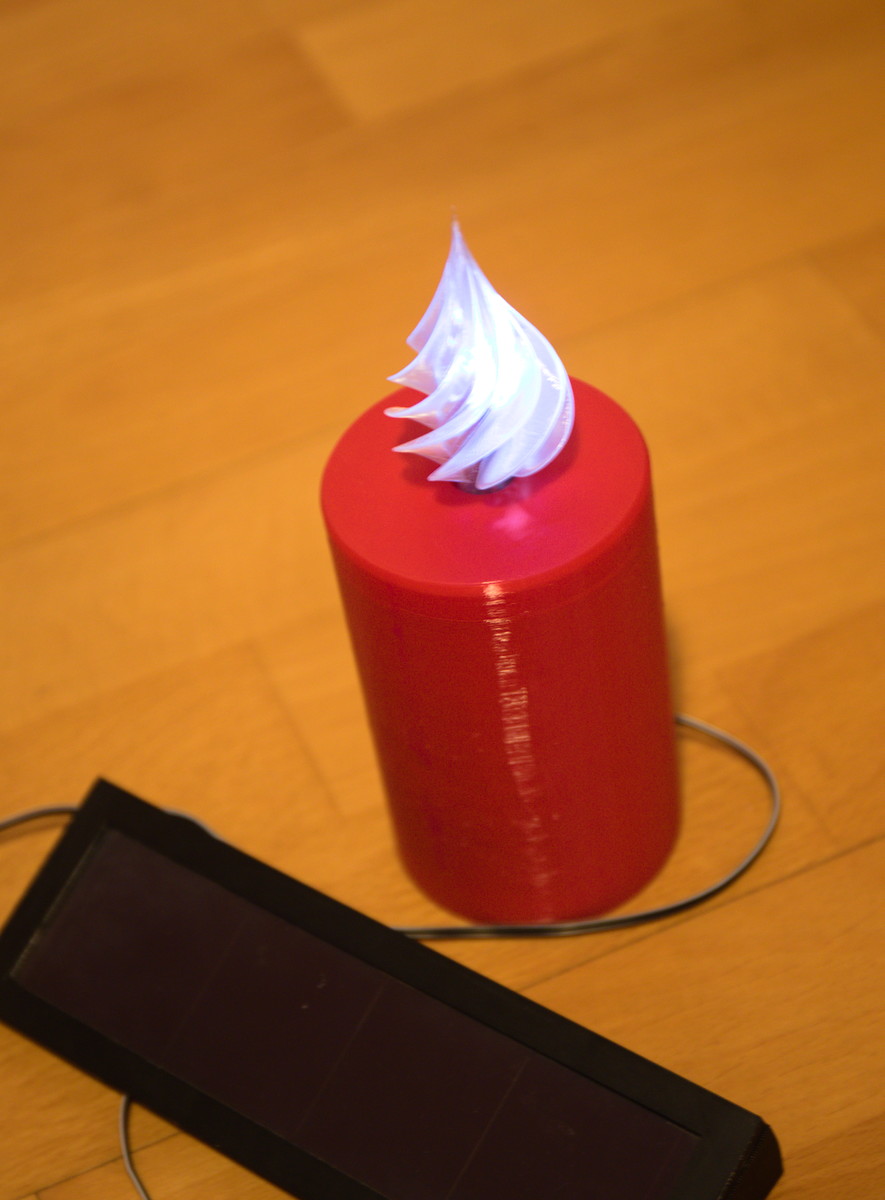
<h3>Printed Parts</h3><p>The candle is printed in three parts:</p><ul><li>The body (Kerze_tubus) is printed upside down (small hole on printing bed). 10 % infill is sufficient.</li><li>The base (Kerze_boden) should be printed with screw tread on top.</li><li>The “flame” (Kerze_flamme) is a remix of a christmas tree ornament (<a href="https://www.thingiverse.com/thing:2705104">Link</a>). I have added a cylinder to attach it to the body. Be aware, that this part has to be printed in vase-mode! I have used transparent filament but you can also use other (translucent) colors.<br>After printing you need to cut the base layers so that you can insert the LED. Or you can use a hot nail to melt a hole into it.<br>You can glue this part to the body.</li></ul><p>The housing for the photovoltaic cell is made of two parts:</p><ul><li>The upper part (Kerze_solar_oben) is printed upside down. The photovoltaic cell should be fitted tight.</li><li>The base (Kerze_solar_unten) is glued to the upper part after soldering the wires to the photovoltaic cell. Be sure that the cables are in the intended space between the two parts.</li></ul><h3>Electronics</h3><p>I have re-cycled an old house number light and resoldered it on a breadboard. Three AAA NiMH-accumulators are used to buffer the electricity. The layout of the circuit diagram can be found in the pdf-document. It is only for reference! Be sure to have the appropriate electronical skills!</p><p>During daylight the LED is switched off and the accumulators are charged by the photovoltaic cell. When it gets dark the voltage of the cell drops and the LED is switched on and supplied by the accumulators.</p><p><i>Be aware that you have to shelter the parts from rain or seal the prints.</i></p>
With this file you will be able to print Solar-powered Candle with your 3D printer. Click on the button and save the file on your computer to work, edit or customize your design. You can also find more 3D designs for printers on Solar-powered Candle.