Solar Panel Holder / Compartment
prusaprinters
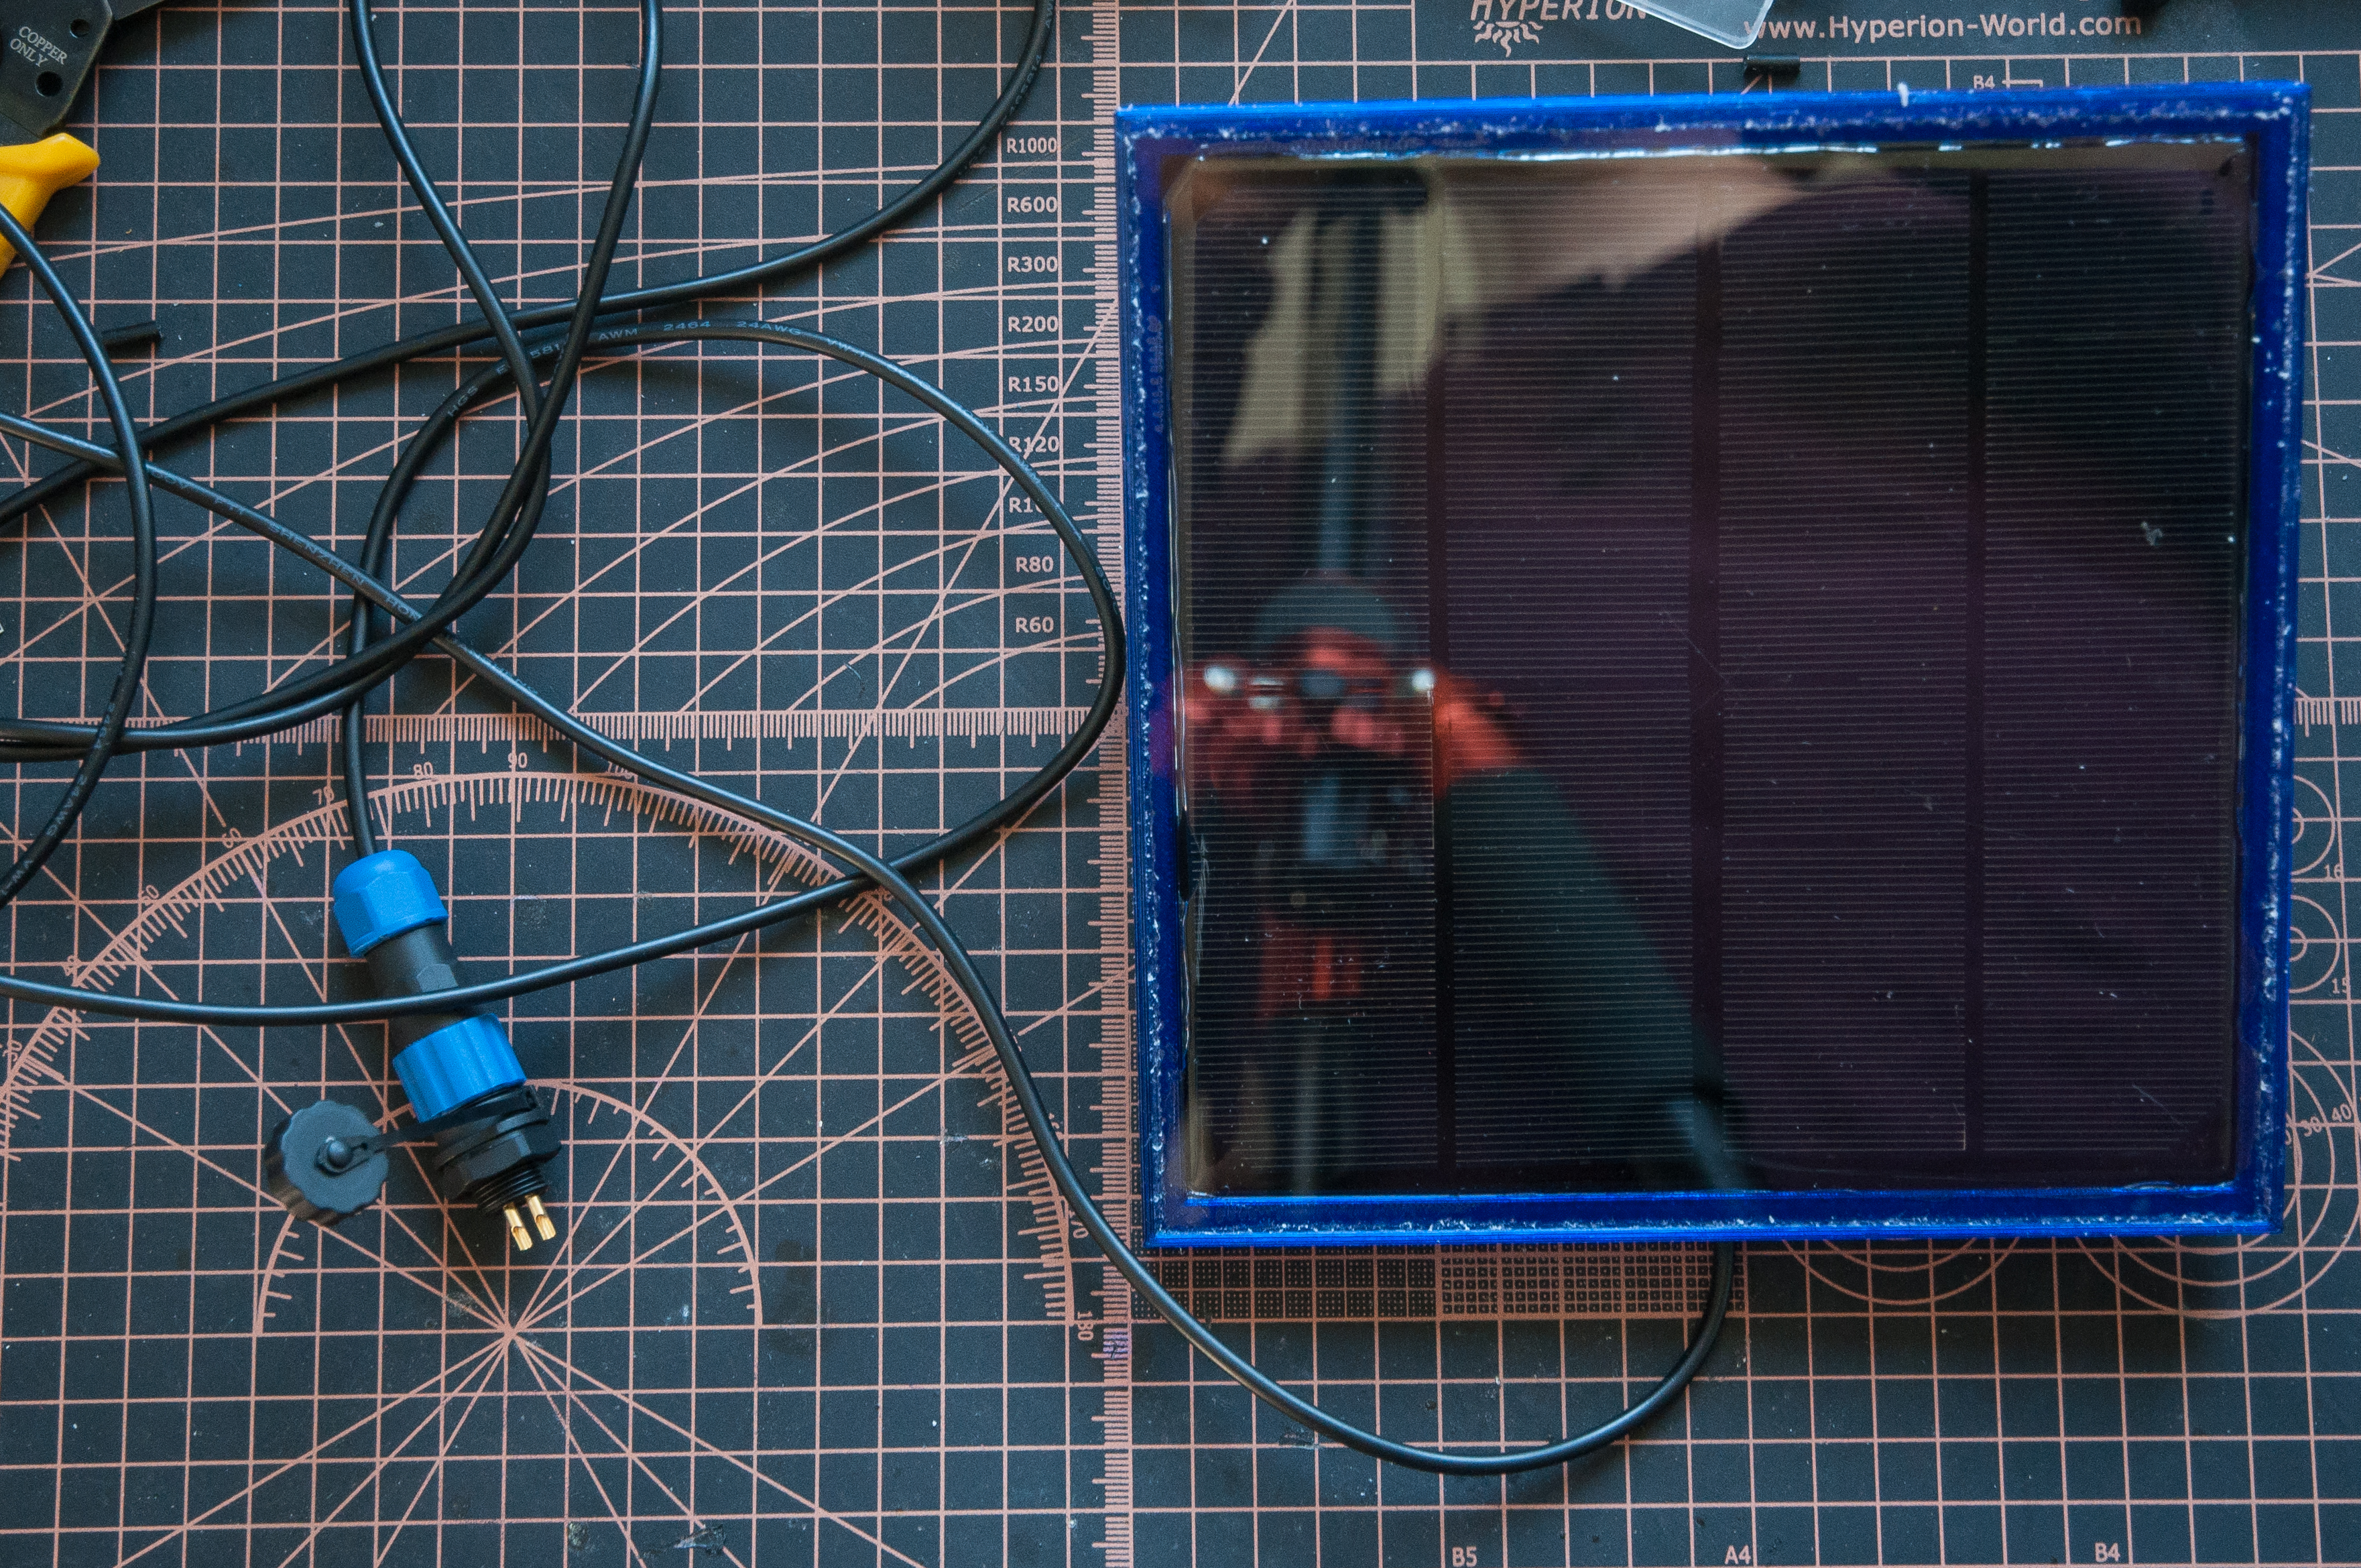
<p>This is the case for a waterproof solar panel mount that allows you to power your electronic projects. The uploaded model is for a 165mm x 165mm panel. The fusion 360 parametric model is provided so you can easily adjust it to your needs. All important parameters are provided in the parameter section. Of course you can replace the plug to whatever connection you need. The plug used in this instructions is waterproof.</p><p>I use the panel to keep the LiPo battery in the irrigation system I built charged.</p><p>Prints without supports, best printed in PETG. Tested in constant rain over days with success. Just be very careful that during assembly the inside is absolutely dry and the seals are good as otherwise moisture might build up.</p><p>Use any model for RAM mounts or the commercial parts to mount the panel as you wish.</p><p><strong>Required materials for full build</strong></p><figure class="image"><img src="https://media.prusaprinters.org/media/prints/105937/rich_content/52514fac-ea98-48a4-a5cf-74d53a45e7df/0_parts_500.jpg#%7B%22uuid%22%3A%22a5515abb-f13e-4505-96d5-03c6777a793e%22%2C%22w%22%3A500%2C%22h%22%3A334%7D"></figure><ul><li>Solar panel (eg. https://www.aliexpress.com/item/32287187961.html)</li><li>Solar panel case (print) and ball mount (print)</li><li>175mm x 175mm glass protective cover for the solar panel (get from your local hardware store)</li><li>UL2464 two core, 22AWG shielded wire (eg. https://www.aliexpress.com/item/4001161631145.html)</li><li>SP13 two core connector (eg. https://www.aliexpress.com/item/4000057522634.html)</li><li>M3x4.6x5.0 brass insert nut (eg. https://www.aliexpress.com/item/4000688990203.html)</li><li>(OPTIONAL) Hot glue.</li><li>(OPTIONAL) Plastic spray</li><li>Silicone sealant (get from your local hardware store)</li></ul><p><strong>Assembly instructions</strong></p><p>We will wire the solar panel with the male part of the two core SP13 connector. You can freely choose the length of the UL2464 wire to allow whatever you are powering sitting in the shade while putting the solar panel in the sun. However, remember that longer cables add resistance and you will loose some voltage. Make sure this does not drop below what is needed by the device you power. You can calculate the loss using the resistance formula (R = ρl/A).</p><p>Assembly steps:</p><ol><li>Turn the solar panel case such that the back side faces up. Place the brass insert nuts into the three holes for the ram mount attachment.<br><img src="https://media.prusaprinters.org/media/prints/105937/rich_content/8ab69449-edf4-4a82-9553-00c0c833c670/1_place_inserts_500.jpg#%7B%22uuid%22%3A%2259a0903c-a544-430f-bb07-7e15f3b727bd%22%2C%22w%22%3A500%2C%22h%22%3A332%7D"></li><li>Heat your soldering iron to approximately 280 degree Celsius. Use a pointy soldering tip that fits nicely on the nut. With the heated soldering iron gently push down the nut such that it melts into the plastic. When the nut is fully inserted (flush with the case) immediately remove the soldering iron. Do this for all three nuts.<br><img src="https://media.prusaprinters.org/media/prints/105937/rich_content/8c8e1a31-6ab5-4167-a806-689a1e985ca6/2_melt_inserts_500.jpg#%7B%22uuid%22%3A%229ba5374b-c271-4829-b164-b3b2f68df777%22%2C%22w%22%3A500%2C%22h%22%3A332%7D"></li><li>Enter the wire from the back of the case in the cabling channel until it exits the other side. Pull it out a fair bit so that you can work on it comfortably.<br><img src="https://media.prusaprinters.org/media/prints/105937/rich_content/d08bafa7-f397-4597-8c0e-5cb921cf77aa/3_insert_cable_500.jpg#%7B%22uuid%22%3A%224edfab09-8a8d-4751-900b-c566a7f6b8ed%22%2C%22w%22%3A500%2C%22h%22%3A332%7D"></li><li>Prepare the UL2464 wire by stripping the outer insulation from the end that exits the panel case on the front (approx 5mm) so that the two wires are accessible (still with their insulation).<br><img src="https://media.prusaprinters.org/media/prints/105937/rich_content/2a63162b-8f57-4091-9ab6-b60e18f66ce0/4_strip_ul2464_wire_500.jpg#%7B%22uuid%22%3A%22b3b7b73e-dec7-4f90-b575-a74621f2b046%22%2C%22w%22%3A500%2C%22h%22%3A332%7D"></li><li>Strip the insulation from the individual cores (approx 3mm).<br><img src="https://media.prusaprinters.org/media/prints/105937/rich_content/49fc30d1-52ab-4e5c-8fa8-02a67a38cdb3/5_strip_ul2464_wire_cores_500.jpg#%7B%22uuid%22%3A%2270cbf79c-e65f-4820-a0c6-3d105cf2e81a%22%2C%22w%22%3A500%2C%22h%22%3A332%7D"></li><li>Solder the two cores from the UL2464 cable directly to the coper pads of the solar panel. Connect red to plus and black to minus.<br><img src="https://media.prusaprinters.org/media/prints/105937/rich_content/785c3cae-e3c3-40aa-9945-a414751b88d4/6_solder_ul2464_wire_cores_500.jpg#%7B%22uuid%22%3A%221c1faf15-b2dc-44e1-b6f9-a933126e5d8e%22%2C%22w%22%3A500%2C%22h%22%3A332%7D"></li><li>Optionally put hot glue over the solder joints and the end of the UL2464 cable to add some stability. Make sure not to cover the full cable, only the two individual wires and solder joints.</li><li>Optionally spray plastic spray over the open coper parts not covered by hot glue (if there are any) to protect them from moisture.</li><li>Put the solar panel in the housing (pulling the wire carefully out the back). The solar panel might need a firm push to enter the case fully, but be careful not to break it. If it does not fit you can either file the solar panel side carefully until it fits or reprint the part entering larger tolerances for the 3d model in the parameter tab of Fusion 360.<br><img src="https://media.prusaprinters.org/media/prints/105937/rich_content/93214d83-3e09-4d26-a489-57a0e014e255/7_fit_panel_500.jpg#%7B%22uuid%22%3A%225e6b702b-0601-438a-b568-aacb0908d1f6%22%2C%22w%22%3A500%2C%22h%22%3A332%7D"></li><li>(optional) Add some hot glue to where the cable exits the housing to prevent moisture entering the case.</li><li>Prepare the other end of the UL2464 wire by stripping the outer insulation (approx 5mm) so that the two wires are accessible (still with their insulation).<br><img src="https://media.prusaprinters.org/media/prints/105937/rich_content/b15138ef-1fbe-4ba9-b145-5f6c5b626e81/8_strip_ul2464_wire_500.jpg#%7B%22uuid%22%3A%22df5db063-e96c-42c5-b2e1-97f205d2340b%22%2C%22w%22%3A500%2C%22h%22%3A332%7D"></li><li>Strip the insulation from the individual cores (approx 3mm).</li><li>Prepare the SP13 connector male side by removing the plastic housing.<br><img src="https://media.prusaprinters.org/media/prints/105937/rich_content/a1bc0f8a-3c83-4573-9b85-6b63a393b3ff/9_prepare_plug_500.jpg#%7B%22uuid%22%3A%220f8e393a-1d0b-4b54-b058-ea57f8b8b0f3%22%2C%22w%22%3A500%2C%22h%22%3A332%7D"></li><li>Slide the cover of the plug on the wire. Make sure everything is oriented right for later assembly.<br><img src="https://media.prusaprinters.org/media/prints/105937/rich_content/38dbbd07-0760-4958-b1cd-4ec35aa770c2/10_slide_plug_case_on_ul2464_wire_500.jpg#%7B%22uuid%22%3A%22f35f13e8-d6ea-4c7d-a3fd-625b90257f5e%22%2C%22w%22%3A500%2C%22h%22%3A332%7D"></li><li>Solder the two cores of the wire to the connecting cores of the male side of the plug. It does not really matter on which pole you put plus and on which minus, but make sure to remember where you put which to not make a mistake later. I also recommend doing this always the same if you build multiple units to be able to use any solar panel with any unit.<br><img src="https://media.prusaprinters.org/media/prints/105937/rich_content/c9a0dc04-1961-4cc6-8d14-8a07eac23bcb/11_solder_cores_to_plug_500.jpg#%7B%22uuid%22%3A%22ac1d8604-1f61-48f2-b6a9-5870da991318%22%2C%22w%22%3A500%2C%22h%22%3A332%7D"></li><li>Reassemble the housing of the male side of the plug.<br><img src="https://media.prusaprinters.org/media/prints/105937/rich_content/0231d02b-2c01-44c3-8fe0-c86df0ad6970/12_reassemble_plug_500.jpg#%7B%22uuid%22%3A%228e36137b-5f6f-4ed7-9de8-90ac3c32397f%22%2C%22w%22%3A500%2C%22h%22%3A332%7D"></li><li>Add silicon sealant to the border of the solar panel housing around the solar panel.</li><li>Put the protective glass cover on the casing and carefully press it down to make sure it sits well. Do not push too hard or the glass can break. Let the silicone sealant dry.<br><img src="https://media.prusaprinters.org/media/prints/105937/rich_content/a5ee811d-7ca2-496e-80b2-014430b590c2/13_seal_case_500.jpg#%7B%22uuid%22%3A%221dbb05ab-e462-4905-917e-a05afdcd2e39%22%2C%22w%22%3A500%2C%22h%22%3A332%7D"></li><li>Clean up excess silicone if necessary (use a utility knife or a razor blade).</li><li>Use 3 M3x10 screws and washers to fix the ram mount ball to the case on the back.<br><img src="https://media.prusaprinters.org/media/prints/105937/rich_content/67c6415d-a598-4363-935b-ee59b11a9b37/14_attach_ram_mount_ball_500.jpg#%7B%22uuid%22%3A%22b9746e48-a5d1-460d-9183-3685c346e24a%22%2C%22w%22%3A500%2C%22h%22%3A332%7D"></li></ol>
With this file you will be able to print Solar Panel Holder / Compartment with your 3D printer. Click on the button and save the file on your computer to work, edit or customize your design. You can also find more 3D designs for printers on Solar Panel Holder / Compartment.