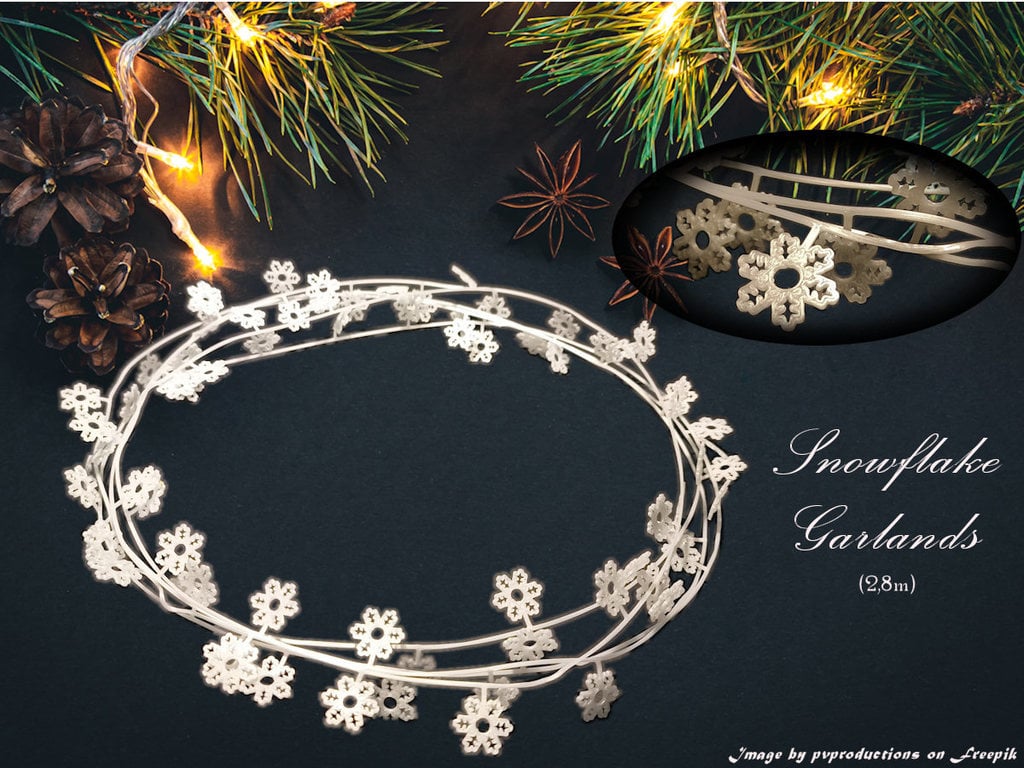
Snowflake Garlands (2.8m long!) - on a 200x200 bed
thingiverse
This is a copy from my publication at <a href="https://www.printables.com/model/325605">Printables</a> <b>The Idea:</b> Make long garlands with your printer! p.s. this only works with PLA, as it has the property of softening below 100°C (212°F). The garlands are neatly nested on the print bed, allowing you to create a total length that extends your print bed length by a very large factor (in this case 14x). After printing and removing the print from the bed (caution advised!) the garlands has to be stretched out with the aid of heating. <b>Printing:</b> As said, print in PLA, with nozzle 0.4mm and layer thickness 0.2mm. Be patient when slicing, the program has to do some serious calculations because of the large number of perimeters! <b>Stretching the Garlands:</b> That's a reasonably simple process: You take a large bowl (dishwashing tub), fill it with boiled water to about a few centimeters deep (one to two inches) and gently lower the printed model into it. You will see that the model becomes completely soft. Make sure you do this slowly and neatly so that the garland doesn't get tangled... Make sure you keep the last point (use the straight end) just above the water in your fingers. Now it is important to slowly pull out and stretch the garland. You can also do this in sections. The PLA hardens in a few seconds and retains its shape. As a free expression you can also add twists by twisting during curing. Instead of stretching the garlands completely, you can also wrap the garland around something else as decoration while curing. Do this relatively quickly because of the rapid curing of the PLA. Don't worry, if you don't succeed in one go, you can always soften the model again and try again. You will automatically get the hang of it! Alternatively, you can also use a hair dryer or heat gun. Make sure that it is not too hot. Due to the fact that the printed garlands are relatively thin, they are still easy to wrap around something or hang in the Christmas tree, even after curing. The only thing you have to watch out for is that you don't kink the thin "wire", because it might break. tip: bend both ends (after tipping them in the hot water) around a pencil or pin and you have your starting hook to attach directly to the tree! <b>STL Files:</b> I added 4 kinds of snowflakes (type 1 - type 4) and 2 kinds of mixed garlands: type 1 is changing with every row (11 pieces) and type 2 is continuously changing. <i>p.s. The rings in the snowflakes have been added to prevent the snowflakes from becoming too deformed during heating and curing. The shape of the snowflakes is relatively simple to create at least 2 print lines for strength.</i> Original Snowflakes Christmas Ornaments by <a href="https://www.thingiverse.com/thing:1978515"> Sneq December 18, 2016</a> Background Coverimage by <a href="https://www.freepik.com/free-photo/christmas-background-with-christmas-tree-branches-garland-flat-lay_34353330.htm"> pvproductions</a> on Freepik
With this file you will be able to print Snowflake Garlands (2.8m long!) - on a 200x200 bed with your 3D printer. Click on the button and save the file on your computer to work, edit or customize your design. You can also find more 3D designs for printers on Snowflake Garlands (2.8m long!) - on a 200x200 bed.
