Snowflake Cutter
thingiverse
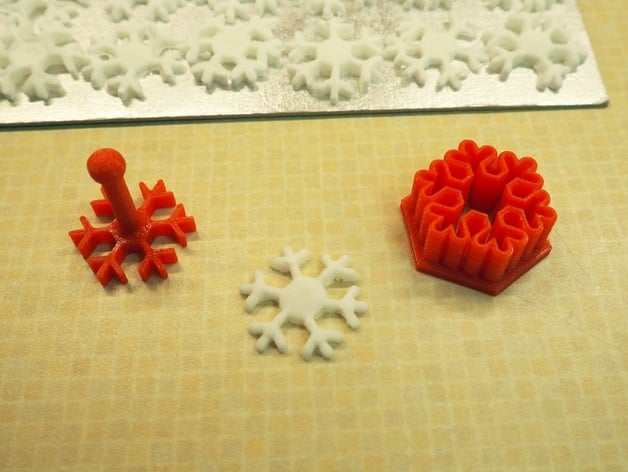
The cutter was designed specifically for cutting icing snowflakes to adorn a Christmas cake. The cutter and the plunger are drawn at identical scales, ensuring that if either is enlarged or reduced, their scaling ratio remains consistent - a crucial factor in guaranteeing a proper fit for the plunger. To begin, roll out the icing to your desired thickness, then press the cutter into it with confidence. Next, use the plunger to release the icing snowflake with precision. The parts were meticulously drawn up using Fusion 360 and exported as .stl files at a 90-degree angle. These files were then loaded into Cura for final processing. When loading the files, note that the cutter sits with its hexagon base facing down. At their original size, the files produced a snowflake with a diameter of approximately 70mm. However, by reducing them in Cura to around 35-40 mm in diameter, I was able to achieve an optimal balance between definition and printability. Once you've determined the ideal size for your cutter, make sure to note its scale ratio and apply it to the plunger accordingly. For my prints, I opted for red PLA at a layer height of 0.2mm with 100% fill. To minimize warping, I chose not to include rafts, brims, or supports. After printing, I washed the finished parts in hot water and dried them immediately - a crucial step in preventing damage. While hot water seems to be okay for washing, it's best to avoid leaving the parts to soak, as the long-term effects are unknown. Definitely steer clear of using a dishwasher at all costs. Print Settings: Rafts: No Supports: No Resolution: 0.2mm Infill: 100%
With this file you will be able to print Snowflake Cutter with your 3D printer. Click on the button and save the file on your computer to work, edit or customize your design. You can also find more 3D designs for printers on Snowflake Cutter.