Snapmaker-2 A350 Heated Bed Cable Adapter (Hidden)
thingiverse
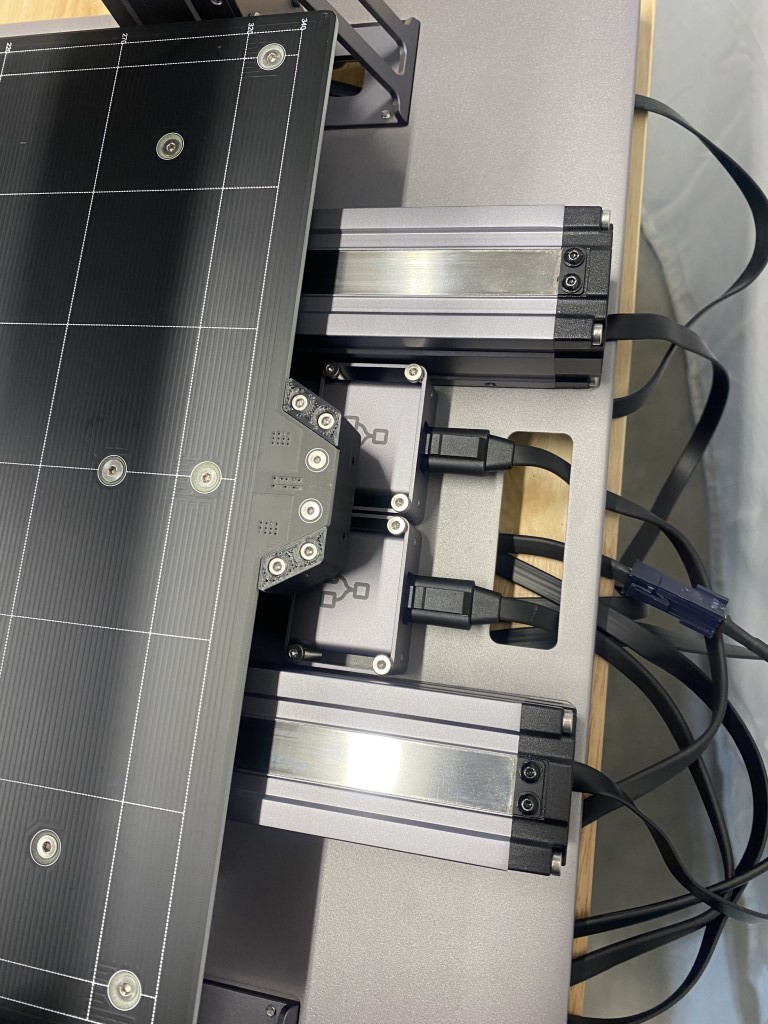
CAUTION: Advanced makers as you will be cutting/soldering wires and changing plug ends !!!! Use at your own will and use caution. Not responsible for mis-wiring or damage to your machine. Attached is my cable track version to hide the Heated Bed Cable and to give it more support and to keep it from bending/breaking off. This will 100% Hide the cable below the table/bed keeping it out of harms way. This adapter also provides a quick disconnect at the bed and also 1/2 way in the cable. You will need the following to adapt this. Threaded brass inserts and molex adapters. Micro Cable Chain, misc. hardware. You will also need to drill/tap into the base where shown using M3 x 8mm Hex countersunk screws. I use brass inserts on 3d Printed items to make them more robust and can be taken on/off easily. Materials Needed: (1) Extra Snapmaker Heated Bed Cable (email support you will have to purchase another bed to get a spare wire). I now have 2 quick change beds with adapters. I also ordered extra x & z axis cables for another adapter project. (1) 4 Pin PCB Pluggable Terminal Block and plug - Green: https://www.amazon.com/gp/product/B077MM2BV9/ref=ppx_yo_dt_b_asin_title_o08_s00?ie=UTF8&psc=1 (1) 10mm x 11mm Length 1Meter Black Plastic Open Type Cable Wire Carrier Drag Chain Towline R18 for 3D Printer and CNC Machines (10mmx11mm-Outside Open). https://www.amazon.com/gp/product/B07QLGWQ1L/ref=ppx_yo_dt_b_asin_title_o07_s00?ie=UTF8&psc=1 (1) Molex 4-Pin Black Connector Pitch 4.20mm.0165" w/18-24 AWG Pin Mini-Fit Jr. https://www.amazon.com/dp/B07DLKSKVD?psc=1&ref=ppx_yo2_dt_b_product_details. (1) Hilitchi 460 Pcs M2 M3 M4 M5 Female Thread Brass Knurled Threaded Insert Embedment Nuts Assortment Kit. https://www.amazon.com/gp/product/B07VFZWWXY/ref=ppx_yo_dt_b_search_asin_title?ie=UTF8&psc=1 (2) M2x4x3.5mm inserts on back of green socket connector. (2) M3x4x5mm inserts inside base to attached to bed (4) M3x6x5mm inserts outside on Cap (2) M2 x 6mm Hex socket head cap screw to attach green socket connector to base (2) M3 x 8mm Hex countersunk screw (or reuse snapmaker screws) to attach base to bed. (4) M3 x 22mm Hex socket head cap screw to attach cap to base. (3) M3 x 8mm Hex countersunk screw to attach chain to Drilled/Tapped holes in SM2 base. (1) M3 x 6mm Hex countersunk scree & 3mm washer to attach chain to bottom of Y-axis table. (MISC) 16ga & 20ga wire to solder adapter to bed. Start by making parts and then heat/insert the brass inserts. Unsolder wires from beds and use Molex adapter to make longer cable. This moles set is the smallest before moving up to the larger sets. You will need to crimp/solder the bed heater wires to the pins. It's a tight squeeze. You can move up to the larger Molex size which is much bigger in size and then have to solder the smaller wires in as you cannot crimp those down enough. Solder wires to green adapter and then to bed. Use some hot melt glue to insulate and keep wires from touching inside. Screw parts to bed to complete bed adapter. Drill & Tap (3) M3 holes in snapmaker base just in front of wire access opening. Screw down cable track. Screw underside of cable track to the 2nd screw in on the underside. Run wires inside of track and attach to green plug. I used wire end crimps to keep it clean and tight (removable). You can solder the wire ends to keep it tight. That's it. See my other adapters for the X-Axis head cable and also the X-Axis cable.
With this file you will be able to print Snapmaker-2 A350 Heated Bed Cable Adapter (Hidden) with your 3D printer. Click on the button and save the file on your computer to work, edit or customize your design. You can also find more 3D designs for printers on Snapmaker-2 A350 Heated Bed Cable Adapter (Hidden).
