Snap-Together Marble Maze
prusaprinters
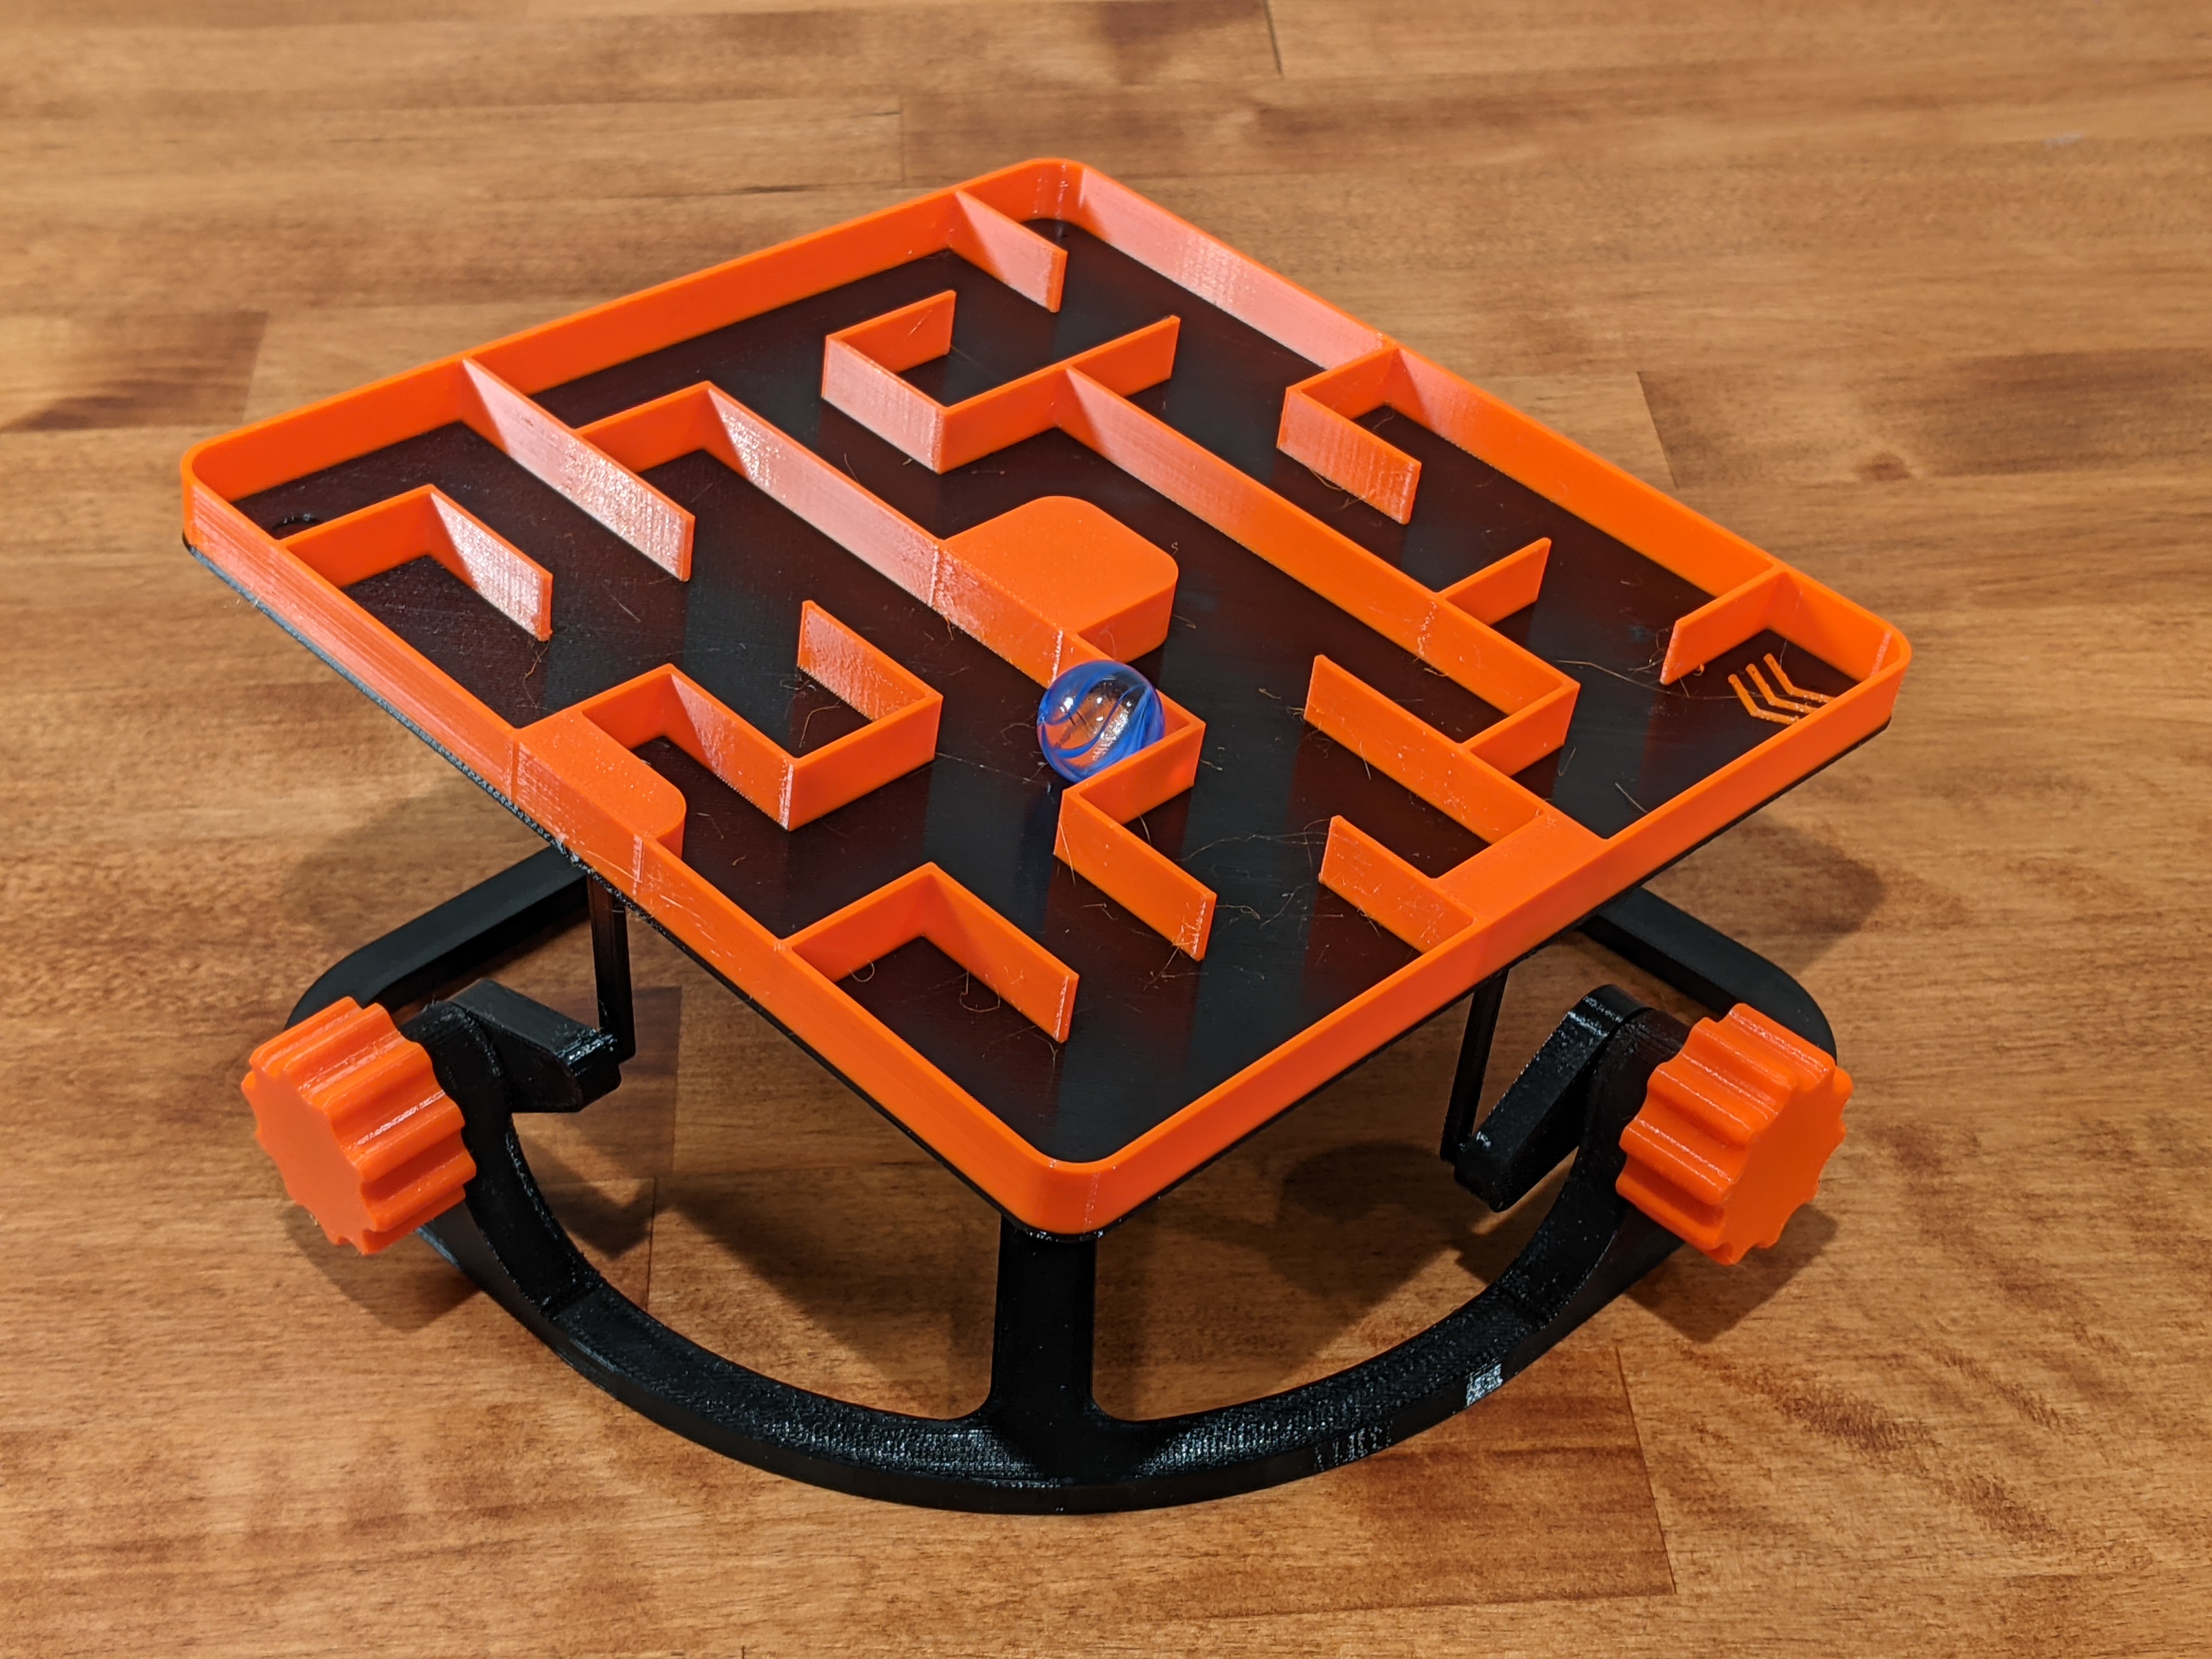
<p>A fun little marble maze. No supports required, and assembly is 100% snap-together using ball and socket joints. No hardware or glue required.</p><p><i>Requires one marble (not included).</i></p><h3>Parts</h3><ul><li>base.stl - 1</li><li>maze.stl - 1</li><li>axle-cam.stl - 2</li><li>linkage.stl - 2</li><li>knob.stl - 2</li></ul><p>The small-parts.3mf and small-parts.gcode files already contain all of the smaller parts you will need.</p><h3>Print Settings</h3><p>Layer height: 0.2 mm</p><p>Nozzle: 0.4 mm</p><p>Material: PETG, although PLA would probably work nicely too. To print the walls of the maze and the starting indicator chevrons a different color, as shown in the pictures, add a color change at 1.60 mm.</p><p>Supports: None. All parts can be printed as oriented in the STL files. You could flip <strong>knob.stl </strong>upside down if desired.</p><p>Infill:</p><ul><li>linkage.stl: 100%</li><li>axle-cam.stl: 15% below 11mm, 100% 11mm and above</li><li>all other parts: 15%</li></ul><h3>Assembly</h3><ol><li>Snap the ball of the linkage into the socket on the bottom of the axle-cam. It helps to align the two parts lengthwise, grasping them between your fingers, and use pliers to snap the ball into place.</li><li>Insert the axle-cams through the holes in the base (see pictures for correct position).</li><li>Snap the knobs onto the axles. It helps to place the knobs face down onto a table, and press down on the axle-cam to snap it into the knob.</li><li>Locate the three holes in the bottom of the maze. Snap the largest hole onto the center post of the base, making sure that the pin is aligned and <i>the other two holes are positioned above the knobs</i>.</li><li>Snap the linkages into the holes in the bottom of the maze. It really helps to use pliers here, holding the linkage close to the insertion end, to avoid buckling the narrow linkage.</li><li>Place a marble on the starting chevron and wish yourself luck.</li></ol><p><i>If the smaller ball and socket joints are too loose, as several users have reported, try printing <strong>linkage.stl</strong> at around 102% size to get a tighter fit. Luckily, this is the smallest part, and quick to reprint if you need to.</i></p><h3>Remixes…</h3><p>…are encouraged! I hope some of you will create other maze layouts which include traps and other elements. Just keep the sockets in approximately the same places and you can snap out the maze for a different one for a new challenge.</p>
With this file you will be able to print Snap-Together Marble Maze with your 3D printer. Click on the button and save the file on your computer to work, edit or customize your design. You can also find more 3D designs for printers on Snap-Together Marble Maze.