Smoother DNA Pencil Helix
thingiverse
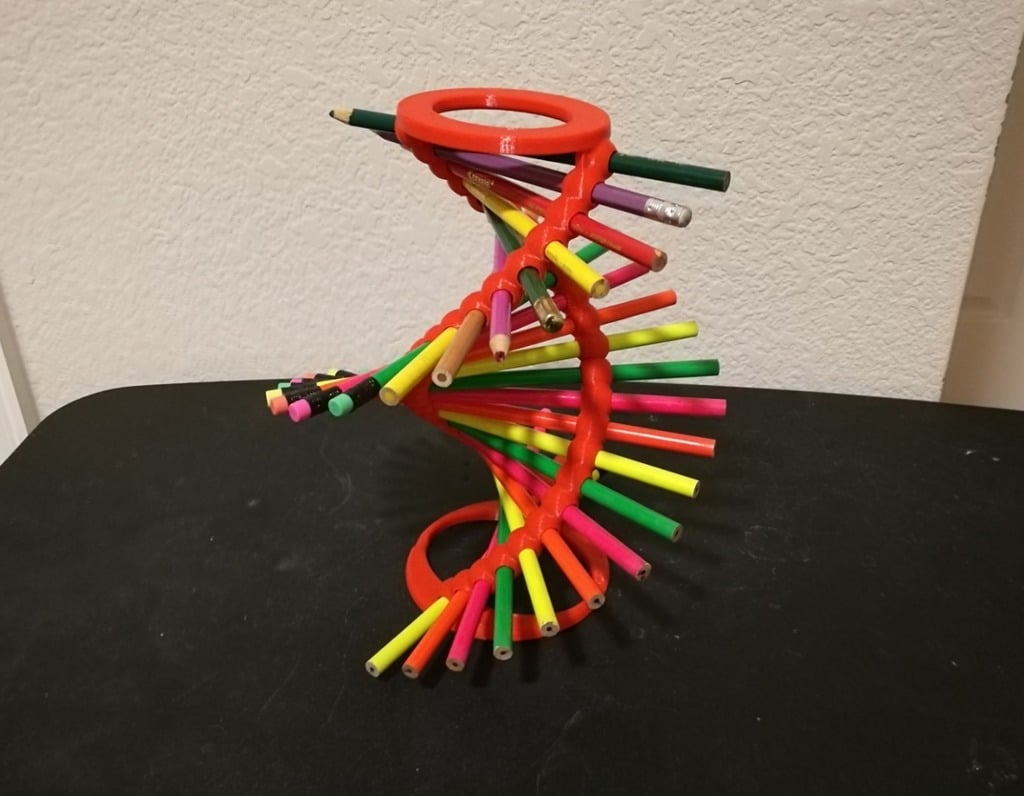
I added a unique parts bowl that I designed specifically for this project. My own pencil sharpener and eraser sit comfortably in mine. I also added an optional extension "BeadyDNA_extender3_zoriented.STL" for the more experienced printing enthusiasts out there. A brim is recommended to ensure better print bed adhesion, as suggested by user SchnickFitzel who was kind enough to be the first to print this extension. I recommend starting with the base and top pieces before considering one or more extensions if you're up for a challenge. Background: Several people have asked me about creating a smoother DNA pencil helix design, so I decided to create a more organic-looking model using solidworks. Here are the print instructions: 1. Add both files to your slicer and orient them as needed. In most cases, the default orientation will work just fine - but feel free to print these separately if you prefer. 2. The outer ring part is the base (bottom) and the inner ring part is the top. 3. Print with 20% infill and whatever layer thickness works best for your printer. I used 0.2mm for the pictured item. Post-printing steps: 1. Remove your parts from the printer 2. Use super glue or crazy glue to attach them together 3. Add pencils and display your creation!
With this file you will be able to print Smoother DNA Pencil Helix with your 3D printer. Click on the button and save the file on your computer to work, edit or customize your design. You can also find more 3D designs for printers on Smoother DNA Pencil Helix.