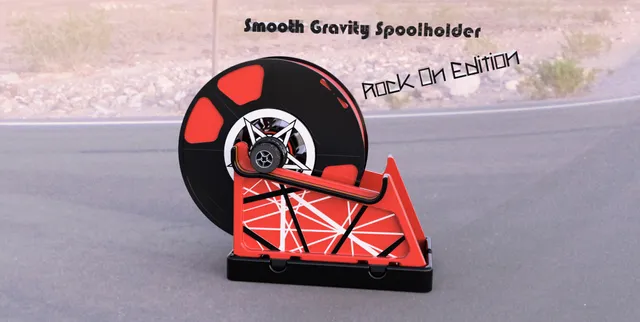
Smooth Gravity Spoolholder, Rock-On Edition 🤘
prusaprinters
I don't have an MMU2s, but I hate tangled up filament spools as much as the next guy, so when I discovered Michal Fanta's design, I was hooked. The only problem is, without the MMU to act as a buffer, the original spool holder would jerk at the print head a little each time it skipped a gear when it reached the top. I made a temporary fix for this by simply wrapping rubber bands around the gears of the original design, but I knew there had to be a better way... I give you: "The Smooth Gravity Spoolholder, Rock-On Edition" This edition solves the problem of "the clunk" at the top of the slope by incorporating some incredibly affordable LEGO tires that can be bought from Brick Link for about 2 cents apiece. Those tires mounted to specially designed rims, travel up a smooth "Road." When the spool reaches the top, much like Fanta''s design, that Road drops away and the spool can then rotate on the smooth Inner-Axle, maintaining just the right amount of tension on the filament to prevent tangles. Here's a quick demonstration video: https://youtu.be/njN7HF-h9NM Additional Features: 4 Custom, Rock and Hot-Rod inspired Rim Designs An in-set LEGO Axle Receiver built into each RIm so that you can add a Crank (coming soon) and use the axles as part of a Spool WINDER system (to take filament and hand-wind it on a new spool - for example, to wind up three 1kg spools of filament from a 3kg big spool, or to spool up that 100-gram sample you got in the mail) A handy holster for those flush cutters you are always looking for at the last minute when you need to make a quick filament change. A large opening in the bottom of the base for feeding 'down' - directly into the printer from the top of an enclosure. Two Sizes of Rock-Star Nuts "Original" which is roughly the same size as the original Gravity Spoolholder, meant for regular spools with an opening of 42 to 55mm "Large" which is perfect for spools with larger center openings of 50 to 90mm Design inspired by Eddie Van Halen's iconic FrankenStrat guitar. Cool full-color print by simply using the "Pause Print" command (no multiple material upgrades are necessary - see Print Instructions) Fully compatible with Fanta's original Base and Nuts (the Sides, Axles and Rims, however, are specific to this design) -- Known Issues, Bugs, Works in Progress, and/or Future Revisions/Features Am working on a spool winding mechanism that will interface with the Rims/Axles from this design. This will be a manual system where filament is pulled from a source spool or filament bundle and is winded onto a new spool (useful for poorly wound spools, for moving from a 3kg spool to smaller 1 kg spools, or winding sample packs of filament onto a spool). Design goal of resulting wound filament to be as similar as possible to the "Perfect" winding of Prusament, with each wind of filament laying directly parallel to the previous one/with as few overlaps as possible. This is still in design phase and is on hold until I've heard from more people regarding this Spoolholder regarding any fixes or improvements that can be implemented to improve its functioning. Even with the revised Frankenstrat Sides (see changelog) the pulling/rewinding force of the mechanism is not strong enough to pull the filament through narrow pass-throughs and/or long stretches of passive Bowden tubes. This is largely by design as I wanted to exert the lowest pulling force possible while still retaining the rewinding function of the system. However not all setups are the same and some people will want something that has a better/stronger pulling force to overcome the friction in their system. Am designing an optional add-on part tentatively named "Gravity Boot(s)" that can be attached to the base to provide a steeper angle. My plan is currently to make this system adjustable so that a user can set their own angle. Expect to see this in the next day or two. -- Changelog: v1: 9.6.20 Original files published Frankenstratv2: 9.7.20 Left and Right Side Frankenstrat_v2: There was an issue in version one where the nearly level surface of the road (when the spool is at the top) would still make slight contact with the tire causing the spool to intermittently fail to rewind when tension was released. A steeper angle was introduced into the upper rail to help lift the tire at the top of the slope which will prevent the spool from getting stuck. If you printed v1 already, simply place small spacers or rubber feet under the front (high side) two corners of the base to create a similarly increased slope angle. The versions are nearly indistinguishable from one another and printing instructions remain unchanged. Pentagram Nuts v2: 9.9.20 Both pentagram nuts had very small, chamfered features that were difficult to print/would lose adhesion to the build surface easily. Bridged a chamfer between each of these small triangles to a larger neighboring structure that fixes this issue. Print instructionsWhat to Print: 1 Base 1 Left Frankenstrat Side 1 Right Frankenstrat Side 1 Axle 2 Rims (4 rim styles are available - see pic) 2 Nuts (90% of the time you'll want the Original Nut, the Large Nut is for filament spools with an unusually large center hole diameter) (I recommend printing a few extra axles (and pairs of rims to go with them) so that you can easily switch out spools of filament without having to unscrew them from the axles each time. Additional Materials Needed: LEGO Tires, Part Number 58090, the cheapest international source I've found for these is BrickLink.com where they can be found for around 2 cents (US) each, (plus shipping). -- These parts were designed to be printed without a multiple material system, using the M600 "Pause Print/Color Change" function (very easy to do in PrusaSlicer). Each part/plate of parts has very specific layers that need to be paused for the color changes to be correct, see below for detailed instructions. - If you have an MMU, even better, but I have no instructions for this as I've yet to use one. -- Overall Print Settings for All Parts: 0.4mm Nozzle Your material of choice (I went with PLA) 0.2mm Layer Height on all layers including First Layer. 0.45mm Extrusion Width on all settings, exception: 0.42mm on Top Solid Infill All parts are rotated so that the correct surface is down/on the build plate. (a 5mm Brim may be needed for the AXLE and RIMS as they print much taller than they are wide) -- COLOR CHANGES Specific Layer and Height in mm for each color change on each part, (NOTE using PrusaSlicer, Changes occur BEFORE the selected layer begins, be sure to double-check as you go to be sure the color changes look correct): BASE Starting color: BLACK Color Change #1: 0.80mm, Layer 4, RED Color Change #2: 2.2mm, Layer 11, WHITE Color Change #3 (to end): 3.6mm, Layer 18, BLACK LEFT and RIGET SIDE FRANKENSTRAT Starting Color RED Color Change #1: 0.6mm, Layer 3, WHITE Color Change #2: 1.2mm, Layer 6, BLACK Color Change #3: 1.8mm, Layer 9, RED Color Change #4: 8.2mm, Layer 41, BLACK Color Change #5: 13.2mm, Layer 66, YELLOW Color Change #6, 14.4mm, Layer 72, BLACK Color Change #7, 15.6mm, Layer 78, YELLOW Color Change #8 (to end), 16.8mm, Layer 84, BLACK ORIGINAL and LARGE PENTAGRAM NUTS Starting Color WHITE Color Change #1: 0.8mm, Layer 4, BLACK Color Change #2 (to end): 2.6mm, Layer 13, RED RIMS PENTA-STAR, TWISTED 5-SPOKE, and '69 GTO Starting Color: BLACK Color Change (to end): 34.2mm, SILVER (Silk or something shiny) RIM '39 ZEPHYR Starting color: RED Color Change #1: 34.8mm, Layer 173, WHITE Color Change #2: 35.2mm, Layer 176, RED Color Change #3 (to end): 35.8mm, Layer 179, SILVER (Silk or something shiny) AXLE Do what you want with this one, I think it looks cool to print it along with the RIMS or the SIDES for the cool stripes, just mirror the color changes for the top side as well (or end up with stripes on one side - which, actually, also looks pretty cool) -- Assembly: The base and sides snap together but it is a very tight fit, be sure the sides are fully seated in the base but be careful not to break them. Orient the sides so that the highest parts point to the Open part of the Base Slide the tires onto the Rims until they find their groove and settle into place, this will be a tight fit and the rims are not especially strong so go slow. Screw the rims on the Axle and adjust the depth of the rims so that each tire is centered on the stripes of the "Road" drop a few drops of super glue over the threads when you are sure it is perfect to keep them from shifting over time. Orient the filament spool so that when it unrolls, the tires roll Up Hill, when it reaches the top, the tires will lose traction and slide smoothly, maintaining light, constant tension on the filament. (there is a great video on the original design's page that demonstrates how it works)
With this file you will be able to print Smooth Gravity Spoolholder, Rock-On Edition 🤘 with your 3D printer. Click on the button and save the file on your computer to work, edit or customize your design. You can also find more 3D designs for printers on Smooth Gravity Spoolholder, Rock-On Edition 🤘.