Smartcore G1
thingiverse
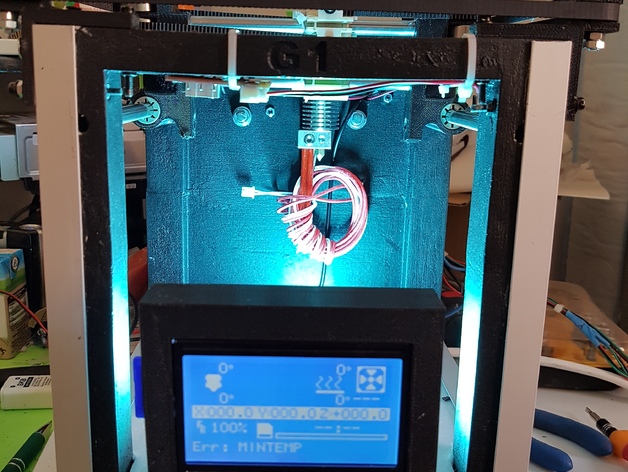
https://youtu.be/0A8flxN1KL4 First Printer project completely or pla abs 3d. Size 20x20x20 cm Print Plan about 10 cm was a long time I was trying to play a printer with other 3D printer, but the lack of design knowledge each have slowed me down. I know it's not perfect and there are some mistakes, but the printer works perfectly ... I used mega ramps 1.4 four nema 17 engines for the plane I used Stripboard with resistance below conrad purchased on the site http://www.conrad.it/ce/it/product/532878/Lamina-riscaldante-Autoadesivo-12-VDC-12-VAC-12-W-Tipo-di-protezione-IPX4-L-x-L-110-mm-x-77-mm-Thermo/?ref=home&rt=home&rb=1 Pulleys gt2 20 teeth from 8 mm rods extruder E3D will ... regular updates and firmware for the frames you will have to divide it into 2 parts so you can print ... inside I always put bars 8 mm in the 4 corners, all filled with epoxy glue .. for any questions, ask them and shall answer as soon as possible .. are also accepted ideas to improve everything. GOOD WORK https://youtu.be/HbbWxFJLEps More from 3D Printers view more Primo progetto di stampante 3d completamente in pla o abs è stato sostituito con il seguente testo. First Printer project completely or pla abs 3d is a large-scale project that involves creating a functional 3D printer using PLA or ABS materials. The size of the print area is approximately 20x20x20 cm, and the print plan spans about 10 cm. I've been working on this project for a long time, trying to replicate a 3D printer with another one, but my lack of design knowledge has slowed me down significantly. Despite its imperfections and mistakes, the printer works perfectly. I used Mega Ramps 1.4 and four NEMA 17 motors for the plane, which is supported by a stripboard with resistance below it. The components were purchased from Conrad on http://www.conrad.it/ce/it/product/532878/Lamina-riscaldante-Autoadesivo-12-VDC-12-VAC-12-W-Tipo-di-protezione-IPX4-L-x-L-110-mm-x-77-mm-Thermo/?ref=home&rt=home&rb=1. The printer also features GT2 pulleys with 20 teeth, 8 mm rods, and an E3D extruder. Regular updates and firmware for the frames will be posted soon, but for now, you'll need to divide it into two parts to print it. Inside, I've placed bars of 8 mm in all four corners, filled with epoxy glue. If you have any questions or suggestions, please don't hesitate to ask. Your input is welcome and appreciated!
With this file you will be able to print Smartcore G1 with your 3D printer. Click on the button and save the file on your computer to work, edit or customize your design. You can also find more 3D designs for printers on Smartcore G1.
