SmartALU Second Z-Axis
pinshape
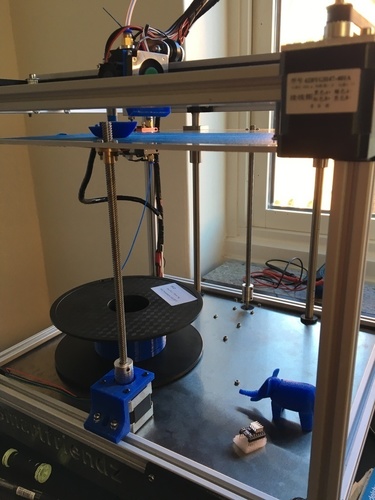
The SmartALU Build Plate Upgrade: A Simple Fix The SmartALU's build plate has a significant flaw that can be easily rectified. Watch this video to see how it's done: https://youtu.be/fHlEnPQbIsw Here are the necessary components: 1. 1 x Lead Screw with an 8mm diameter and 8mm travel per revolution. 2. 1 x Nema17 Stepper Motor with a resolution of 1.8 degrees and a torque of 0.45Nm or more. 3. Some M3 bolts, M4 bolts, and T-nuts. Installation Instructions: First, drill a 10mm hole about 310mm from the edge of the current z-nut (315mm from its center point), positioning it outside your build area. Next, drill two additional holes to match the mounting specifications of the Z-nut you have. Mount the z-nut to the build plate using the drilled holes. Attach the stepper motor loosely to the bracket and the coupler to the stepper motor. Install the bracket with the stepper motor loosely so it can be adjusted along the 2020, keeping the stepper screws loose for fine adjustments. Lower the build plate until it touches the coupler and insert the lead screw from above. Position the stepper motor and bracket correctly, then tighten the screws. Finally, connect the stepper motor in parallel with the rear z-stepper.
With this file you will be able to print SmartALU Second Z-Axis with your 3D printer. Click on the button and save the file on your computer to work, edit or customize your design. You can also find more 3D designs for printers on SmartALU Second Z-Axis.