Smart Espresso Machine
prusaprinters
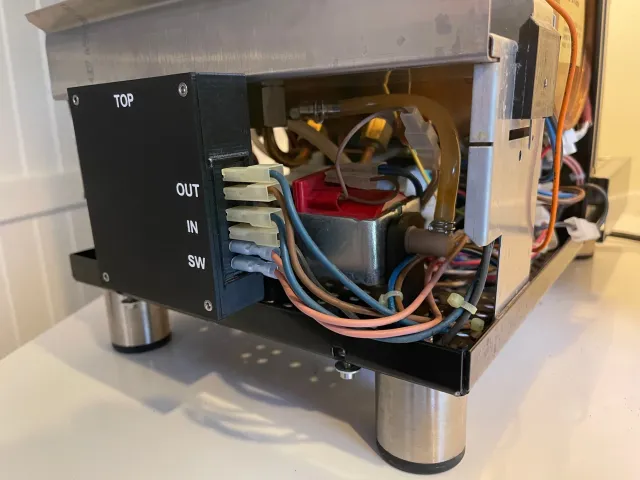
Thank you for supporting me!This is another free 3D model made available for you. I love sharing my models, but designing, testing, polishing, uploading and maintaining them is a lot of work. In case you enjoy this model, please leave a small Donation or Buy me a Coffee. Thank you!DesignLatest project “make your Italian portafilter machine smart”. Using a ShellyPlus1PM, the machine can be turned on and off using either any Shelly interface, or the machine’s old style button. See section on smart function below.So this is about a full DIY project and not just a 3D print.Model optionsCase and Top are considered device independent and should fit in most large espresso machines. Take care the spot picked in dry and not super hot. In case you want to print the model in multi color, use TopWhite and TopBlack. For a single color print, only TopBlack is required.Mount and Base included are specific designs for a Bezzera Giulia. In case you add a mount for other machines, please contact me to include it here.Print settingsUse PETG or ASA. I'd rather not use PLA in a hot machine. The parts can be printed using standard 0.4mm nozzles and 0.2mm layer height. Case and Top parts need to be rotated so the large outer sides point to the printing bed. Enable automatic supports from print bed.Additional parts requiredShelly Plus 1PMfinder 13.31.8.230.4300 relay (available e. g. on Amazon)11 x M3 10mm screwssilicon isolated wires 1.5m24 x fully isolated blade receptacles 6.3mm6 x 6.3mm flat plugs to be soldered on a circuit boarduniversal circuit board2K glue to permanently fix flat plugs / circuit board7 x M3 Rutex threaded insertsPlease see the wiring diagram and photos on how to assemble this parts. The models come with 4mm holes instead of threaded M3 connections. So in case you print the models as is, M3 Rute inserts are required.Smart functions implementedTo start with the most basic part, the project utilizes a ShellyPlus 1PM plus a dumb relay. The relay is actually an optional part but allows us to switch both the live and the neutral lines of the coffee machine. While the electric installation of these coffee machines can be considered quite crude, they follow some good practices in electrics.The PM version off the Shelly is used because we want to monitor power consumption. This for two purposes: while “on”, these machines use a lot of power - we want to know how much. Furthermore, the on / off pattern of the boiler can be used to understand how hot the machine is. The initial heating on time is quite long. Afterwards, the boiler will be turned on and off periodically. Integrated into openHAB (or any other home automation), this allows you to detect when the machine is really hot - which is a must to brew a great espresso.The Plus version of the Shelly is used because it seems to come with a better WiFi than the older Shelly devices. The system is going into a metal body, which shields electromagnetic waves. So the better the WiFi, the more fun and convenience.Arguable, one could use a second Shelly 1 instead of the “finder” relay. As none of its additional features is used and some configuration is required, I decided for the simple solution. NB: the case is designed for the finder relay.Other features: turns on shortly before sunrise, turns off if not used for more than 45 minutes. Notifies when it is ready to go by sending a message to our smartphones, and by turning on the light above the machine.
With this file you will be able to print Smart Espresso Machine with your 3D printer. Click on the button and save the file on your computer to work, edit or customize your design. You can also find more 3D designs for printers on Smart Espresso Machine.
