Small Toolmakers Clamp
prusaprinters
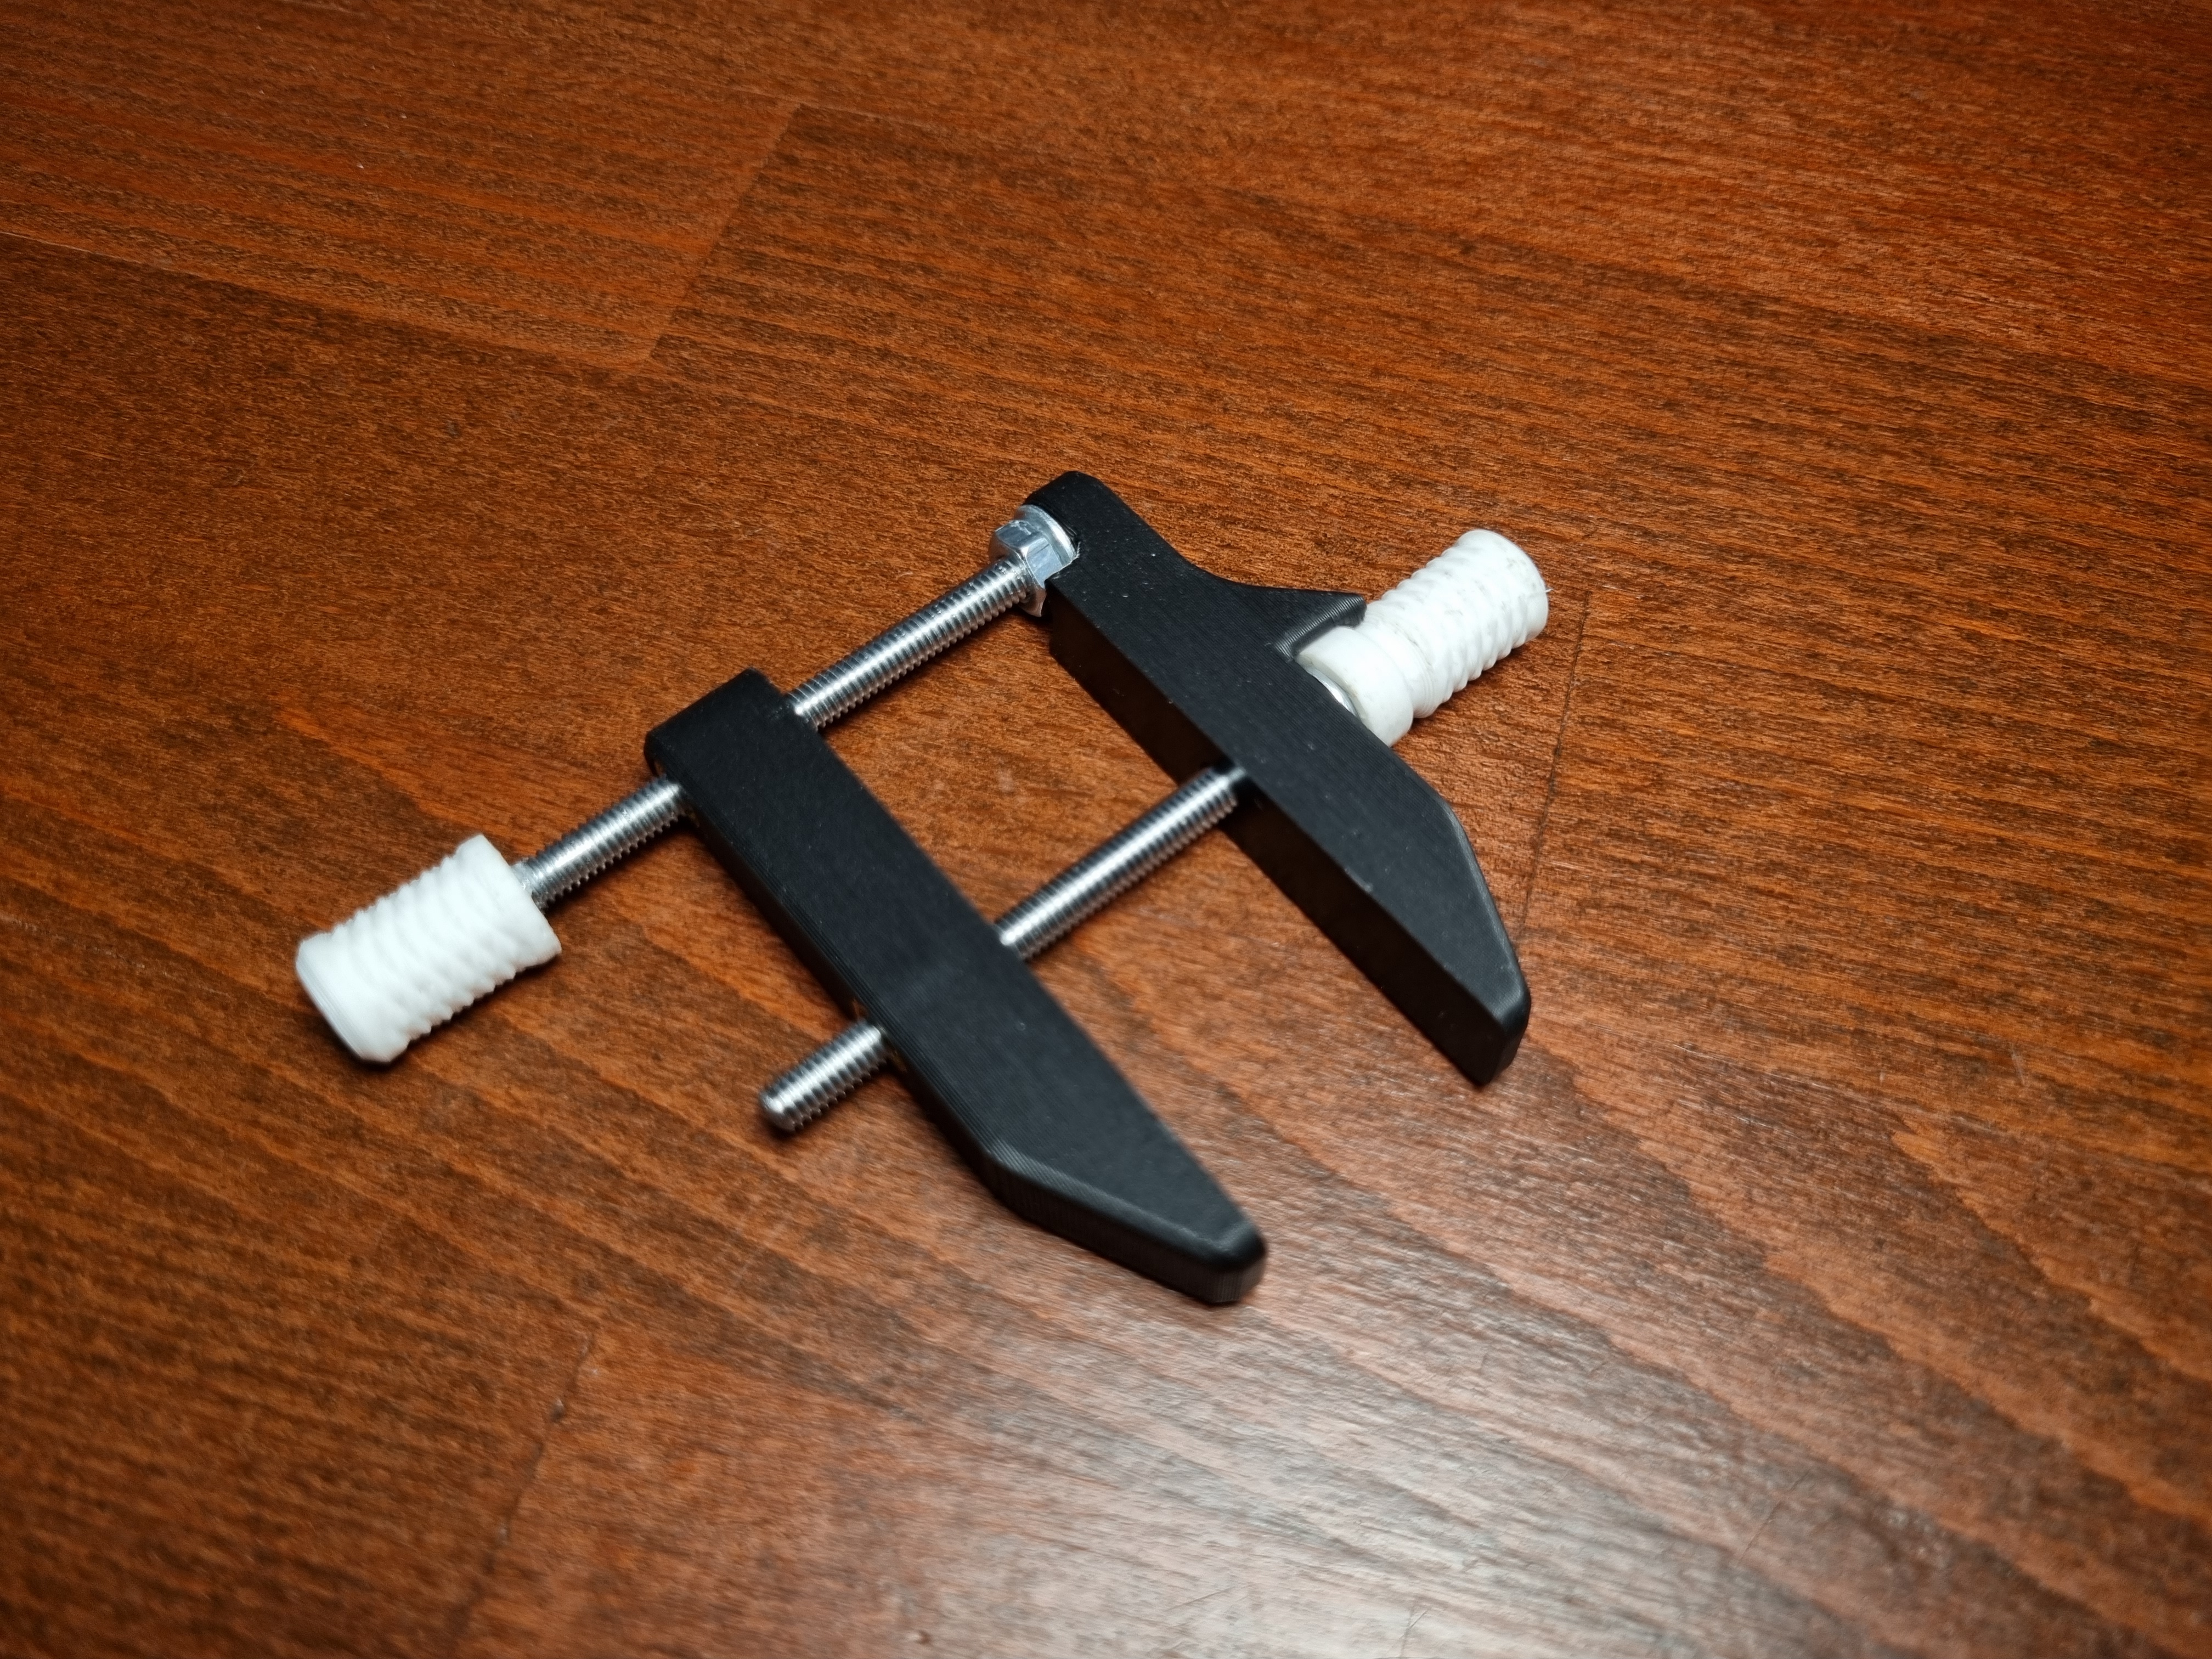
<h3>Small Toolmakers Clamp</h3><p> </p><p><a href="https://www.printables.com/model/230209-large-toolmakers-clamp"><strong>Find the large one here!</strong></a></p><p> </p><p>I designed this <strong>little toolmakers clamp</strong> for <strong>light clamping</strong> work such as <strong>glue up</strong>s. Obviously its <strong>not designed for actual machining</strong> work but its <strong>quite strong for a printed clamp</strong>!</p><p><strong>Hardware you need:</strong></p><ul><li>2 x 60-70mm of <strong>M4 allthread/threaded rod</strong></li><li>2 x <strong>M4 threaded inserts</strong></li><li>2 x <strong>M4 washer</strong></li><li>3 x <strong>M4 nuts</strong></li><li><strong>Superglue</strong> or loctite</li></ul><p> </p><p><strong>Instructions:</strong></p><ol><li>Use your <strong>soldering-iron</strong> to melt in the <strong>M4 threaded inserts. </strong>Alternatively you can press them in with a vice. Make sure <strong>they go in straight</strong>!</li><li><strong>Carefully glue one of the M4 nuts</strong> into the <strong>smaller knob</strong>. Make sure <strong>not to use to much glue</strong>. Afterwards use glue or loctite to fix a length of threaded rod in the knob and nut. Again make sure to <strong>avoid glue squeezing out</strong>.</li><li>Thread the <strong>assembly through the rear insert</strong> in the jaw. Then <strong>glue another nut and washer on the end of the rod</strong>, so that <strong>~5mm of threaded rod stick out</strong>. <i>(See pictures!)</i></li><li>Now insert the last <strong>nut into the taller knob</strong>, again with <strong>just a little bit of glue</strong> so that no glue squeezes out. Make sure the <strong>nut goes all the way in</strong>. </li><li>Now you need to <strong>be really careful:</strong> put a <strong>little glue on the inner threads</strong> of the nut, making sure <strong>no glue lands on the face of the nut</strong>. Hold the <strong>knob into the undercut on the second jaw</strong> with the last <strong>washer inbetween</strong>. Then <strong>quickly screw the second threaded rot throug the jaw into the knob</strong>, making sure you get it <strong>all the way in</strong>, before the glue dries.<i>(See pictures!)</i></li><li>Now for the final assembly just <strong>screw the middle threaded rod into the middle insert</strong> in the other jaw. <i>(See pictures!)</i></li></ol><p> </p><p><i><strong>Have fun printing!</strong></i></p><p> </p><p> </p>
With this file you will be able to print Small Toolmakers Clamp with your 3D printer. Click on the button and save the file on your computer to work, edit or customize your design. You can also find more 3D designs for printers on Small Toolmakers Clamp.