Small thumbwheel for bed leveling
pinshape
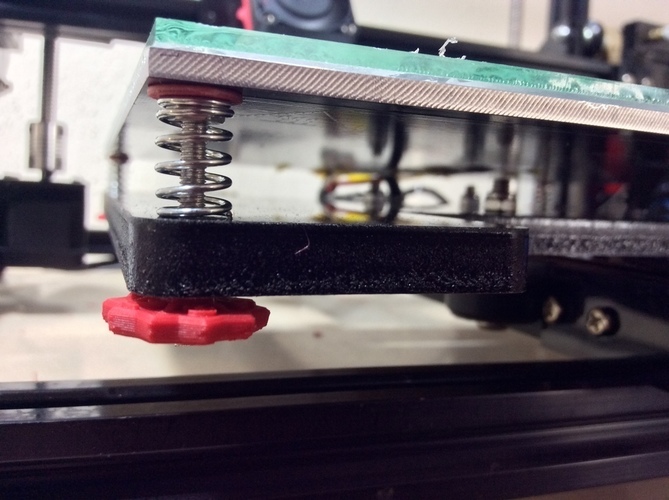
Summary Small 18mm thumbwheels replace manually adjusting beds on assorted derivative i3 kit printers. They outperform smaller metal thumbscrew nuts and wing nuts without obstructing anything. An M3 screw has a 0.5mm pitch when turned, meaning one full turn of a bed leveling nut moves the bed 0.5mm. Two turns would move it a full millimeter. The thumbwheel I designed features ten points on it, so every point is a 0.05mm height change. Two points would move that corner of the bed up or down 0.1 mm. I also created another thumbwheel design that's too large for some newer i3 kits. This thumbwheel works well with new Tronxy X3 printers, as well as Zonestar P802M and a couple other i3 kits. Print Settings Printer: Tronxy X3 Supports: No Resolution: 0.12mm - 0.16mm Infill: 20% Notes: The printer features a built-in support ring that can be pushed out with a 2.5mm hex wrench. A M3 nut should press fit into it. Three shells. Post-Printing Use a 2.5mm hex wrench to pop out the support ring. Press in an M3 nut. How I Designed This I used Onshape, my go-to design tool, starting on my iPad and refining it on my iMac.
With this file you will be able to print Small thumbwheel for bed leveling with your 3D printer. Click on the button and save the file on your computer to work, edit or customize your design. You can also find more 3D designs for printers on Small thumbwheel for bed leveling.