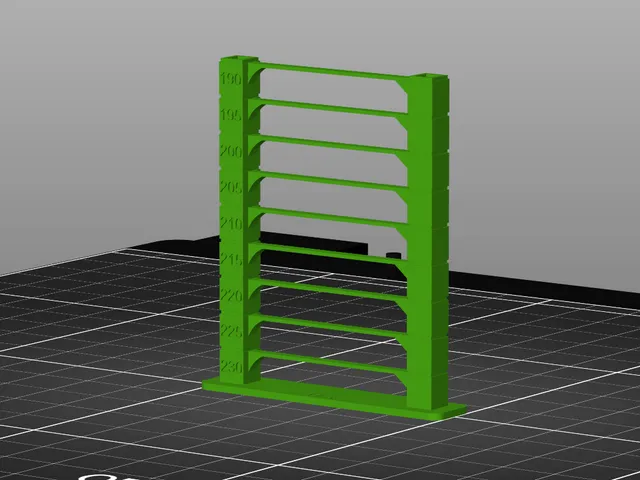
Small quick temperature tower STL for use with MMU
prusaprinters
I bought a new spool of FilaCube PLA 2, but it jammed the extruder as soon as the second print layer started. FilaCube recommended raising the temperature, determined by printing a temperature tower.Most temperature towers use way too much material, and take too long to print. I just needed to see if my jamming problem was temperature-dependent. Then I found Celta's Quick Temp Tower, remixed from Spiga76's Thingiverse design to have the temperature scale that I needed.Unfortunately, Celta's model is in .3mf format exported from the slicer, which renders it unusable for selecting an MMU filament with which to print; it forces you to use filament #1 always, and I didn't want to change my filaments around. So, I converted it to .stl format.You don't need to write G-code scripts to have the nozzle automatically change temperature during the print! It's easier than other designs describe. The process is simple, explained in this YouTube video. Here's all you need to do:Import the STL file into PrusaSlicer.In the filament settings tab, select your filament and change the temperatures to 230°.Assign the corresponding MMU filament to the part.Slice it using the 0.20mm quality setting.In the sliced view, slide the slicer slider down to the first layer above the first bridge. Right-click on the “+” icon and select “Add custom G-code” from the drop-down.Type the code M104 S225 into the box to set the temperature to 225° and click OK.Move the slider to the first layer above the second bridge, and repeat the process with the next lower temperature, M104 S220, and so on until you reach the top-most bridge at 190°, or M104 S190.Export your G-code, and print it. Abort the print if the extruder starts clicking. This means it has jammed because the filament temperature got too low. In this picture, the FilaCube PLA 2 jammed at 210°.I put the penny there to show how small this is. The full print (if you make it that far) uses less than 4 grams of filament if printed with zero infill.210° is the usual temperature for printing PLA. So it seems this FilaCube PLA 2 needs something higher. Because the maximum recommended temperature is 230°, I split the difference and will be using 220° as the print temperature, with 225° for the first layer. Pretty hot for a PLA variant.Because it's so small, it doesn't take long to see results: about 5 minutes per temperature change.
With this file you will be able to print Small quick temperature tower STL for use with MMU with your 3D printer. Click on the button and save the file on your computer to work, edit or customize your design. You can also find more 3D designs for printers on Small quick temperature tower STL for use with MMU.
