Small "bookshelf" style speaker enclosures
myminifactory
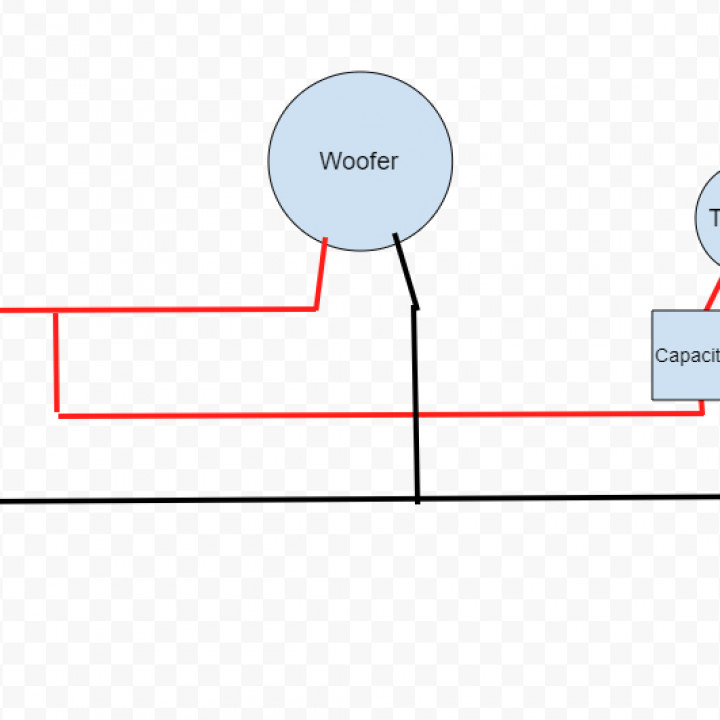
Hello everyone, This is a set of my bluetooth speaker designs. These are like a mini "bookshelf" style speaker. I will have a parts list and brief set of build directions. Parts list per speaker: Dayton Audio TCP115-8 4" Treated Paper Cone Midbass Woofer 8 Ohm Dayton Audio ND20FA-6 3/4" Soft Dome Neodymium Tweeter 3" speaker box 2 way terminals (example in link) https://www.amazon.com/Tinksky-Speaker-Terminal-Connector-Subwoofer/dp/B00X5KMM2G/ref=sr_1_1_sspa?crid=2801BSXGY7CSU&keywords=speaker+box+terminals+connectors&qid=1670730064&sprefix=speaker+box+terminal%2Caps%2C126&sr=8-1-spons&psc=1&smid=A368RSCGNM9U8G&spLa=ZW5jcnlwdGVkUXVhbGlmaWVyPUE5MUFPRFVOSjJSSEomZW5jcnlwdGVkSWQ9QTAyNDg0NjYyUUFQT0gySlpVV0NGJmVuY3J5cHRlZEFkSWQ9QTAzNzU0NTYzT1JNVEZCR0RJVDQyJndpZGdldE5hbWU9c3BfYXRmJmFjdGlvbj1jbGlja1JlZGlyZWN0JmRvTm90TG9nQ2xpY2s9dHJ1ZQ== a set of banana cables to hook to the amplifier of choice (i am using a 50w amp in my build which is more than plenty. I would say a 30w would do just fine and would be up to your own research and personal preference) 3/8" speaker gasket to create an airtight seal Nuts, Bolts, and Washers (M4 15 to 20mm in length):12 of each (4 for the woofer, vent, and cable mount each) 10 M5 bolts (15 to 20mm in length) to secure the back panel in place E6000 glue or anything similar Optional: pillow fluff such as Poly-fil (this will make the bass sound clearer and more controlled in some cases but is optional to the builder) Semi-Optional: 1 microfarad capacitorI was experiencing some popping and clicking so I made a simple high pass filter to prevent the tweeter from clipping with the bass by attaching a 1 microfarad capacitor to the positive lead. If the more daring individual wants to build a full crossover, you may see better results, but for me this worked just fine Build directions: 1.) When printing the front face, I included 2 different file types. one for a single color front, and one with the edge banding like seen in the photos. I used the same method for printing in dual colors as Devin does in the multicolor printing video on the MakeAnything Youtube channel. Note I did print this with a .8mm nozzle and so the first layer I used was 0.4mm thick. IF you decide to do the first layer color change like this you may have to adjust your slice settings to support this for your setup. 2.) After printing all the parts, i started the assembly with adding the sealing foam on backside of the main housing where the back panel is screwed into place 3.)Next I attached and soldered the speaker drivers making sure to add my 1 microfarad capacitor on my tweeter (I added my wiring diagram in the photos). Note I did glue the tweeter down to create a better seal, this is optional as it would make removing it in the future more difficult if you have to. 4.) Glue the front face too the housing and let it cure 5.) Attach the vent and the cable mounts to the back panel while the glue cures 6.) Once the glue is cured, solder the speaker wires to the cable mount 7.) Optional: add pillow fluff to fill the cavity 8.) Screw on back panel with M5 bolts 9.) Plug into the amp and enjoy listening to your new speakers! I am on instagram! if you have any questions, comments, or concerns about this build please message me there as i will be more likely to respond Instagram: @the_creation_lab
With this file you will be able to print Small "bookshelf" style speaker enclosures with your 3D printer. Click on the button and save the file on your computer to work, edit or customize your design. You can also find more 3D designs for printers on Small "bookshelf" style speaker enclosures.
