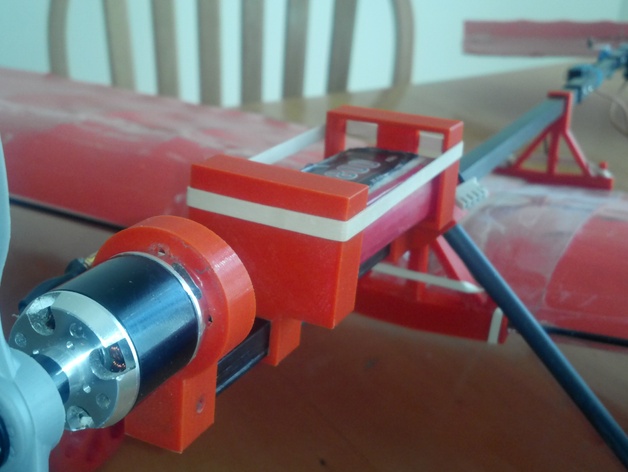
Slow Stick Battery Box
thingiverse
Two boxes are necessary and one rubber band to hold one battery securely in place. This will effectively contain a three cell square Lipo battery from 1300 ma to 2200 ma. Simply slide the two battery boxes, cups facing each other, onto the 10 mm square fiber glass tube behind the motor mount. Next, replace your motor mount and thread your wires through the holes so charging and power can be connected to your ESC. Finally, close the cups around the battery by sliding them together, securing with an elastic band. Print Settings: Printer: RepRap Rafts: Doesn't Matter Supports: No Resolution: 1.5 Micron Infill: 100 % Notes: It is crucial to use an elastic around the two battery boxes after the battery installation to keep the battery firmly in place. Post-Printing: Securing the battery with an elastic band is of utmost importance after installing the battery, ensuring it remains in its designated position. How I Designed This: If you detest frequently changing batteries between flights, this design is perfect for you! I used to abhor changing out batteries between flights. I didn't enjoy fiddling with rubber bands and velcro; it was awkward and disrupted my center of balance. Furthermore, on the Slow Stick, the battery could potentially fall off. My son Kevin conceived this innovative idea.
With this file you will be able to print Slow Stick Battery Box with your 3D printer. Click on the button and save the file on your computer to work, edit or customize your design. You can also find more 3D designs for printers on Slow Stick Battery Box.
