Slot Rail Articulating Light
prusaprinters
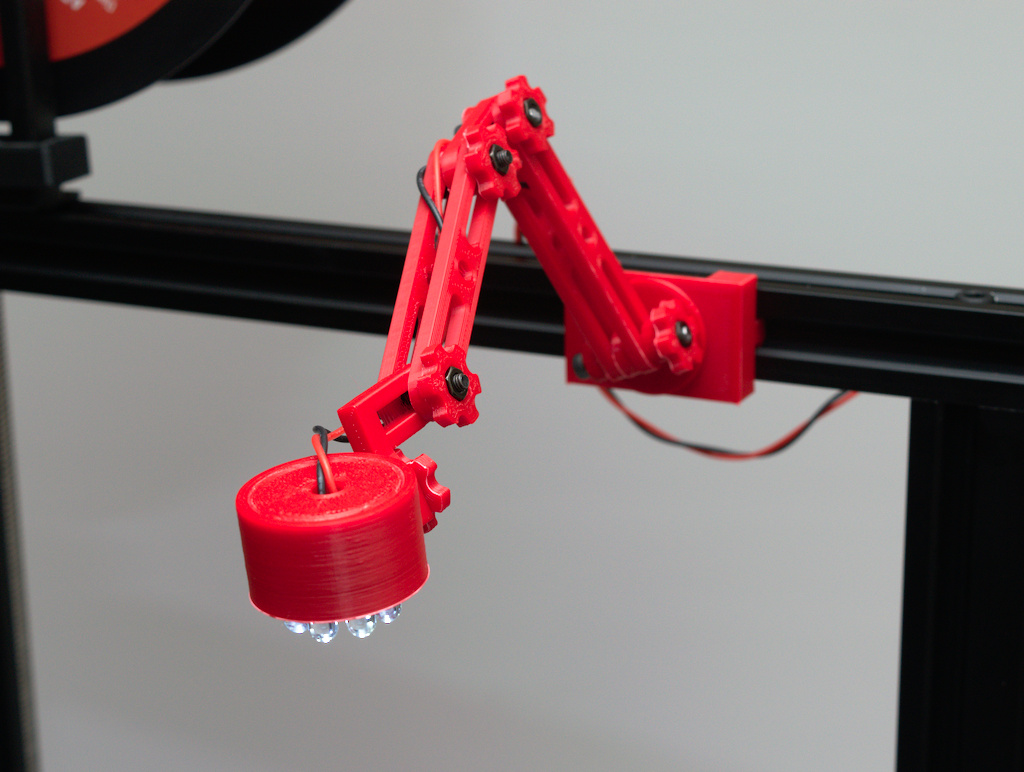
<p>Articulating light mount that utilizes the business end of a dollar store flashlight.</p> <p><strong>Supplies</strong></p> <ul> <li>Dollar store / gas station / <a href="https://www.walmart.com/ip/Ozark-Trail-Mini-Flashlight-in-Assorted-Colors/34350005">Walmart</a> flashlight.<em>(Check that drawer in your kitchen, I had two)</em> </li> <li>Resistor depending on power supply and needs. </li> <li>Some thin wire, something you can route in the unused rail slot behind the psu </li> </ul> <p><strong>Assembly</strong></p> <ol> <li>Disassemble the flashlight and remove the head</li> <li>Solder wires to the head of the flashlight as shown below (fig1), the inner ring should be the cathod (+) and the outer ring should be the anode (-) </li> <li>Pass the wires through the cap</li> <li>Insert the bolt into the head, this also should be quite snug to prevent it from spinning, use the nut to draw in if needed</li> <li>Fit the LEDs into the head</li> <li>Press the cap into the head</li> <li>Assemble the rest of the arms as shown below(fig 2)</li> <li>Slide the assembly onto the rail</li> <li>Wire as needed<br/> <strong>*Important:</strong> there is no resistor in the head of the flashlight be sure to add as needed depending on your power supply. See resources below </li> </ol> <p><table></table></p> <p><tr></tr></p> <td width="50%"> <img src="https://media.prusaprinters.org/thumbs/inside/1280x960/media/prints/22555/images/222641_e12b56f7-a8c2-4870-abbd-9534d96f06bd/dsc_0493_22555.jpg" width="300px"/> </td> <td width="50%"> <img src="https://media.prusaprinters.org/thumbs/inside/1280x960/media/prints/22555/images/222630_475e194f-65d1-44bb-b653-46275d3bd1b3/dsc_0496_22555.jpg" width="300px"/> </td><p><strong>Resources</strong></p> <p>Ohms Law calculator if you need help calculating your resistor.<br/> <a href="http://www.ohmslawcalculator.com/led-resistor-calculator"></a><a href="http://www.ohmslawcalculator.com/led-resistor-calculator">http://www.ohmslawcalculator.com/led-resistor-calculator</a></p> <p>Example: to run this off the 5v power supply at 20 milliamps you would use a 160ohm resistor. (Assuming a 1.8v drop on the LED)</p> <p><strong>Check the wattage rating on your resistor</strong></p> <h3>Print instructions</h3><table width="50%"> <tr> <th width="35%">Setting</th> <th width="65%">Value</th> </tr> <tr> <td>Supports</td> <td>No</td> </tr> <tr> <td>Rafts</td> <td>No</td> </tr> <tr> <td>Layer Height</td> <td>0.2mm</td> </tr> </table><p><strong>Notes</strong><br/> This was only printed in ABS so that it would visually match some other parts on my printer which were printed in the same material due to heat concerns. PLA is just fine the light gives off no heat.</p> <p><strong>Post-Printing</strong><br/> I left the fit between the cap and the head rather tight. Ensure that you can remove the cap, lightly sand if needed.</p>
With this file you will be able to print Slot Rail Articulating Light with your 3D printer. Click on the button and save the file on your computer to work, edit or customize your design. You can also find more 3D designs for printers on Slot Rail Articulating Light.