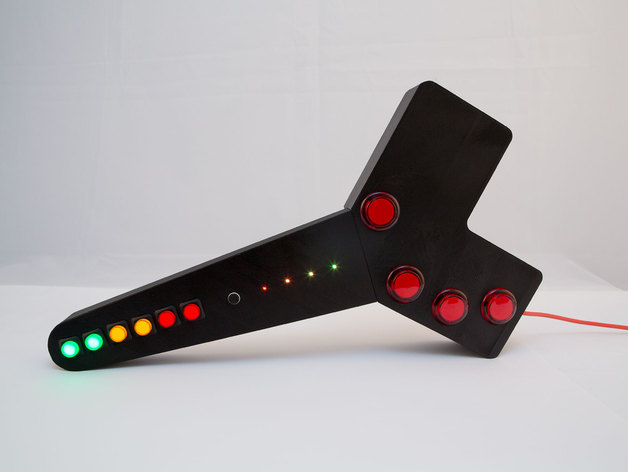
Slixtar MIDI Controller
thingiverse
Slixtar is a 3D printed, customizable MIDI controller that allows you to break free from traditional square-button designs and create your own unique setup. With a form factor designed for standing and playing like a musician, Slixtar is perfect for live performances, sequencing, and producing. The device requires assembly using parts such as Makey Makey, Adafruit Flora, Neo-Pixels, an Audio Mic, Arcade Buttons, LED Push Buttons, a Lithium Battery, and a Tactile On/Off Switch. To configure Slixtar, you can use the MakeyMakey to set up to 12 buttons, remap pins A0-A5 on the Arduino IDE for additional keys, and map MIDI CCs and notes using a virtual midi app like vmpk. You can also use Garageband or Ableton Live to play back samples, play virtual synths, and DJ. The Adafruit Flora powers 4 Neo-pixel LEDs that animate based on sound detected by the audio mic, acting as a level meter. Open-source code from Adafruit makes configuring the FLORA easy. The LEDs are also fully customizable. To assemble Slixtar, first print the body and neck frames using PLA at 20% infill, 2 shells, and temperatures of 240°C for the extruder and 80/100 mm/s for speed. This will take approximately 10 hours, but results may vary. The frames and front covers snap together, while LED buttons require wiring with 4 leads each, and arcade buttons need just 2. All wires must be soldered into the contacts of their respective buttons before testing. The MakeyMakey micro-controller fits into the top left of the body and uses pins D0-D5 and A0-A5 for button wiring. To wire LED buttons, use D14, D16, and 5V. Label each wire before soldering connections, and test with alligator clips or wrapped wires. Connecting the Flora micro-controller powers 4 Neo-pixels using daisy-chained wiring and an audio mic. Use a hot glue gun to secure these components and prevent dislodging during play. The tactile on/off switch connects to the lithium battery and clips onto the neck back cover, connecting to the Flora. To map MIDI, connect MakeyMakey via USB to your computer, download Arduino IDE, and install the MakeyMakey scratch code for modifying key settings. Use the Arduino IDE to edit the settings file with desired keyboard characters, and use a virtual midi app like VMPK to map these characters into MIDI notes or CCs.
With this file you will be able to print Slixtar MIDI Controller with your 3D printer. Click on the button and save the file on your computer to work, edit or customize your design. You can also find more 3D designs for printers on Slixtar MIDI Controller.
