Slidy Santa
myminifactory
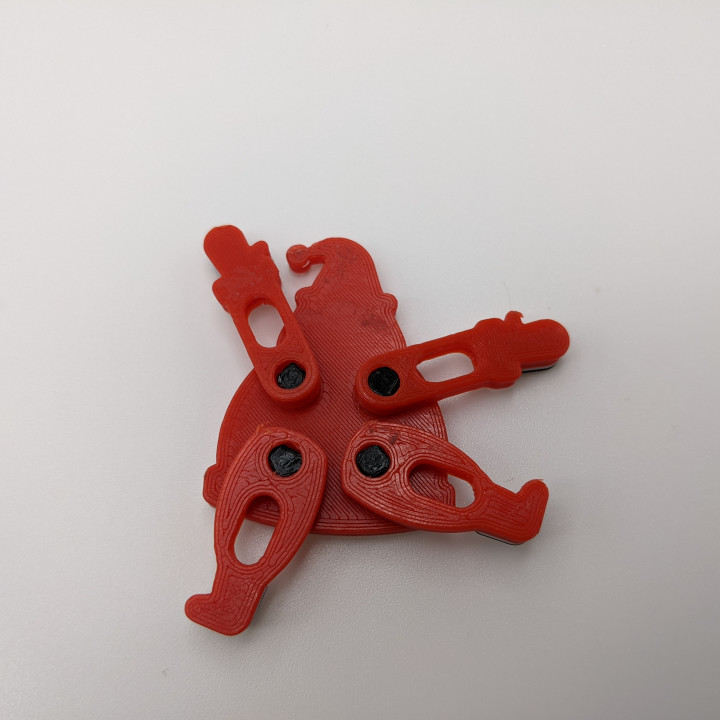
Place Santa on your Tipmas Tree and watch as his arms and legs shoot up in joy! My design uses 8 pegs that snap into place to join Santa's body to the stand. I have the files separated into two prints, but you can you can actually print it all together too! I used a filament swap from red to white at 3mm and white to black at 3.6mm. Merry Tipmas and stay creative! Assembly: The pegs themselves are symmetrical, and don't need to be put in facing any specific way. First connect four pegs into the stand- you should notice that the stand is not symmetrical however. It is slightly set back from the middle so that Santa sits directly under the center of the stem, so connect the pegs to the side closer to the center. Santa's arms and legs snap into these pegs. Next connect the remaining four pegs to Santa's back and press his body onto the arms and legs.
With this file you will be able to print Slidy Santa with your 3D printer. Click on the button and save the file on your computer to work, edit or customize your design. You can also find more 3D designs for printers on Slidy Santa.