Skull Fidget Spinner
thingiverse
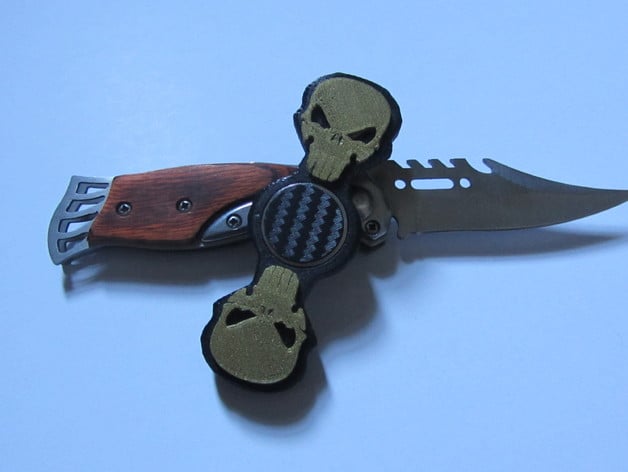
Skull Fidget Hand Spinner Toy Fidget Hand Spinner with Skulls that are made of Brass, featuring extra weight from Fillament for a nice shiny finish. You can print them with any filament it doesn't matter, but the two nuts in the body provide most of the weight. Extra things you'll need: The body uses two M8 Hex nuts (13mm) or (1/5 inch) in the US that you can buy from any hardware store or Home depot or from the links below: eBay: https://goo.gl/Aw0ngF Aliexpress: https://goo.gl/ffH0uw And one Skateboard bearing, which I won't leave a link for since it's easy to find anywhere and comes in different types. There are cheap ones and expensive ones, ceramic and steel. Carbon fiber used to cover the bearing caps (if you want to use ones): Aliexpress: https://goo.gl/UMujHq Look in print settings part to see the settings I printed mine with. Note: The Skull design is a modified version from the original design of Wolfiest, which can be found here: http://www.thingiverse.com/thing:1665209 Object Specifications: Total length: 8.5 cm Total width: 3 cm Body height without the skulls: 7.6 mm Body height with skulls: 12 mm I'm excited to see what filaments you guys will make this design with! Don't forget to upload a picture of what you'll create. Print Settings: Printer Brand: RepRap Printer: ZONESTAR Prusa i3 Rafts: Doesn't Matter Supports: No Resolution: 0.2 mm layer height for both the body and the skulls, with two shells enough for walls. Infill: Anything between 20% to 50% or more if you like is fine for the body and 100% infill for the skulls. Notes: When printing the skulls, make sure to raise the first layer a bit higher to get smooth and shiny first layers and better adhesion. Post-Printing Assembly: After printing the body, put the bearing in its place. You can use a bench vise to press it in or gently hammer until it's inside. Put the nuts in place in the same way. Make sure you use the same type of nuts on both sides or the weight won't be balanced. Put the 4 skulls in their places (2 on each side) by inserting them into the holes on the body to hold in place (you can use a vise to press them tightly). Add the bearing caps on both sides of the bearings for better grip. See images below for steps. Sorry for the bad pictures, my other phone is broken. Parts: Press bearing and nuts in place Clip the skulls in place Put the bearing caps in place
With this file you will be able to print Skull Fidget Spinner with your 3D printer. Click on the button and save the file on your computer to work, edit or customize your design. You can also find more 3D designs for printers on Skull Fidget Spinner.