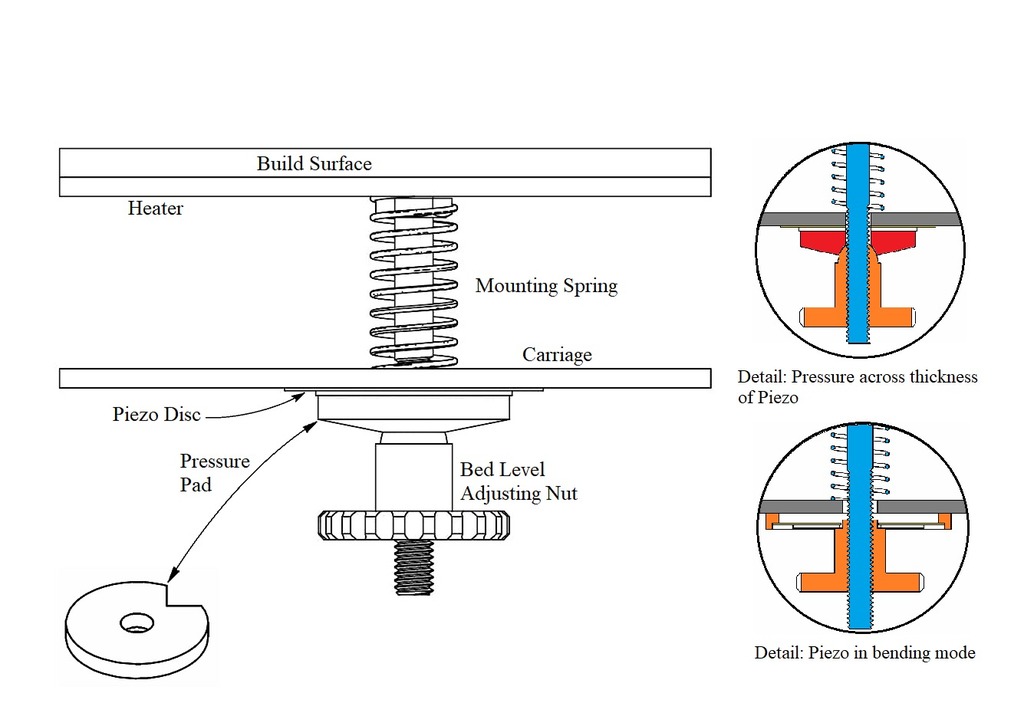
Simplified underbed piezo sensor mount
thingiverse
This is an upgrade of my integrated bed mounting and piezo nozzle contact sensor design found at https://www.thingiverse.com/thing:1399512, as illustrated in this sectional drawing. A 27mm piezo disc with a hole drilled into it is attached between the carriage and bed adjusting nut. The piezo can be mounted directly on a flat surface of the carriage under a pad for minimal compliance; or it can be attached to the ring abut without a pad, resulting in better sensitivity but more compliance. Additional information regarding this topic and others can be found at http://forums.reprap.org/read.php?1,635075,page=1. Two nuts are provided for use with 3mm or 4mm bed jacks. A nut, preferably made of Nylon or Nylock, should be glued into the recess. An amplifier/conditioner can be built DIY or purchased from https://www.precisionpiezo.co.uk/shop. When drilling a hole in the piezo element, it is essential to use a sharp drill and secure the piezo to a flat surface using strong tape. A 5mm hole should be drilled for a 3mm jack or a 6mm hole for a 4mm jack. The ceramic powder generated during this process may be hazardous, so proper clean-up of the powder is crucial.
With this file you will be able to print Simplified underbed piezo sensor mount with your 3D printer. Click on the button and save the file on your computer to work, edit or customize your design. You can also find more 3D designs for printers on Simplified underbed piezo sensor mount.
