Shoe rack wall mounted (fits on Prusa Mini)
prusaprinters
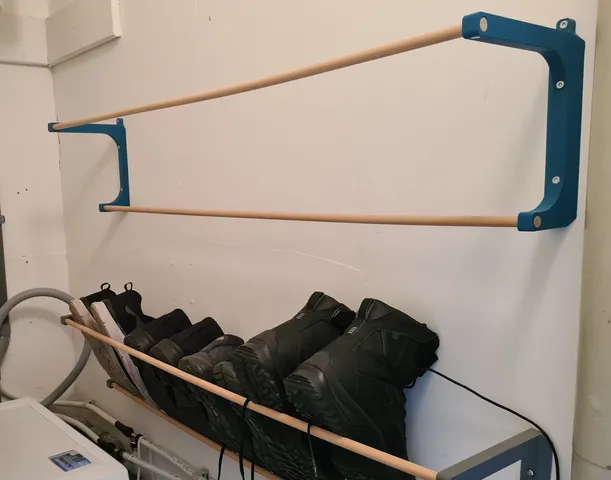
Hi makers!This is a wall mounted shoe rack I made to make the hallway shoe-free. Spoiler alert: it worked!It uses a 12mm rod to hold the shoes in place up aganist the wall. there's a lot of ways a shoe fits on this so you can find out what works best for you. I used wooden rods because they look nice, but you can also use aluminum pipe or other materials. The wood does sag a little, but it can take a lot of force during my testing!Edit: I've included side plates with closed holes if you prefer this. This way you only need glue to stop the rods from rotating or the original way with a screw or a bolt. (optional but recommended). You can use a normal side plate in the middle if you have very long rods. happy printing!Attention to US users: I would like to hear if these materials are easily obtainable in the US, if not, let me know what is and i will make a US version asap!What do you need?2x printed side plates (if you rae using wood longer than 1 meter I suggest an extra one in the middle to prevent sagging)2x 12mm rod, you can choose the length yourself, I went for 1 meter and you van hold about 4 pairs of shoes on that.4x 4x16mm (a bit shorter/longer will work fine too) countersunk screws to hold the wood in place (when using aluminum use glue or a countersunk M4x8mm bolt and a M4 nut)6x 4x…mm countersunk screws to hold the brackets on the wall (I used 40mm in length but check out what works best for your case :)Printing instructionsThe .STL is pre-oriented for you slicing comfort ;)At least 3 walls and 20% infillMaterial doesn't really matter. I tested with PLA and it is crazy strong, so all materials should be fine.Pre-slices files for PLA and PETG included for Prusa MK3s and MiniHow can you make it? (wood)Print the side platesGather materials as stated abovePlace the rod in a hole, place both brackets on the ends of the rod.(optional for best result) Use a 2-3mm drill to pre-drill in the rod at the place where the screws go.Screw the rods in place (4x16mm countersunk screws)It is important to have both brackets on in the right orientation at the same time. otherwise, you might make a twisted shoe rack! Dont ask me how I know this…Repeat for other rodPlace the shoe rack on a wall, and screw it on! :) (you can mark the places and pre-drill these too if you want or if you need to use plugs in concrete)Place shoes on the shoe rack, make a picture and post a make! :DHow can you make it? (Aluminum pipe/other)Print the side platesGather materials as stated abovePlace the rod in a hole, place both brackets on the ends of the rod.Glue in place (skip step 5 and 6), or drill a 4.5/5mm holeNote: Glue is easiest and should be fine, it is only to keep rods/pipes from falling out and rotating.Secure pipe with a countersunk M4x8mm bolt and a M4 nutIt is important to have both brackets on in the right orientation at the same time. otherwise, you might make a twisted shoe rack! Dont ask me how I know this…Repeat for other rodPlace the shoe rack on a wall, and screw it on! :) (you can mark the places and pre-drill these too if you want or if you need to use plugs in concrete)Place shoes on the shoe rack, make a picture and post a make! :D If there are any questions or tips, please let me know, I'm always happy to help! I really hope you enjoy this as much as I do! We've had it for a few weeks now and it is still working fine and it keeps out hallway a shoe-free zone!I make much more projects with 3D-printing, motorcycles and woodworking, if you would like to you can check out my instagram for more cool projects that I am working on!https://www.instagram.com/pascal.makes/Don't forget to post a make to ears prusameters, and i and keen to see what you make! Happy printing,Pascal
With this file you will be able to print Shoe rack wall mounted (fits on Prusa Mini) with your 3D printer. Click on the button and save the file on your computer to work, edit or customize your design. You can also find more 3D designs for printers on Shoe rack wall mounted (fits on Prusa Mini).