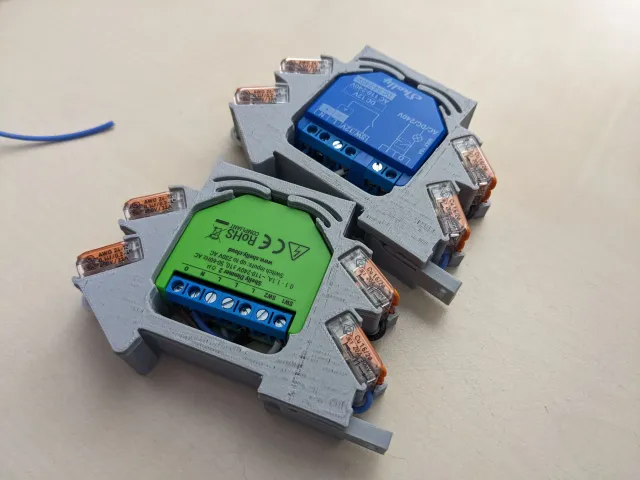
Shelly DIN Mount with Wago 221 Terminals
prusaprinters
I wanted a good DIN Mount for my Shelly Switches to mount them properly into my electrical box, but all that i found did not really satisfy me.So i made my own inspired by severel other designs with these key features:vertical orientation to save spaceneeds to be compatible with “common” DIN Rail box standardstoolless wire teminalsPrint InstructionsPrint in 0.2mm for the integrated support on the Main Body to work, you need to remove the purple Support after printing with a screwdriver or similar tool.Assembly Instructions:For each Mount you need 4 x Wago 221-413 Terminals and some wires.Slide in the Wago Terminals vom the side ⅔ of the Way so you can still open all latchesfeed through the wires from the inside to the outside without cutting it form the spool and strip ~8mm of wire on the outsidePut the stripped wire into the bottom wago port, close the latch and push that terminal all the way downRepeat that process with all 4 Ports (Recommended colors: N: Blue, S: Black, O: Brown, S: White)Pull all the Wires, that are still connected to the Spools gently tight like in the picture and cut them roughly to the length where me finger holds the wireWire up the wires to the Shelly (O: Brown, L: Black, N: Blue, SW: White)Push the shelly into the cavity with the wires beneath it, make sure now wires stick out anywhereRemove the support structure and slide in the Lock like this:
With this file you will be able to print Shelly DIN Mount with Wago 221 Terminals with your 3D printer. Click on the button and save the file on your computer to work, edit or customize your design. You can also find more 3D designs for printers on Shelly DIN Mount with Wago 221 Terminals.
