Shelf for Tonie figures
prusaprinters
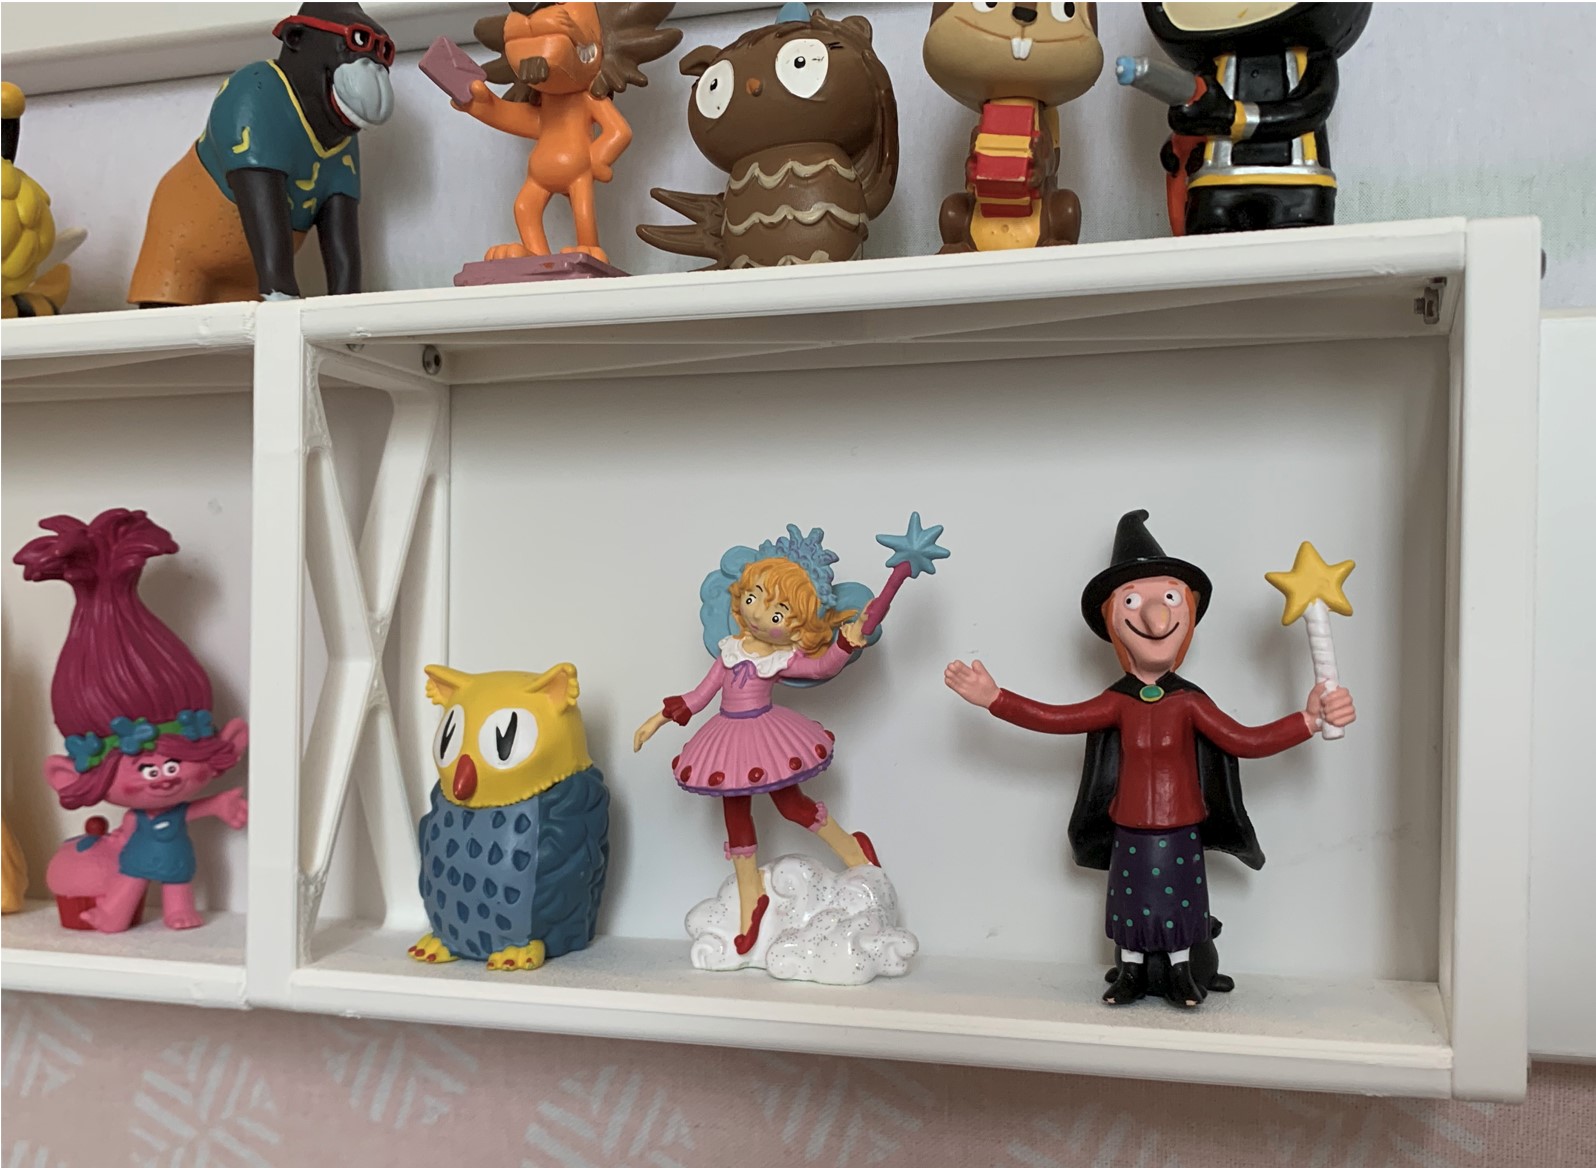
<p>My daughter's countless tonies needed a permanent place. I had found a good place for the tonies on my daughter's loft bed. The basic idea was a shelf to hang up. The aim was to accommodate as many Tonies as possible with the shortest possible printing time.</p><figure class="image"><img src="https://media.printables.com/media/prints/177113/rich_content/f19fc8e1-54e2-4d59-b9a6-c030ae4b963d/shelf-2.jpg#%7B%22uuid%22%3A%22c3196eab-9224-4f37-8ce4-0ecfb8720be0%22%2C%22w%22%3A1717%2C%22h%22%3A1074%7D"></figure><figure class="image"><img src="https://media.printables.com/media/prints/177113/rich_content/16b17981-5098-4967-a8fa-083627ae8bdb/shelf-1.jpg#%7B%22uuid%22%3A%222181b11f-5b9f-4bf1-b08f-7e9b411601dd%22%2C%22w%22%3A1596%2C%22h%22%3A1168%7D"></figure><p>To achieve this goal, the parts of the shelf should be as flat as possible. To do this, I separated the shelf and holder into different parts. At the same time, the parts should be created in just one print job on the Ender 3v2.</p><p><img class="image-style-align-right" src="https://media.printables.com/media/prints/177113/rich_content/5c4387e9-5698-4490-8628-e0a728e96d0e/shelf-for-tonies.jpg#%7B%22uuid%22%3A%2213ea3f8f-ab32-4b01-869f-868a36c37c16%22%2C%22w%22%3A1830%2C%22h%22%3A1206%7D"></p><figure class="image image-style-align-left"><img src="https://media.printables.com/media/prints/177113/rich_content/8357fce3-d8de-4aff-acac-b0988bc81dc5/drawing.jpg#%7B%22uuid%22%3A%228980b068-f709-4843-8078-f4d1e052eca4%22%2C%22w%22%3A993%2C%22h%22%3A626%7D"></figure><p> </p><p> </p><p>As a counterpart to the magnets on the Tonie figures, I used M4 body washers. These are inserted during printing. In order to pause the print job at the right point, I used the color change function in Prusaslicer.</p><p><img src="https://media.printables.com/media/prints/177113/rich_content/dcdb9ead-8891-498e-b810-c72b53dfa7f1/m600.jpg#%7B%22uuid%22%3A%2251e8269e-ce3a-4f90-9dee-273fc77f9e75%22%2C%22w%22%3A3439%2C%22h%22%3A1400%7D"></p><figure class="image"><img src="https://media.printables.com/media/prints/177113/rich_content/19564fae-6ebc-4773-9383-591868f3523f/insert-washers.jpg#%7B%22uuid%22%3A%22208daff4-1b47-414b-8e84-72f32fa76b96%22%2C%22w%22%3A1948%2C%22h%22%3A1273%7D"></figure><figure class="image"><img src="https://media.printables.com/media/prints/177113/rich_content/c5994782-3ce5-4fb8-b489-316156f60c33/washers.jpg#%7B%22uuid%22%3A%22909c09ea-8a0b-45ce-8464-8b50c24f48e3%22%2C%22w%22%3A1204%2C%22h%22%3A950%7D"></figure><p>Here are my printing parameters:</p><ul><li>Layer height 0,2mm</li><li>“color change” at Layer 1,8mm</li><li>extrusion width 0.6mm</li><li>Nozzle 0,4mm</li><li>Infill 15%</li><li>Material PLA</li></ul><h3>Assembly</h3><p>For the assembly you need eight screws M3x16 and nuts M3</p><figure class="image"><img src="https://media.printables.com/media/prints/177113/rich_content/2d7dc9e2-3b2b-4ea4-97f4-4de247f27af1/assembly.jpg#%7B%22uuid%22%3A%22f95a63d1-22c8-49c8-aa3d-646f7ea678f6%22%2C%22w%22%3A1410%2C%22h%22%3A890%7D"></figure><figure class="image"><img src="https://media.printables.com/media/prints/177113/rich_content/2c7f277a-777e-49c2-b52b-eb1f3c4e730f/screwnuts.jpg#%7B%22uuid%22%3A%229615147c-8ef9-43f8-ab2f-ec45388dcb09%22%2C%22w%22%3A988%2C%22h%22%3A1106%7D"></figure><p> </p><h3>When the shelf is full…</h3><p>When the shelf is full and space allows, you can then print the extension</p><figure class="image"><img src="https://media.printables.com/media/prints/177113/rich_content/a6b8bace-59b5-44c2-8133-03859617d07f/extension.jpg#%7B%22uuid%22%3A%22d59a5aaf-2f21-4115-9089-fdb2cc95723b%22%2C%22w%22%3A1663%2C%22h%22%3A1261%7D"></figure><p>To connect the extension to the shelf, replace the M3x16 screws with M3x20</p>
With this file you will be able to print Shelf for Tonie figures with your 3D printer. Click on the button and save the file on your computer to work, edit or customize your design. You can also find more 3D designs for printers on Shelf for Tonie figures.
