Sheet Metal Cutting System
thingiverse
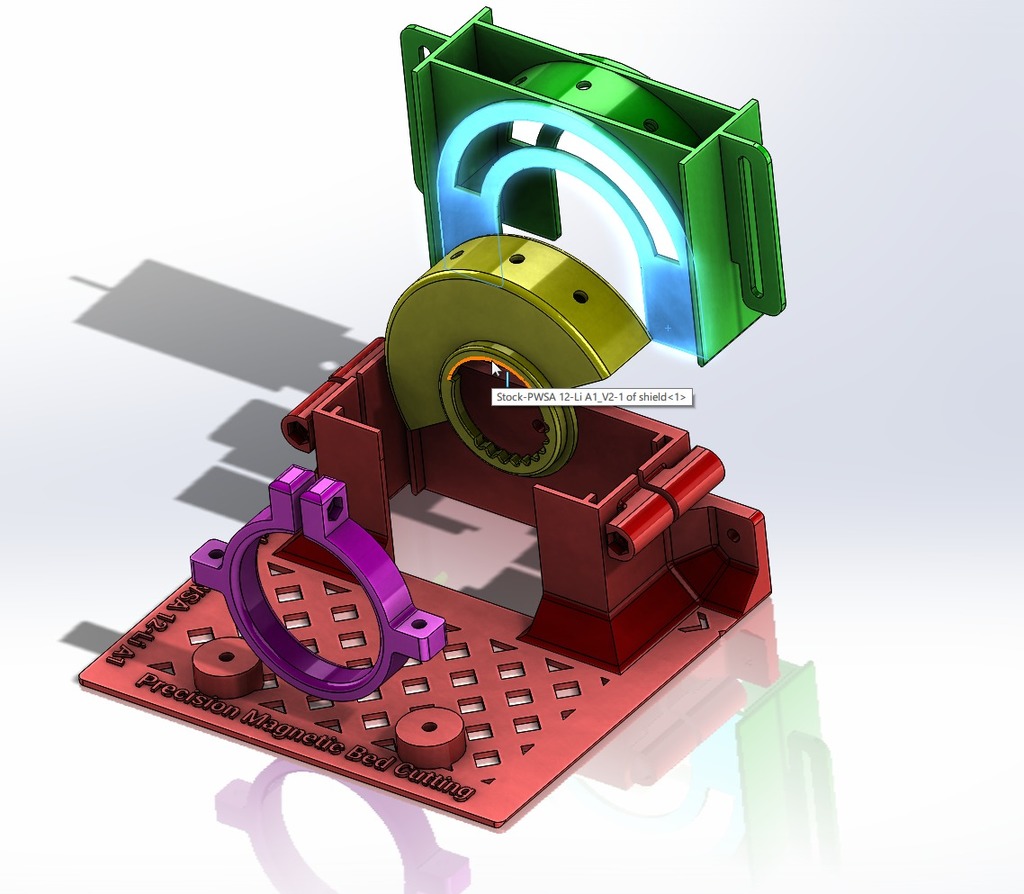
**Sheet Metal Cutting System** The system is designed to make precise cuts in sheet metal without deforming the cutting area. It can be used for both steel and aluminum with a thickness of less than 2 mm. If you have access to an industrial shearing machine, the cuts are equally perfect. However, I don't have access to such machinery, so I chose to build this simple cutting system based on an angle grinder with a 12V lithium battery from Parkside (model PWSA 12 Li A1). Once all the parts are assembled, it allows for precise selection of the cutting height and also enables sliding along a metal rule that serves as a guide for making straight cuts. In my case, I printed the pieces in ASA (110ºC hot bed and 260º hotend) because it supports higher temperatures and is mechanically more resistant than PLA. I converted the hot bed of my Anet A8 into magnetic and used metal sheets of 220 x 220 mm in both steel and aluminum as printing surfaces, which I cut with this system. The cutting system consists of 4 parts: 1. **Rail Cut**: This piece serves to slide the assembly longitudinally along a guide rule (for making straight cuts). I use an extruded aluminum profile as a rule. 2. **Spacer**: This piece serves to accurately set the cutting height. It is fastened to the rail with two M4 screws and wing nuts. 3. **Shield Anti-Shavings**: This piece serves as a safety element to protect us from hot metallic shavings resulting from the cut. It is attached to the spacer with two M4 self-locking nut screws. 4. **Fastening Housing**: This piece serves to hold the grinder to the rail, requiring three M4 screws and 2 normal nuts and one butterfly. The system is designed to make precise cuts in sheet metal without deforming the cutting area. It can be used for both steel and aluminum with a thickness of less than 2 mm. If you have access to an industrial shearing machine, the cuts are equally perfect. However, I don't have access to such machinery, so I chose to build this simple cutting system based on an angle grinder with a 12V lithium battery from Parkside (model PWSA 12 Li A1). Once all the parts are assembled, it allows for precise selection of the cutting height and also enables sliding along a metal rule that serves as a guide for making straight cuts. In my case, I printed the pieces in ASA (110ºC hot bed and 260º hotend) because it supports higher temperatures and is mechanically more resistant than PLA. I converted the hot bed of my Anet A8 into magnetic and used metal sheets of 220 x 220 mm in both steel and aluminum as printing surfaces, which I cut with this system. The cutting system consists of 4 parts: 1. **Rail Cut**: This piece serves to slide the assembly longitudinally along a guide rule (for making straight cuts). I use an extruded aluminum profile as a rule. 2. **Spacer**: This piece serves to accurately set the cutting height. It is fastened to the rail with two M4 screws and wing nuts. 3. **Shield Anti-Shavings**: This piece serves as a safety element to protect us from hot metallic shavings resulting from the cut. It is attached to the spacer with two M4 self-locking nut screws. 4. **Fastening Housing**: This piece serves to hold the grinder to the rail, requiring three M4 screws and 2 normal nuts and one butterfly.
With this file you will be able to print Sheet Metal Cutting System with your 3D printer. Click on the button and save the file on your computer to work, edit or customize your design. You can also find more 3D designs for printers on Sheet Metal Cutting System.
