Sharpie Scriber
prusaprinters
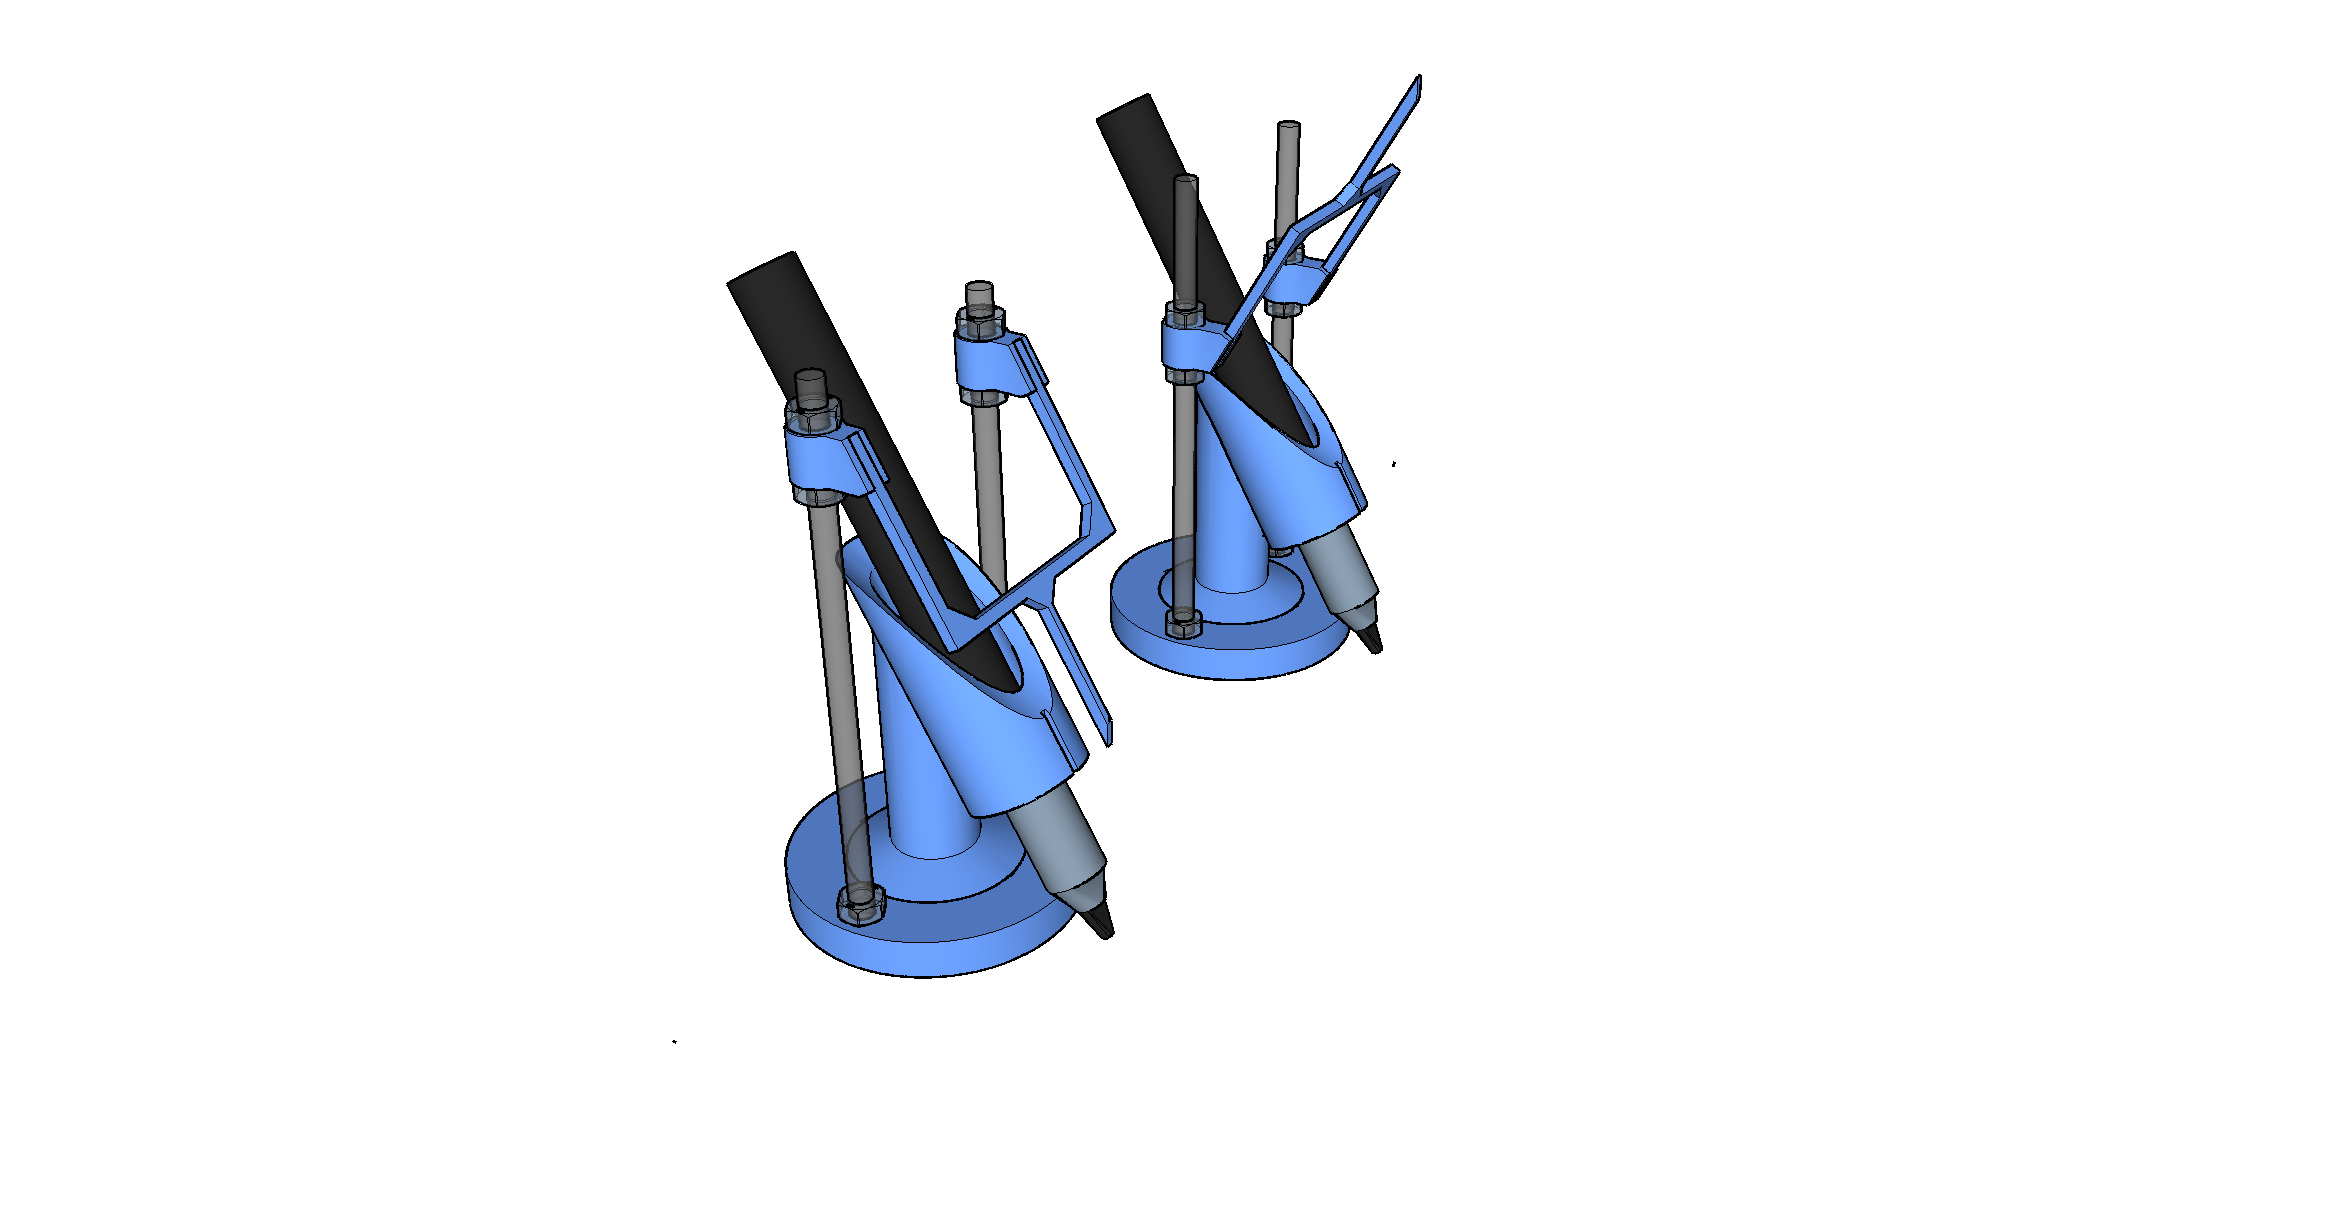
<p>The need I am aiming to to fulfil is how to draw an outline of an object that is reasonably accurate so that I can cut some foam to secure it while being transported or in storage. Camera gear is may main use-case for this although other items could be scribed as well e.g. tools. What I want is the top down shadow or outline of the object that includes any parts that extend out further than its basic footprint - think of a viewfinder that sticks out to the rear of a camera.</p><p>To keep printing simple, the Sharpie Scriber is in three parts that are glued together (I used superglue). To facilitate this, part B has a sunken outline for Part A to attach too and part C has a notch to set it at the correct level into a corresponding slot in part B.</p><p>The print is in PLA with no supports required. The fit is quite snug so that a clamp screw is not required. If the Sharpie becomes loose over time there is enough gap in the upper end of Part B to fit a wedge between the Pen and Part B.</p><p>I have some other idea’s for extensions to this for more complicated objects and for scribing individual levels rather than an overall outline. I’ll update this post when they are ready to be used.</p><p> </p><p><i><strong>V2 Update 7/8/22:</strong></i></p><p><i>I have updated parts A and B to make alignment a bit easier. I have also added new parts D, E and F as an alternative way to follow the outline of an object at different levels (you will also need some M4 threaded rod, two M4 full nuts and four M4 half nuts). Basically use all of these instead of part C. Note that parts E and F need to be glued together. </i></p><p><i>Assemble as per included picture using the full M4 nuts in the base of part D. The M4 half nuts are for adjusting the height of part E/F. Once glued together, parts E and F can be also be reverse mounted to scribe taller objects (see picture).</i></p><p><i>You can of course use alternative M4 components, the above mentioned are the ones I had spare.</i></p><p><i>I have also updated the CURA project file which now uses a Raft bed adhesion for a more reliable print with PLA.</i></p><p> </p><p><i>Update 8/8/22: I have joined together parts E and F into a single part as an alternative to gluing them together. It printed reasonably well on my printer but in all honestly, not as “perfect” as when done in separate parts but the major benefit is that it is in exact alignment with the Sharpie. Anyway, that STL file is also included in case anyone finds it useful.</i></p>
With this file you will be able to print Sharpie Scriber with your 3D printer. Click on the button and save the file on your computer to work, edit or customize your design. You can also find more 3D designs for printers on Sharpie Scriber.
