Sharpie Pantograph
prusaprinters
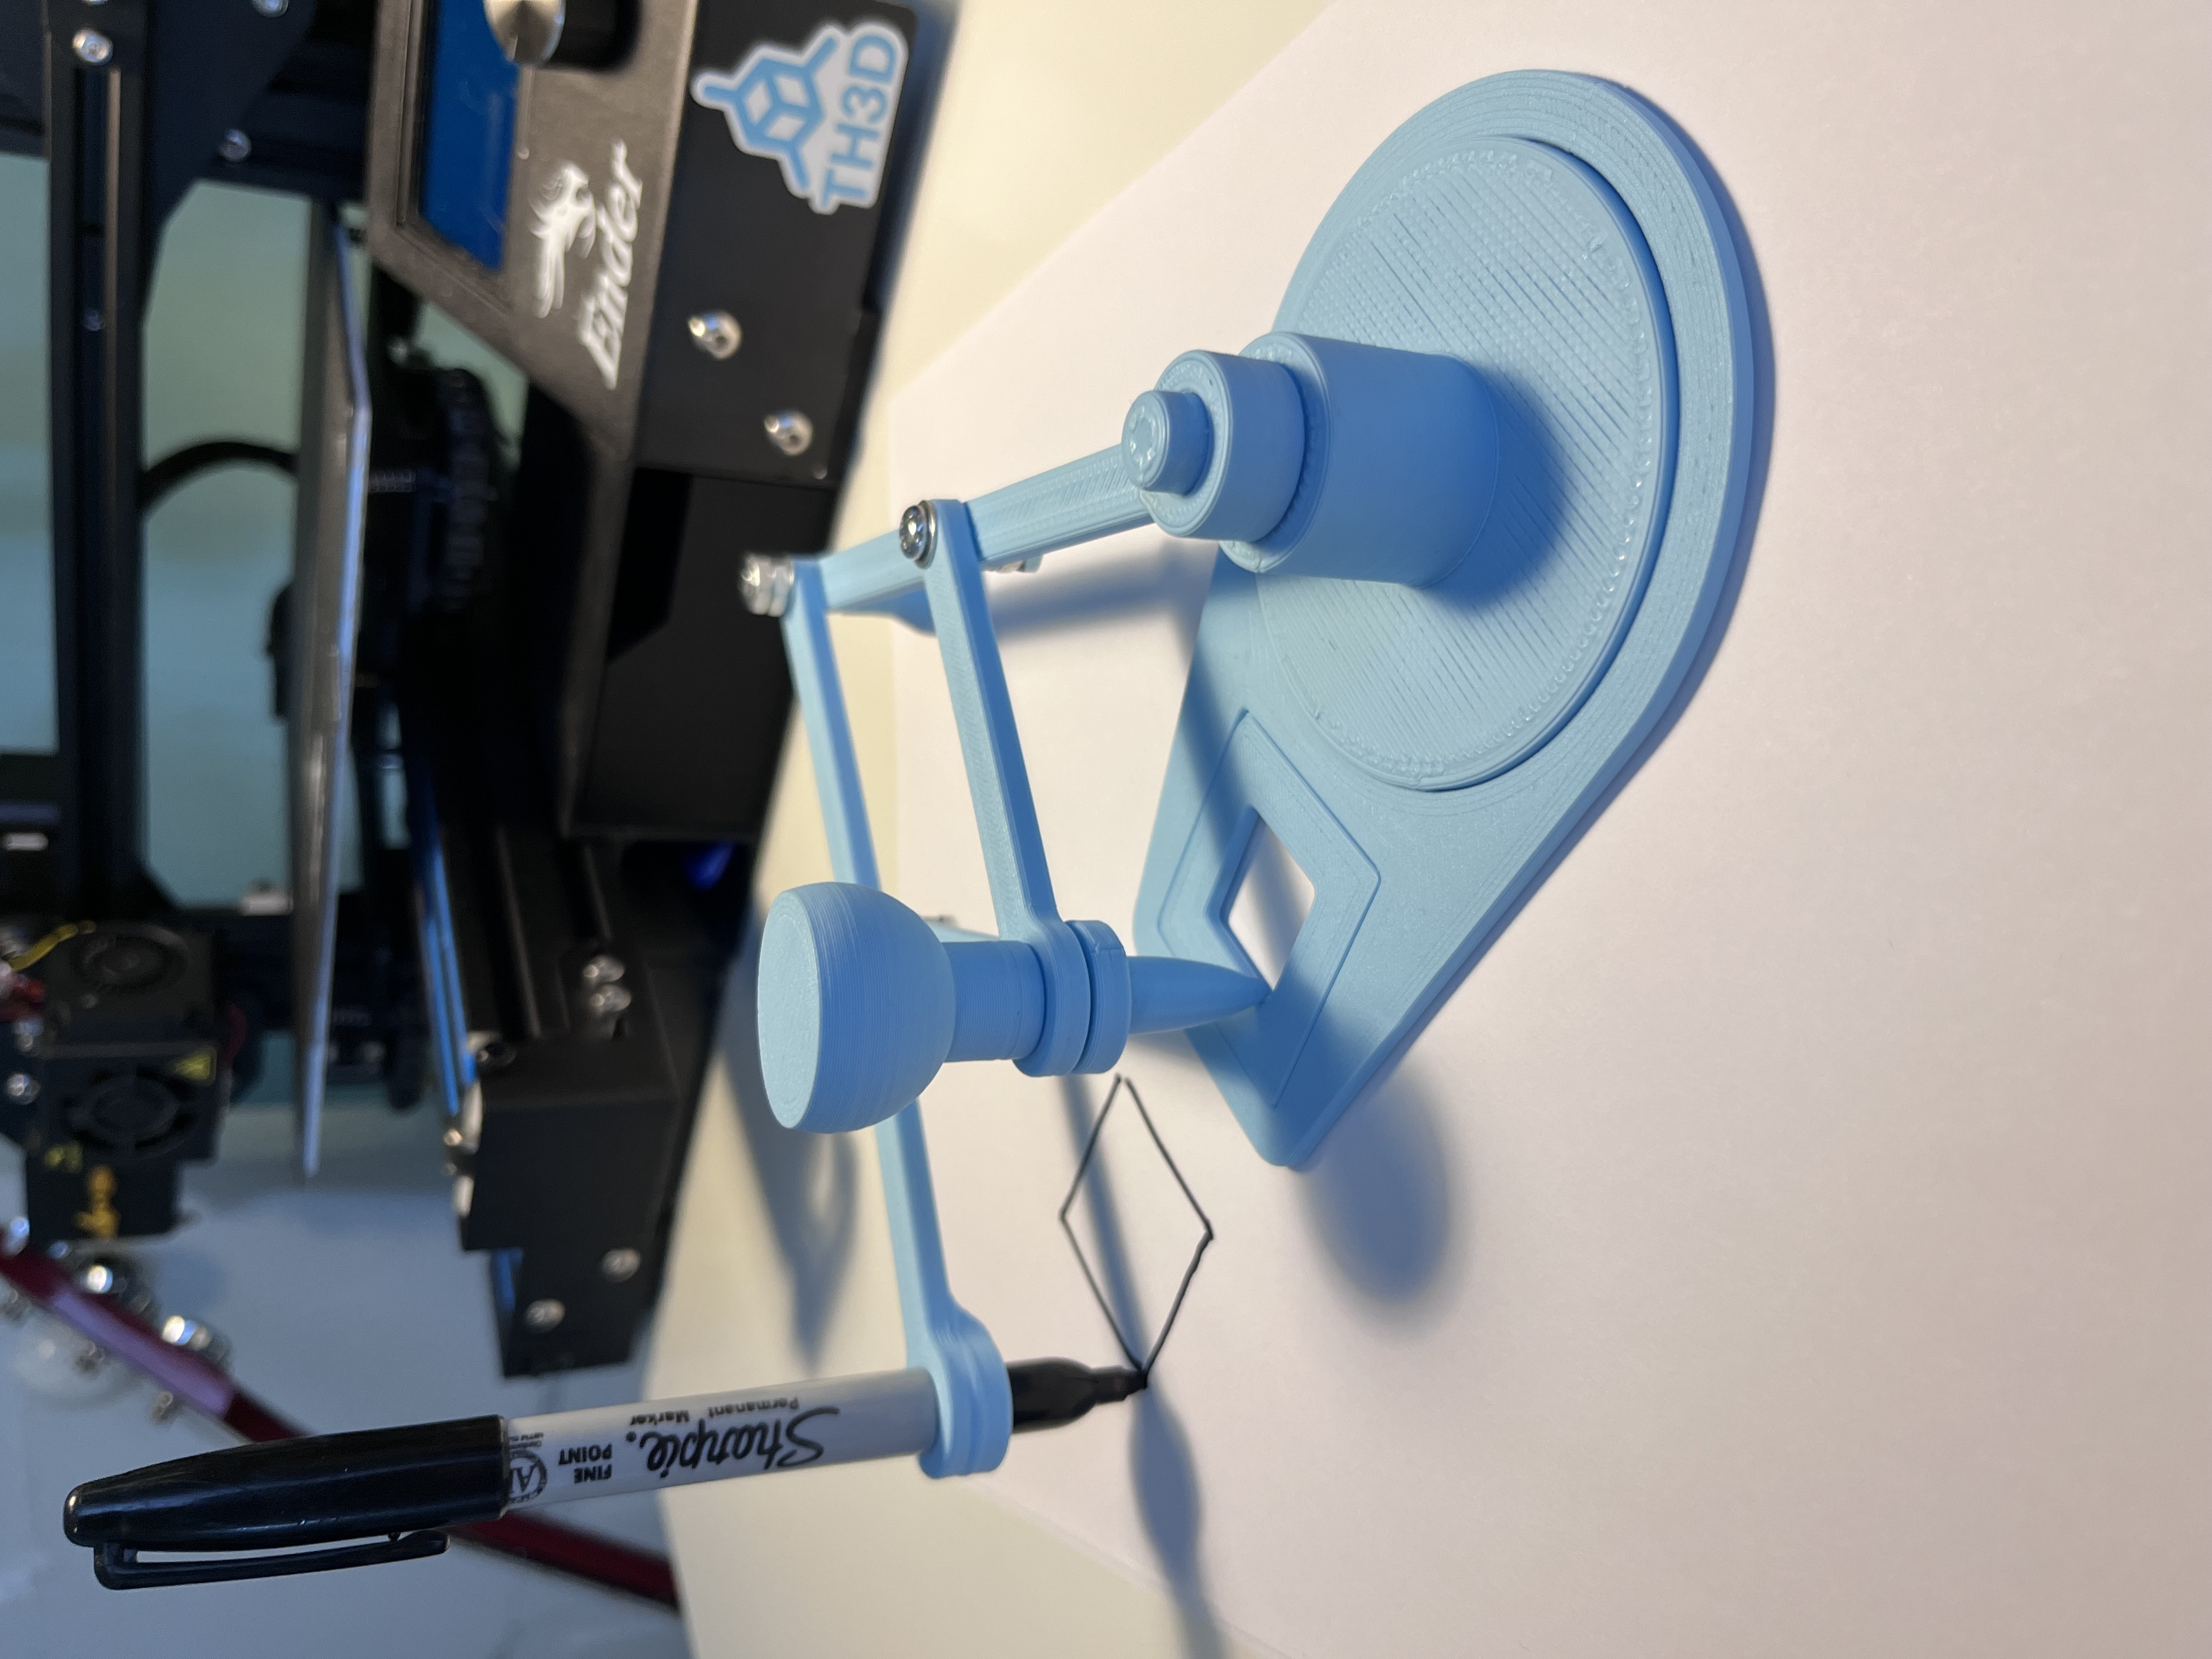
<p>This is an original pantograph design made to hold a traditional sharpie. The design allows the user to either double or divide the tracing in half by switching the location of the sharpie. It also includes a holder for a 40x40mm stencil. The design is intended to be used as a math toy to teach about ratios, but it could be used for more detailed drawings by a skilled user.</p><p>In addition to the printed parts, you'll need:</p><ul><li>Two M5 x 20 (or 10-24 x 0.75") bolts</li><li>One M5 x 25 (or 10-24 x 1") bolt</li><li>3 M5 (or 10-24) Nyloc nuts OR 6 M5 (or 10-24) nuts to be used as jam nuts</li><li>5 or 6 M5 (or 10-24) washers</li></ul><p>Assembly instructions:</p><ol><li>Install the 25mm (1in) bolt into the support piece so that the head of the bolt is inside the model and the threads are sticking out. </li><li>Insert the bolt through the small hole at the ends of the long arms, ensuring that the bottom arm has the raised portion facing up, and the top arm has the raised portion facing down. This is critical to making sure all of the sharpie-sized holes align vertically. (see photos for reference)</li><li>Add another washer to the bolt and then tighten on a nyloc nut.</li><li>Install the short arms by threading a 20mm bolt (.75") and a washer through the top of the arm, and then drop down through the central hole on the longer arms. </li><li>Add another washer and then tighten a nyloc nut to the bottom of each of the 20mm bolts.</li><li>Install the circular base piece to whichever side is your non-dominant hand. You can switch this later if someone else wants to use it.</li><li>Install the stylus/scribe into the two sharpie-sized holes on the short arms. Be sure that the arms are stacked so that the long arm they're parallel to is in the same vertical plane, otherwise the mechanism will bind.</li><li>Finally, install the Sharpie into the last remaining sharpie-sized hole, ensuring it is pressed all the way to the gray portion of the marker.</li><li>If you want to use the pantograph to reduce the size of a drawing, swap the stylus/scribe to the long leg, and move the Sharpie to the middle.</li></ol><p>A few pointers from my experience:</p><ul><li>Be sure your nyloc nuts are tightened well enough that there's no vertical slop in the joints, but don't go too tight to make sure the joint can still rotate freely.</li><li>Lightly sanding the end of the stylus/scribe reduces the chance it will tear the paper</li><li>The printed pieces should fit well together but may need some working in for smooth operation.</li><li>If the sharpie isn't making good contact, add another washer between the support piece and the bottom of the long arms to add leverage to the sharpie arm.</li></ul><p>The print files are combined into two files:</p><ul><li>Sharpie_Pantograph- all of the pantograph parts</li><li>Pantograph_Stencil- Stencil holder and 5 shape stencils</li></ul><p>If you have questions, feel free to contact me here, via email at juniperandsixth@gmail.com, or on instagram @juniperandsixth.</p><p>Thanks for checking out my model, good luck on your print!</p>
With this file you will be able to print Sharpie Pantograph with your 3D printer. Click on the button and save the file on your computer to work, edit or customize your design. You can also find more 3D designs for printers on Sharpie Pantograph.