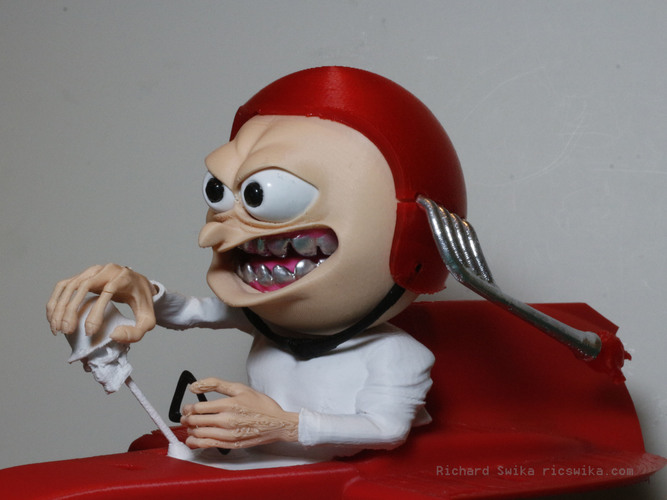

Sharky for OpenR/C Formula 1 (Driver/Cockpit)
pinshape
Skarky for OpenR/C Formula 1 (Driver/Cockpit) In this episode, somehow Sharky has managed to slip into the cockpit of an actual OpenR/C Formula 1 race car and drive off... naturally, chaos erupts. Includes 18 detailed parts including driver and cockpit to fit OpenR/C F1 compatible with Skarky Rail Rod for static display. Arranged to print in color or easily be painted to achieve a variety of cool custom looks. Doesn't require glue, but glue is recommended for OpenRC applications. See assembly video on YouTube. Printing Instructions Print at 0.2mm, 15% in-fill, use support as indicated here. Assembly Steps PART 1 - Sharky Pop pupils into eye whites. Locate the teeth with NO TAB on the side and snap them into position at the bottom of head shell by pushing all the way forward and down. Drop eyes into head so they fall into position notch down. Push all the way forward into eye sockets. Drop the tongue into head shell and push all the way down so the tab protrudes from the hole in the neck area. Make sure it is all the way down. Snap the teeth WITH TABS on the side into head shell and push all the way forward. There is a groove inside the head to accept the tabs. Carefully snap the tongue into the neck socket on Sharky's jacket. Twist a little to help it snap into position. The head position is adjustable. Slide the helmet over the head from the front and turn it to the correct orientation. Wedge the chin strap into the slots on both sides of the helmet. Carefully screw one flame into the end of each exhaust pipe. Insert the exhaust pipes into the four holes on both sides of the helmet. Make sure the openings at the end of sleeves are clean and free of support or other debris. Plug steering wheel into open at top of steering column. Use a drop of glue to secure it as needed. Clean out the hole on the bottom of the skull shift knob slightly and carefully bit the shift knob onto the end of the shift level. WITHOUT putting any force on the fingers, carefully twist and slide the hands into the position at the end of the arms. If you encounter resistance, DO NOT FORCE IT, use sandpaper to so there is only enough resistance to retain the hand. Make sure the hands slide all the way into the sockets. Make sure the right hand cups the shift knob. Drop Skarky into the cockpit of your OpenR/C F1. Secure with a 3mm self-tapping screw from below.

With this file you will be able to print Sharky for OpenR/C Formula 1 (Driver/Cockpit) with your 3D printer. Click on the button and save the file on your computer to work, edit or customize your design. You can also find more 3D designs for printers on Sharky for OpenR/C Formula 1 (Driver/Cockpit).
