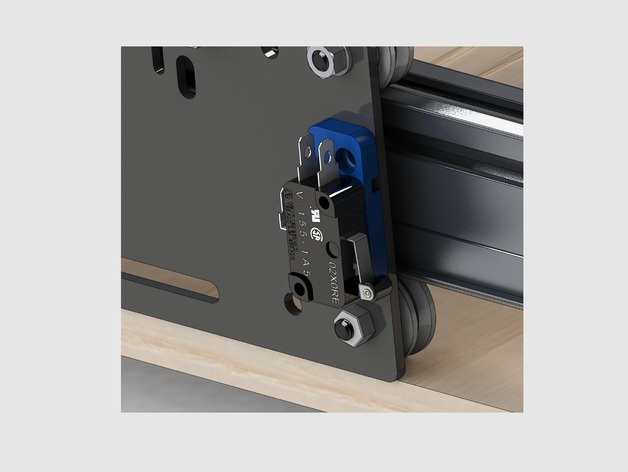
Shapeoko 2 Compact Limit Switches
thingiverse
For Shapeoko 2 side gantry plates that work seamlessly with both X and Y carriages, modifications to fit other machines can be easily made. To construct these parts, you will need the following materials: * 2 x 15 mm M3 socket head hex screws * 2 x 8 mm M3 socket head hex screws * 4 x M3 nuts * 2 x "22/18 gauge fully insulated .250 female spade crimp connector terminals" Here's a step-by-step guide to assemble these parts: Bolt the nuts into the hexagon holes using an allen key and pliers. Make sure each nut is aligned with the shape of its corresponding hole before it's seated, then crank down on the bolt until the nut is pressure-fitted in place. Alternatively, you can use a press or vice to seat the nuts. Next, install the 3D printed limit switch mount onto the Shapeoko 2 gantry using the provided nuts and washers (optional). Finally, attach the limit switch to its mount using the 15 mm screws. Important: Print these parts with hexagonal shapes facing upwards. Also, mirror this piece for the other side of your gantry. Here are some recommended print settings: * Printer Brand: LulzBot * Printer Model: TAZ 5 * Rafts: None * Supports: None * Infill: 80%
With this file you will be able to print Shapeoko 2 Compact Limit Switches with your 3D printer. Click on the button and save the file on your computer to work, edit or customize your design. You can also find more 3D designs for printers on Shapeoko 2 Compact Limit Switches.
